

 AhsayCBS
Ahsay Go Utilities - Data Integrity Check Overview
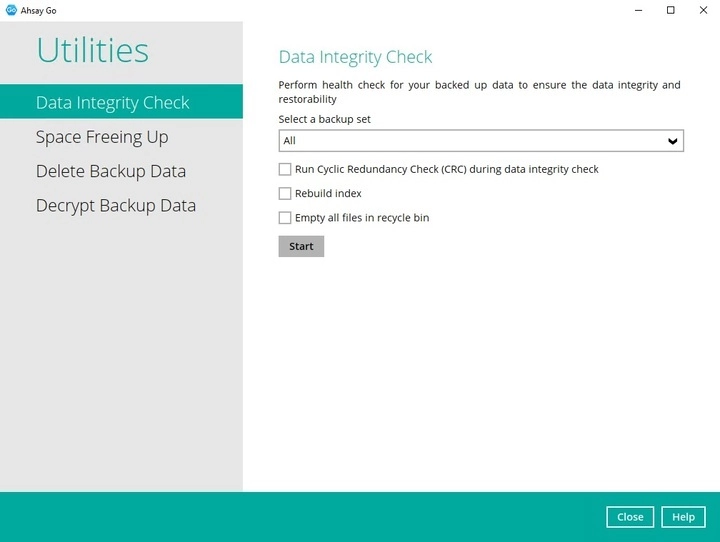
The Data Integrity Check (DIC) is used to identify the data in the backup set that has index-related issues, remove any corrupted file(s) from the backup destination(s) to ensure the integrity of the backup data and its restorability, and update the storage statistics.
For an efficient management of overall storage size of the backup destination(s), the data integrity check job will perform check for the backup destination(s) to remove old index files that are more than ninety (90) days old in the backup job folder(s).
- Data Integrity Check CANNOT fix or repair files that are already corrupted.
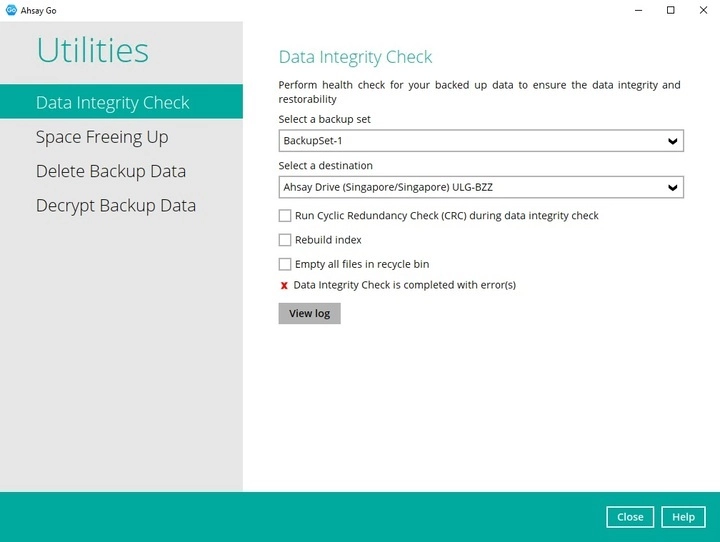
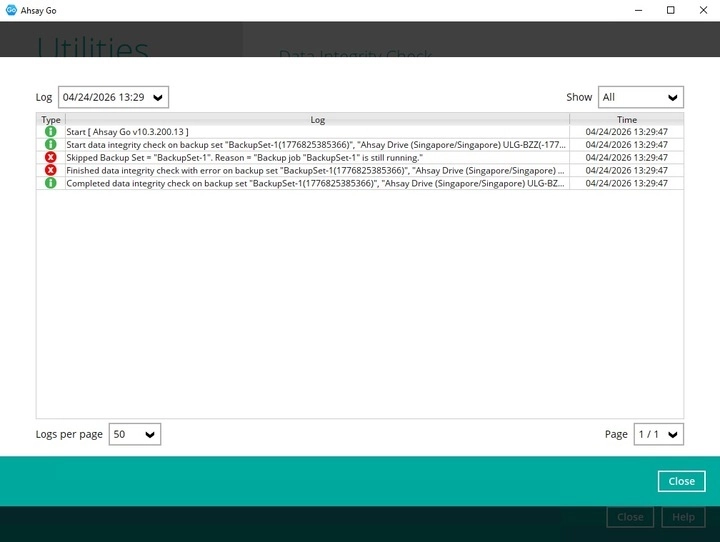
- Data Integrity Check can only be started if there is NO active backup or restore job(s) running on the backup set selected for the DIC job. As the backup, restore and data integrity check are using the same index for read and write operations. Otherwise, an error message will be displayed in the post-DIC to indicate that the data integrity check is completed with error(s) and had skipped a backup set with an active backup job.
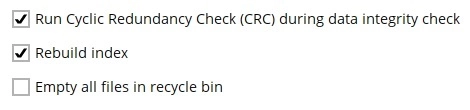
Run Cyclic Redundancy Check (CRC)
When this option is enabled, the DIC will perform check on the integrity of the files on the backup destination(s) against the checksum file generated at the time of the backup job.
If there is a discrepancy, this indicates that the files on the backup destination(s) are corrupted and will be removed from the backup destination(s). If these files still exist on the client machine on the next backup job, AhsayOBM will upload the latest copy of the files.
However, if the corrupted files are in the Retention Area, they will not be backed up again as the source file has already been deleted from the client machine.
The time required to complete a data integrity check depends on several factors such as:
- number of files and/or folders in the backup set(s)
- bandwidth available on the client computer
- hardware specifications of the client computer such as, the disk I/O and CPU performance
- For user(s) with metered internet connection, additional data charges may be incurred if the Cyclic Redundancy Check (CRC) is enabled. As CRC data involves downloading the data from the backup destination(s) to the client machine in order to perform this check.
- To find out how much data is downloaded from the backup destination(s) for the CRC check, please refer to the value for Utilities in the Data Transfer statistics section.
Rebuild Index
When this option is enabled, the DIC will start rebuilding corrupted index and/or broken data blocks if there are any.
Empty All Files in Recycle Bin
When this option is enabled, all the files in the Recycle Bin will be deleted.
There are four (4) options in performing the Data Integrity Check:
| Settings | Function |
|---|---|
|
Option 1
|
For checking of index and data. |
|
Option 2
|
For checking of index and integrity of files against the checksum file generated at the time of the backup job. |
|
Option 3
|
For checking and rebuilding of index. |
|
Option 4
|
For checking of index, integrity of files against the checksum file generated at the time of the backup job and rebuilding of index. |
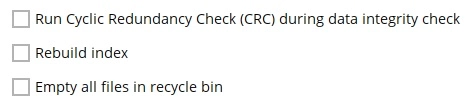
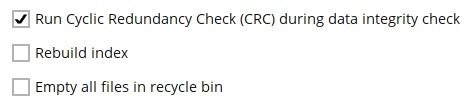
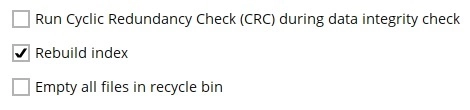
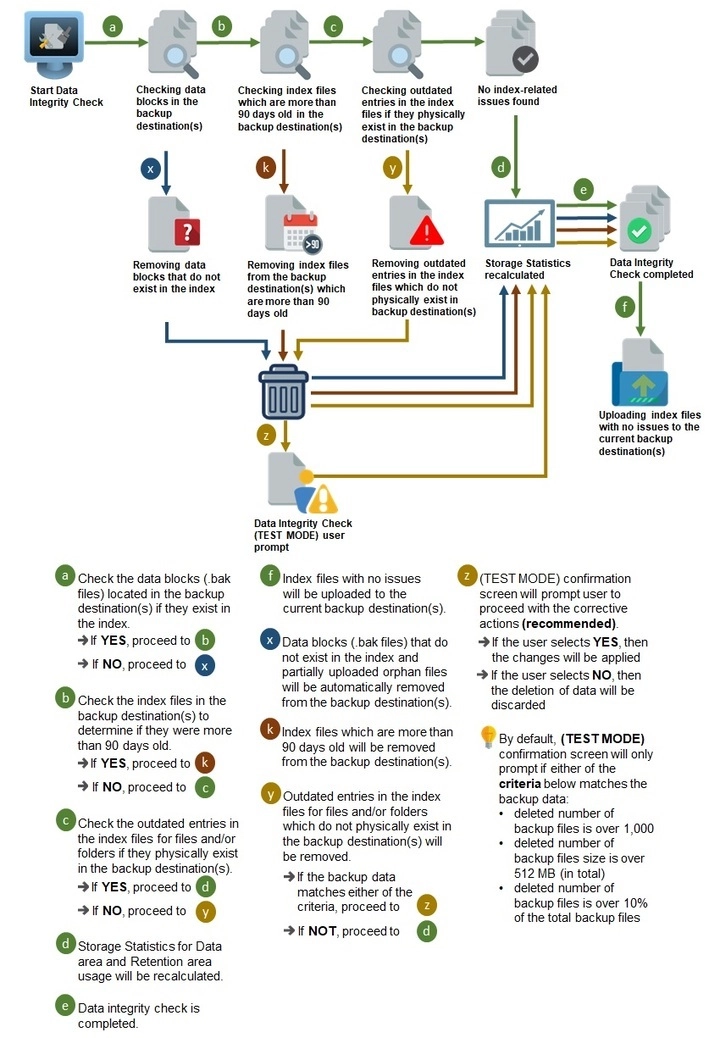
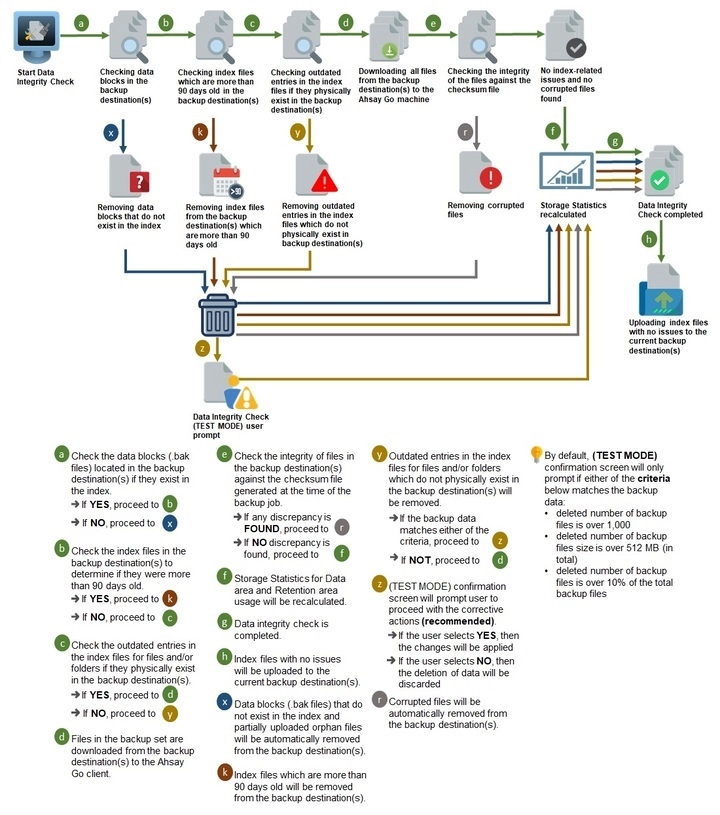
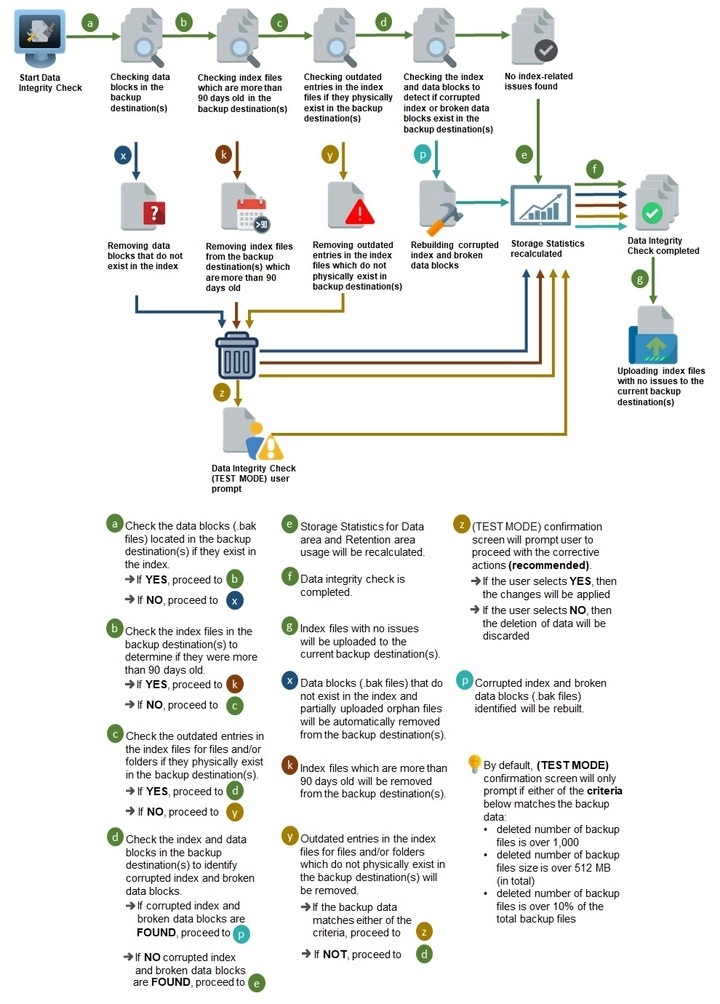
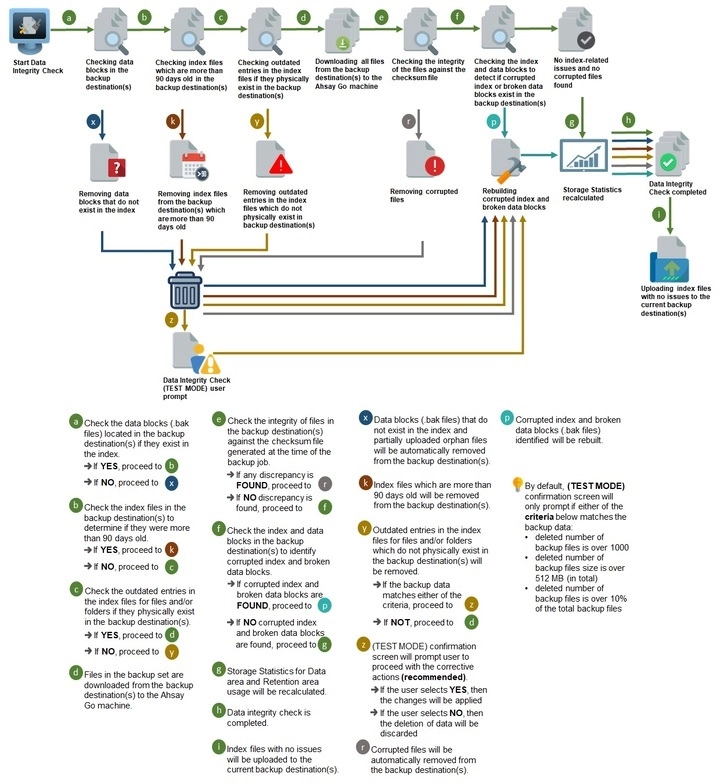
The following diagrams show the detailed process of the Data Integrity Check (DIC) in four (4) modes:
-
Option 1
Disabled Run Cyclic Redundancy Check (CRC) and Rebuild index - (Default mode)
-
Option 2
Enabled Run Cyclic Redundancy check (CRC) and Disabled Rebuild index.
-
Option 3
Disabled Run Cyclic Redundancy Check (CRC) and Enabled Rebuild index
-
Option 4
Enabled Run Cyclic Redundancy Check (CRC) and Rebuild index.
Perform a Data Integrity Check
-
Go to the Data Integrity Check tab in the "Utilities" menu.
-
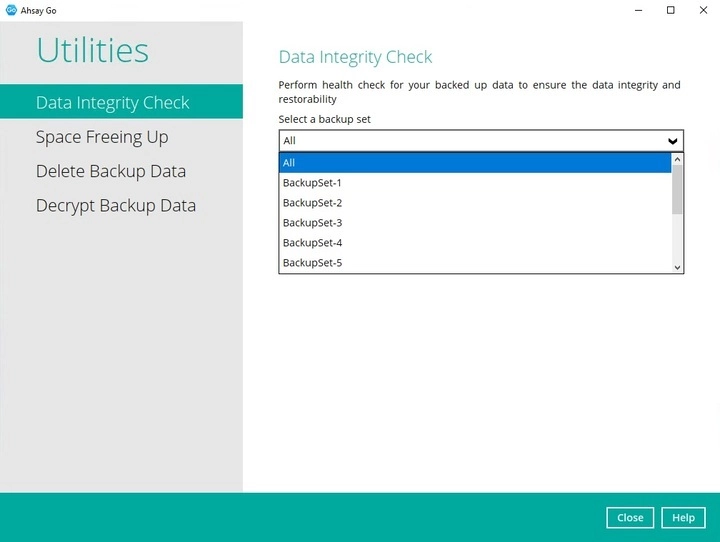
Click the drop-down button to select a backup set.
-
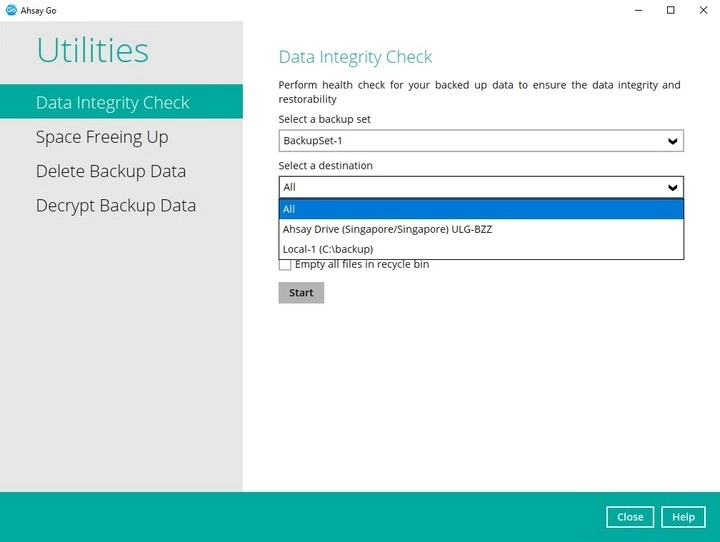
Click the drop-down button to select a backup destination.
-
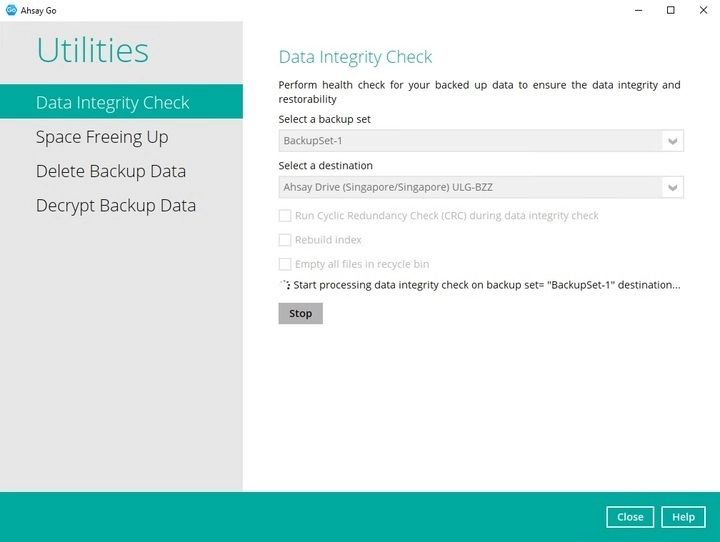
Click the Start button to begin the Data Integrity Check.
The Data Integrity Check will start running on the selected backup set(s) and backup destination(s).
-
Once the Data Integrity Check job is completed, click the View log button to check the detailed DIC log.
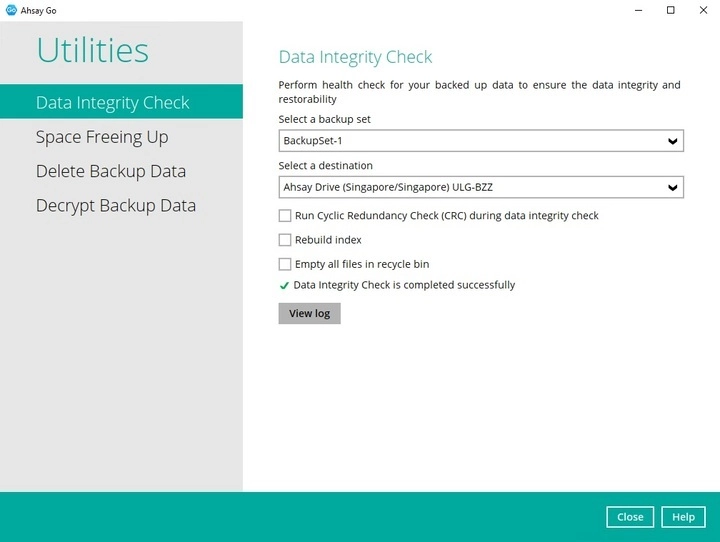
The detailed log of Data Integrity Check process will be displayed.
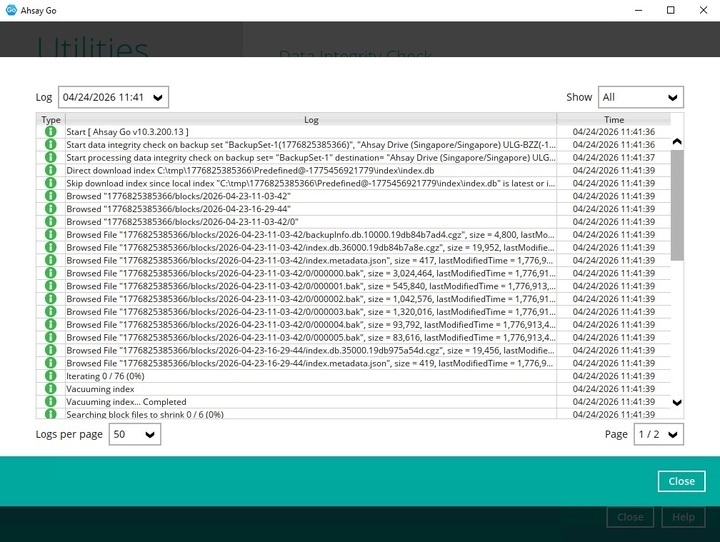
The following options can be used for further viewing of the detailed DIC log:
- Log filter
- Show filter
- Logs per page
- Page
Settings Screenshot Function Log filter 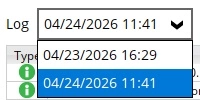
This option is used to display the available logs of the Data Integrity Check jobs. Show filter 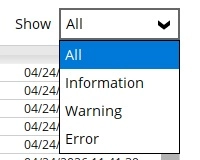
This option is used to sort the Data Integrity Check log by its status (i.e., All Information, Warning, and Error). Logs per page 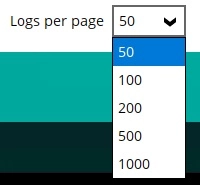
This option allows user to choose the displayed number of logs per page. Page 
This option allows user to navigate the logs to the next page(s). If the backup destination used for storing the backup set is an immutable destination, then the backup user account must be setup with 2FA in order to delete corrupted data blocks. If the backup user account does not have 2FA, DIC will proceed but there will be a warning in the logs since deleting of corrupted data blocks will not be allowed.
Data Integrity Check Completed with Errors
The following screenshot is an example of a Data Integrity Check completed with error(s). A Data Integrity Check is run on a backup set with an active backup job running which resulted in the Data Integrity Check to stop with error(s).
Clicking the View log button will display the details of the Data Integrity Check job error(s).
Data Integrity Check Result
There are two possible outcomes after the completion of a Data Integrity Check:
- Data Integrity Check is completed successfully with no data corruption or index-related issues detected.
- Corrupted data (e.g., index files, checksum files and/or broken data blocks) has been detected.
The screenshot below shows an example of a data integrity check log with NO data corruption or index-related issues detected.
If any index-related error(s) or data corrupted item(s) is found, it will automatically take corrective actions.
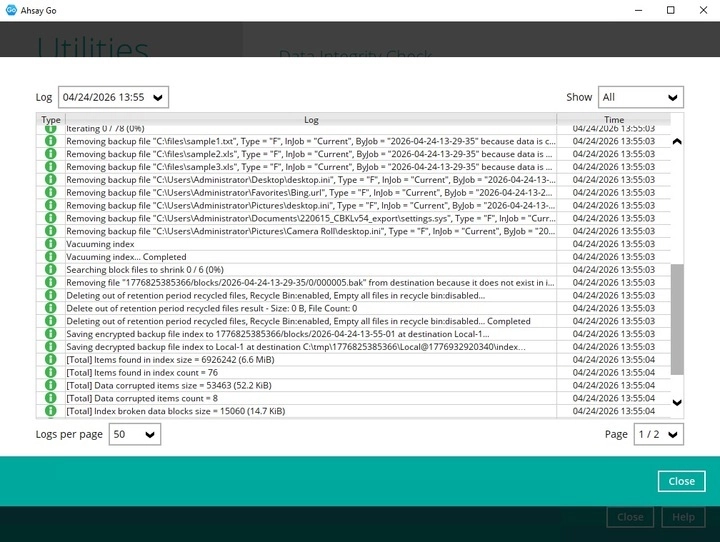
The logs will inform the user of the following details:
- Backup set that contains an error
- Backup Destination
- Items found in index
- Data corrupted items
- Index broken data blocks
- Statistics (i.e. Correct or Incorrect)
- The corrective action ensures that the remaining corrupted file(s) will be removed from the backup destination(s), therefore on the next backup job, these files are backed up again if they are still present on the client machine. However, if the corrupted files are in Retention Area, then they will not be backed up again as the source file has already been deleted from the client machine.
- If the DIC detects data blocks (.bak files) in the backup destination(s) that do not have related index entries, then these physical data blocks will be automatically removed from the backup destination(s).
Aside from viewing the Data Integrity Check logs directly on Ahsay Go client, they can also be viewed on the file system of the Ahsay Go client machine. The DIC logs are located in the following directory:
-
on Windows, it is in:
%UserProfile%\.obm\system\IntegrityCheck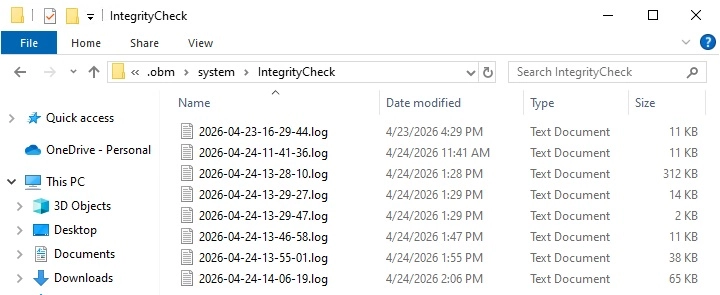
-
on Linux it is in:
$UserProfile/.obm/system/IntegrityCheck -
on macOS it is in:
$UserProfile/.obm/system/IntegrityCheck