[v10] Policy Group
The following shows the “Policy Group” tab under Backup / Restore > Users, Groups & Policies.
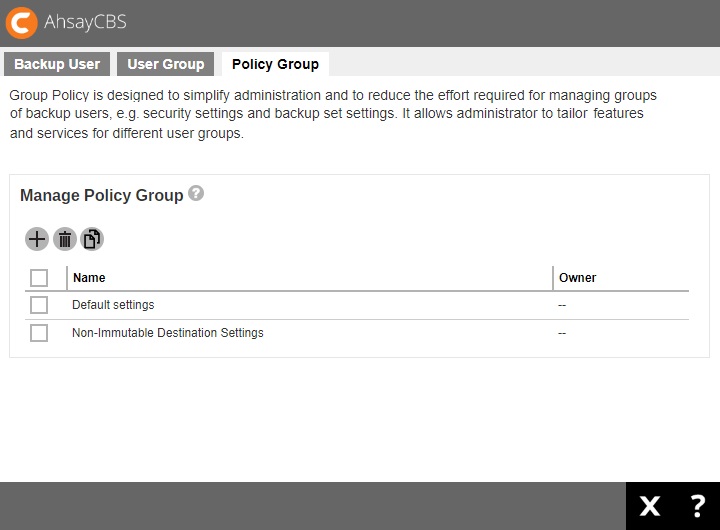
Policy Group is designed to simplify administration and to reduce the effort required for managing groups of backup users, e.g. security settings and backup set settings. It allows administrator to tailor features and services for different user groups. On a fresh AhsayCBS installation, there are two policy groups which are: Default settings policy group which is assigned to the “All users” user group and Non-Immutable Destination Settings policy group assigned to the “Non-Immutable Destination Group” user group.
In case you need to work on the policy settings for a group of users based on the default policy group settings, you can consider the following:
- Duplicate the “Default settings” policy group. Refer to the steps in Duplicate a policy group for details.
- Create a user group for your selected users and apply the duplicated policy group to this new user group. Refer to the steps in Create a new policy group for details.
Create a new Policy Group
- Click the Add button under the “Manage Policy Group” section.
-
Enter a name for the policy group.
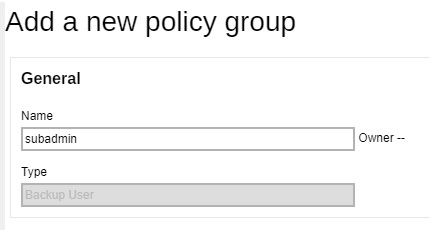
- Click Save.
-
Go back to the Policy Group tab under Backup / Restore > Users, Groups & Policies, and you should be able to see the policy group name you have just created.
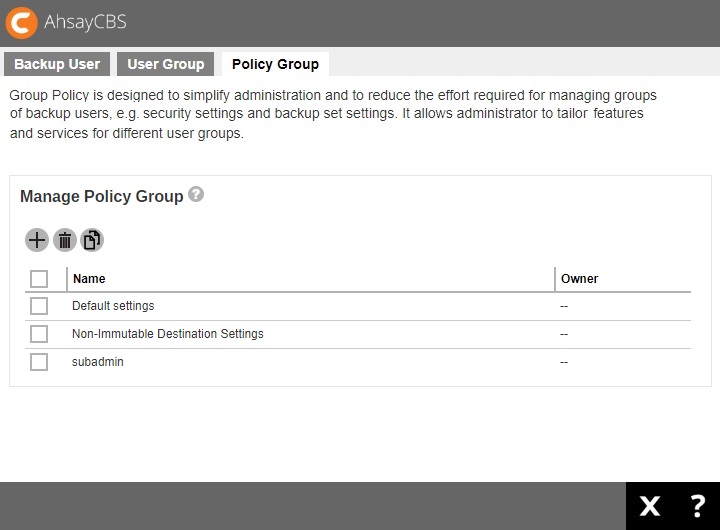
- Click on the policy group for configuration. The configuration items are subdivided into 7 sections, each of which is described in the Configure a policy group section below.
Modify a Policy Group
-
Navigate to the Policy Group tab under Backup / Restore > Users, Groups & Policies.

- Click on the policy group you wish to modify, then follow the steps in the Configure a policy group section below for further instructions on modifying the configurations.
Delete a Policy Group
-
Navigate to the Policy Group tab under Backup / Restore > Users, Groups & Policies.

- Tick the box of the policy group you wish to delete, then click the Delete button.
- Click OK to confirm.
Duplicate a Policy Group
This is useful when you wish to apply the same configurations from a policy group to a group of users.
-
Navigate to the Policy Group tab under Backup / Restore > Users, Groups & Policies.

-
Tick the box of the policy group you wish to duplicate, then click the Duplicate button.

-
You will immediately see the policy group is being duplicated, with the suffix “Cloned at YYYY-MM-DD HH:MM:SS” in the duplicated group policy’s name.
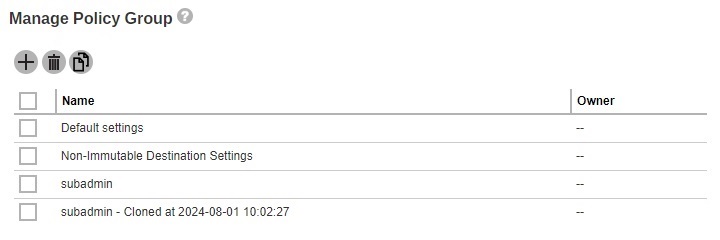
- If you need to configure the duplicated policy group, follow the steps in the Configure a policy group section below for details.
Configure a Policy Group
There are 7 sections that can be configured for the policy group:
- General
- User Settings
- Backup Set Settings
- GUI Settings
- Default Values
- Preempted Values
- Preempted Backup Sets
General
This is the general settings of the policy group page, and the user group is a list of user group which has applied this policy.
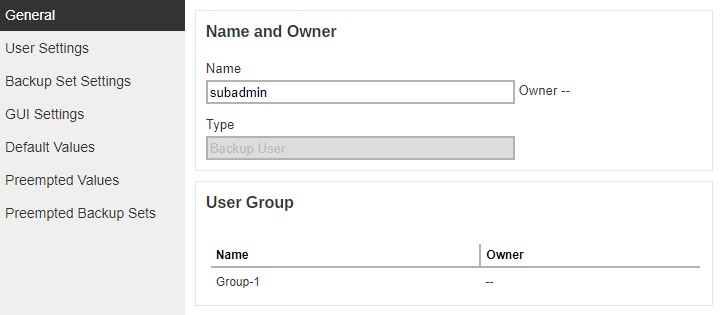
- Name - the name of the policy group. The name is configurable.
- Type - predefined as Backup User.
- User Group - displays the user group(s) with this policy group applied.
If you have changed the policy group name, click Save to save.
To add backup user to a Policy Group
Backup users cannot be added to a policy group directly in this setting menu. To do so, you have to:
-
Add the user to a user group first by following the steps in either case below:
-
Add a user to a user group when you first create the user account, refer to Create a new backup user for further instructions.
OR
- You can add a user to a user group after the account has been created, refer to User Group for further instructions.
-
- Assign the desired policy group to the user group by following the steps in To add a new policy group to a user group.
User Settings
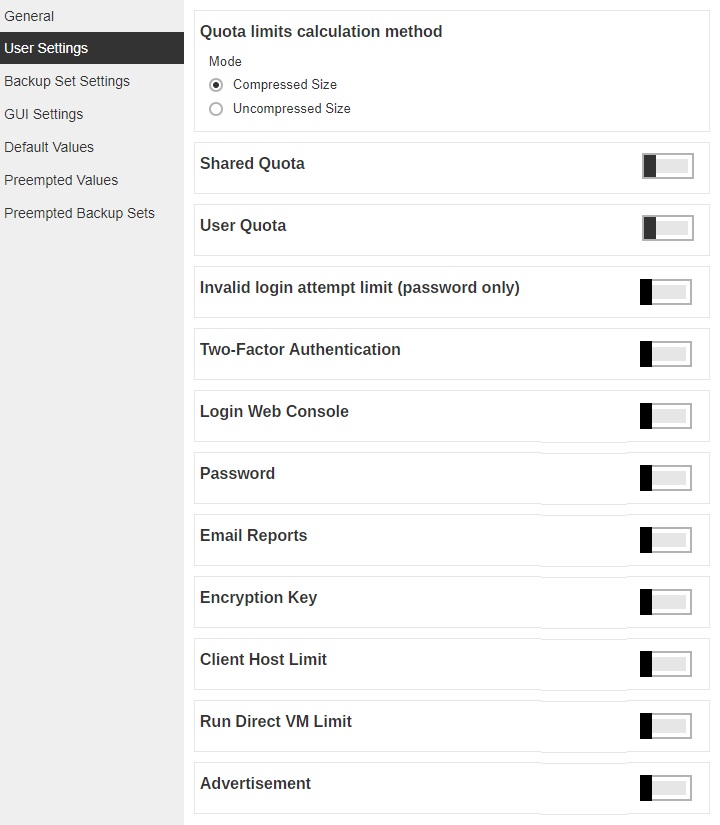
This section allows you to manage user settings such as Quota, Invalid Login Attempt Limit, Two-Factor Authentication, Login Web Console, Password, Email Reports, Encryption Key, Client Host Limit, Run Direct VM Limit and Advertisement.
Quota
Administrators can set a group storage quota to a user group.
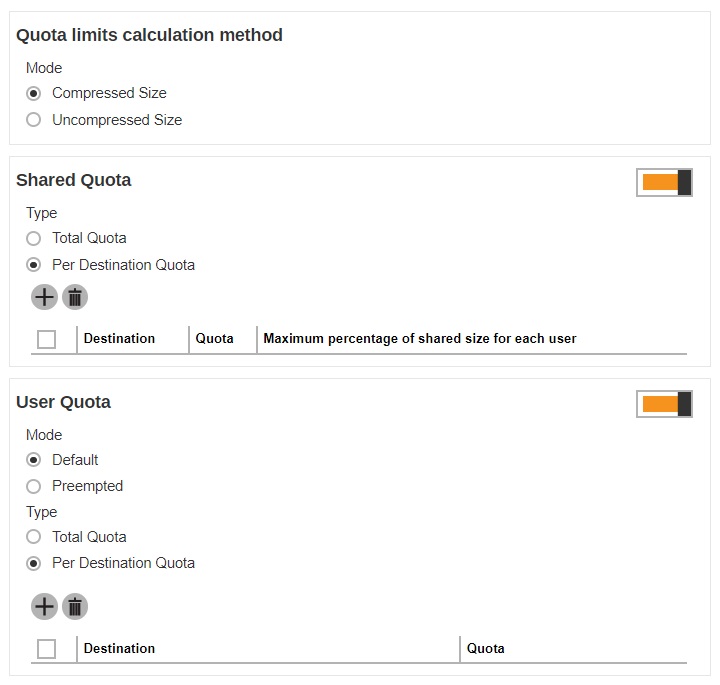
The following items can be set:
- Quota limits calculation method – this defines if the quota limit is calculated by Compressed Size or Uncompressed Size.
-
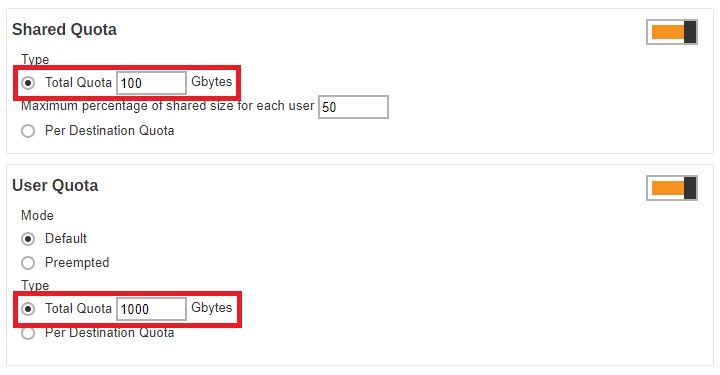
Shared Quota defines the storage quota that will be shared by the user, whether in total or per destination.
- For new AhsayCBS installation, the Default Settings policy will have Shared Quota policy disabled, new backup user will inherit whatever policy is assigned to the user.
- For the user migrated from pre-v8.1, Shared Quota will be same with the previous setting.
This feature is enabled by sliding the switch to the right.
-
If Total Quota is selected, you can specify the total quota and maximum percentage of shared size for each user.

-
If Per Destination Quota is selected, click Add to add the shared quota option per destination, and the destination storage quota will be shared by all users within the user group.

Select the destination then configure the following settings:

- Quota - this defines the storage quota allowed for the user group.
- Maximum percentage of shared size for each user - defines the maximum percentage of shared storage allowed for each user. For example, setting 50% means all users in the user group can occupy up to 50% of the assigned storage quota. If 100GB is the assigned storage, each user can store up to 50GB of the assigned storage quota. If the value is set to 100%, all users can fully utilize the storage until the assigned storage quota is full.
The shared storage quota is allocated to users on a first-come-first-serve basis. If the shared storage quota remains unchanged when the number of backup user grows or there is a change on the maximum percentage of shared size for each user, it may cause issue like the one mentioned below.
Example
Settings: The shared storage quota is 100GB shared by 2 users with a maximum percentage of 50% of each user. In other words, each user is entitled to a maximum of 50GB of storage.
Current usage: Now, one of the users has used up 45GB of capacity.
New setting: The maximum percentage of shared size for each user has adjusted to 30%.
Impact: In that case, that backup user has exceeded the new maximum percentage allowed for each user, which is 30GB. The backed up data will remain on the backup destination but that user will no longer be allowed to perform any new backup.
Best Practice: System administrator should consider upgrading the shared storage quota as the number of backup users in the user group grows or there is a change on the maximum percentage of shared size for each user.
-
User Quota - this defines the destination and quota storage for the newly added backup user.
If the feature is disabled by sliding the switch to the left, the backup user quota for newly-added user will be default quota setting, AhsayCBS with 50MB, but you can configure the quota setting as required.
When this feature is enabled, this defines if the user quota mode is Default or Preempted. If you select Preempted mode, you can configure the quota settings in Backup/ Restore > Users, Groups & Policies > Backup User > %backup user% > User Profile > Backup Client Settings.
This will also define if the user quota type is Total Quota or Per Destination Quota.
-
If you select Total Quota, enter the total storage quota in Gbytes.

-
If Per Destination Quota is selected, click Add to add predefined destination for the user as backup destination. Configure the quota storage setting per destination.

- For new AhsayCBS installation, User Quota will be Default mode, Per Destination Quota type and Destination contains AhsayCBS with default quota setting, 50MB.
- For the user migrated from pre-v8.1, User Quota will be Default mode, Per Destination Quota type and Destination contains AhsayCBS with default setting, 50MB. If the policy group enable quota setting, the predefined destination will also be displayed.
-
The Shared Quota and User Quota type should be the same. If different types are selected, for example Shared Quota type is Total Quota while User Quota type is Per Destination Quota.
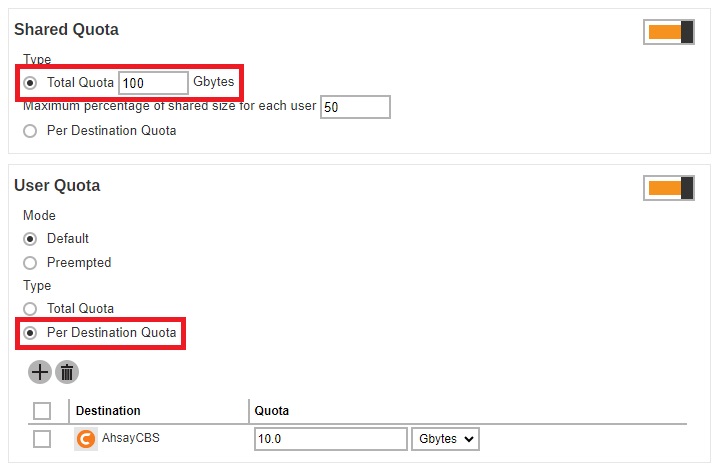
This message will be displayed once you try to save the settings.

-
In situations where the Shared Quota and the User Quota have different values, the lower value will be followed. For example, Share Quota value is 100 Gb while User Quota value is 1000 Gb, then the Shared Quota value will be followed.
-
Invald login attempt limit
This setting allows administrator to apply conditions for the number of invalid login attempt allowed to the user group. The following conditions can be set after you slide the switch to the right.
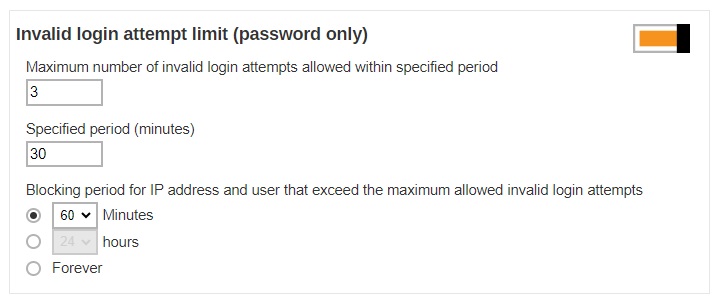
- Maximum number of invalid login attempts allowed within specified period – this defines the maximum number of attempts allowed for invalid login within the set period time. The backup user account will be blocked after the set number of invalid login attempts have been reached.
- Specified period (minutes) – this defines the period of time during which the set maximum number of invalid login attempt is allowed before the invalid login counter resets.
- Blocking period for IP address and user that exceed the maximum allowed invalid login attempts – this defines the period of time during when the IP address and user that has exceeded the invalid login attempts will be blocked from logging in again.
Example
If the following settings are applied:
- Maximum number of invalid login attempts allowed – 3
- Specific period – 30 minutes
- Blocking period for IP address and user – 60 minutes
That means the backup user can only enter a maximum of 3 times of invalid login within 30 minutes since the first attempt. If invalid login is made for the 4th time within that 30 minute duration, the user account will be blocked for 60 minutes.
Two-Factor Authentication
Once you enable the two-factor authentication option, users will be required to either enter a one-time password generated in an authenticator app or accept the log in request in the Ahsay Mobile app to log in to AhsayOBM/AhsayACB.
Slide the switch to the right and then make sure the check box “Require Two-Factor Authentication for user logon” is ticked for this feature to work.

Login Web Console
This setting allows administrator to determine if a backup user will be allowed to login to the AhsayCBS user web console. This switch is enabled by default with ticked “Allow login web console” checkbox.

If there are several policies assigned to the user, these are the conditions that needs to be considered on which policy will take effect:
- This policy setting will be followed if the switch is enabled and skipped if the switch is off.
-
Next condition, consider the order of the assigned policy (of all the User Groups assigned to the user). The first policy with the setting switch enabled will be followed.

Please refer to the table below for examples on policy combination and result:
| Policy Combination | Result |
|---|---|
|
Policy Group 1 has Login Web Console enabled and Allow login web console ticked. Policy Group 2 has Login Web Console enabled and Allow login web console unticked. |
Log in is allowed, it will follow Policy Group 1. |
|
Policy Group 1 has Login Web Console disabled. Policy Group 2 has Login Web Console enabled and Allow login web console unticked. |
Log in is not allowed, it will follow Policy Group 2. |
|
Policy Group 1 has Login Web Console enabled and Allow login web console unticked. Policy Group 2 has Login Web Console enabled and Allow login web console ticked. |
Log in is not allowed, it will follow Policy Group 1. |
|
Policy Group 1 has Login Web Console disabled. Policy Group 2 has Login Web Console enabled and Allow login web console ticked. |
Log in is allowed, it will follow Policy Group 2. |
|
Policy Group 1 has Login Web Console enabled and Allow login web console unticked. Policy Group 2 has Login Web Console disabled. |
Log in is not allowed, it will follow Policy Group 1. |
|
Policy Group 1 has Login Web Console enabled and Allow login web console ticked. Policy Group 2 has Login Web Console disabled. |
Log in is allowed, it will follow Policy Group 1. |
Password
This setting allows administrator to set up the password policy. The following items can be set after you slide the switch to the right.
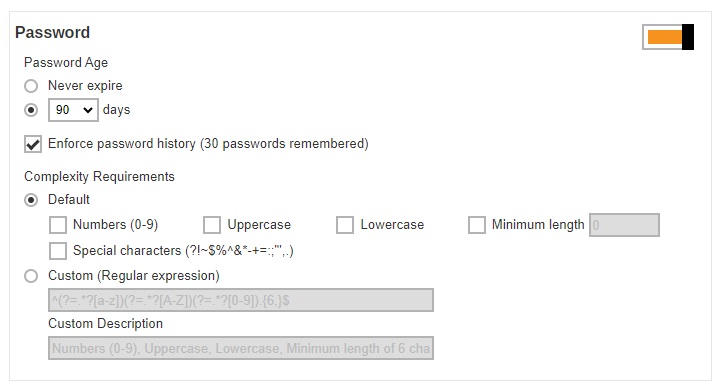
- Password Age – defines the period of time when the login password of a backup user account expires. When the set period of time is reached, backup users will have to change their passwords before they can continue using AhsayCBS.
- Enforce password history (30 passwords remembered) – when this feature is enabled, the last 30 login passwords of each user are recorded and cannot be used again when users change their password.
- Complexity Requirements – you can customize the complexity requirements for the password to provide better protection for the users. Under the Default option, the selected item(s) will be the mandatory element(s) when backup users create their passwords. While the Custom option, will allow you to specify the “Regular expression” and/or “Custom Description” that can be used to create their passwords./li>
Email Reports
This menu allows administrator to select what email reports to be sent to the users of a user group. Slide the switch to the right then select the desired email report(s) to send. By default, almost all email reports are selected after you turn on this feature except for “Restore Drill Report” and “Email me inactive backup report when my backup set hasn’t run for this number of days”.
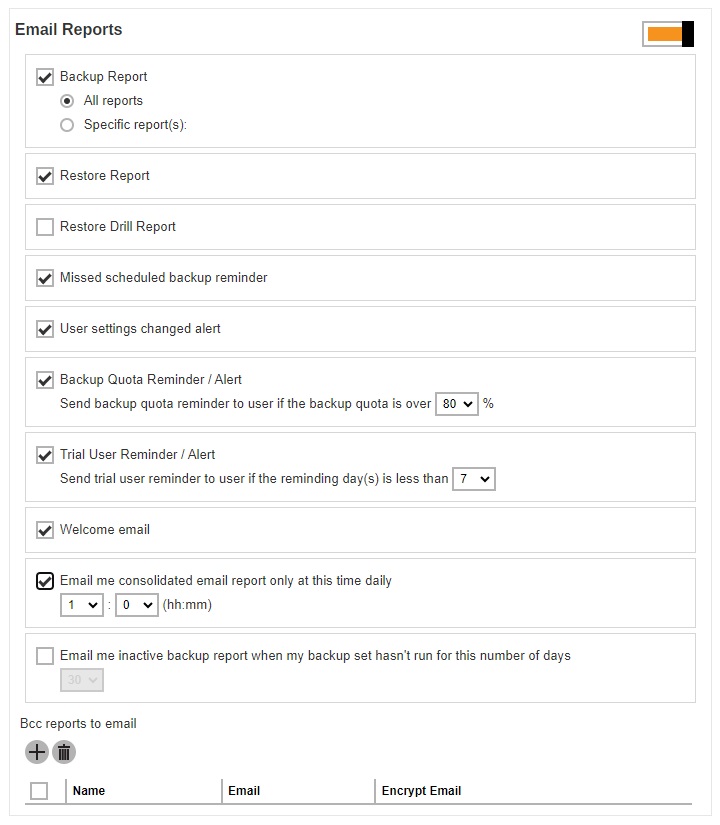
The table below lists out all types of email reports, together with explanation on what the email report is about, when it will be sent and what action the backup user should take. You can also add email recipients in the “Bcc reports to email” section so that the email reports will be sent to them as well.
| Backup Report |
|---|
|
What is this email about? A backup report in PDF format, there is a choice if it will include all the reports or just specific reports. The default setting for new installation is “All reports”. It will be the same with upgrades, from v6, v7, pre-8.5.0.0 to v8.5.0.0 and onwards. If All reports is selected, the following backup reports will be received: Backup Errors, Backup Quota Exceeded, Backup Warnings and Backup Successful. If Specific report(s) is selected, the user has an option to select specific backup report(s) that will be sent thru email. These are organized in four different categories:
|
|
When will you receive it? Backup Report is generated and sent to backup user every 15 mins (every :00, :15, :30 and :45 of an hour). Depending on the backup size and backup finish time, the actual report sending time may be longer than 15 mins. |
|
What action should you take? Download the backup report attached with the email or click on the download link provided to download the backup report. |
| Restore Report |
|---|
|
What is this email about? A restore report in PDF format, showing the Restore Job Summary, Restore Logs and Restore Files. |
|
When will you receive it? Restore Report is generated and sent to backup user every 15 mins (every :00, :15, :30 and :45 of an hour). Depending on the restore size and restore finish time, the actual report sending time may be longer than 15 mins. |
|
What action should you take? Download the restore report attached with the email or click on the download link provided to download the restore report. |
| Restore Drill Report |
|---|
|
What is this email about? A restore drill report showing the details of the backup set, indicating if there are invalid and/or unverifiable data found in the backup. |
|
When will you receive it? Restore Drill Report is generated and sent to backup user every 15 mins (every :00, :15, :30 and :45 of an hour). Depending on the restore drill size and restore drill finish time, the actual report sending time may be longer than 15 mins. |
|
What action should you take? Review the restore drill summary, if there are no invalid/unverifiable data found, no action needs to be taken. However, if there are invalid/unverifiable data found, perform a backup job to fix the corrupted data. |
| Missed schedule backup reminder |
|---|
|
What is this email about? A reminder to alert the backup user about a scheduled backup failure. Any backups that have failed to start 6 hours after the scheduled backup time will be considered as missed schedule backup. |
|
When will you receive it? The report is generated and sent to backup users at the next :00 after it is classified as missed scheduled backup (6 hours after backup failure). |
|
Common causes for missed scheduled backups The following highlights some of the common reasons causing missed scheduled backups or scheduled backups not running according to schedule. The cause of missed backups can be related to either server side issues (AhsayCBS or Redirector) or client side issues (AhsayOBM/AhsayACB client machine setup). Server Side Issues
Client Side Issues
|
|
What action should you take? You may have to check for the causes of the missed scheduled backup. That could be caused by, for example, incorrect login credentials of the client backup application, Internet connection problem, time zone settings, etc. |
| User settings changed alert |
|---|
|
What is this email about? A summary report showing the user settings that have been changed in detail, with the old values and new values of the changed settings shown. |
|
When will you receive it? User Settings Changed Alert Report is generated and sent to backup user every 15 mins (every :00, :15, :30 and :45 of an hour). |
|
What action should you take? The purpose of this email is to allow user to confirm the changes that have been made, and alert user for unauthorized access if they have not made those changes. In the latter case, user should change their login password and correct the settings as soon as possible. |
| Backup Quota Reminder / Alert |
|---|
|
What is this email about? A reminder to alert backup users about the backup quota has exceeded the set percentage. User can configure the percentage where the reminder/alert email is triggered when it is reached. By default, this percentage is preset as 80% when this feature is enabled. |
|
When will you receive it? The backup quota reminder / alert email is generated and sent to backup user at 6:00am daily. |
|
What action should you take? The backup quota is going to exceed its storage quota. Contact your backup service provider to increase the capacity. Alternatively, consider cleaning up the existing backup sets that you are no longer using, or reviewing the retention policy. |
| Trial User Reminder / Alert |
|---|
|
What is this email about? A reminder to alert trial backup users that their account is about to expire in the set number of days. By default, the preset value of this setting is 7 when this feature is enabled. |
|
When will you receive it? The trial user reminder / alert email is generated and sent to backup user at 6:00am daily. |
|
What action should you take? In order to continue using your account for backup and restore, contact your backup service provider to subscribe to the paid backup service. |
| Welcome Email |
|---|
|
What is this email about? A welcome message generated by the AhsayCBS to confirm a backup account has been created. |
|
When will you receive it? Shortly after a Backup User account has been created. |
|
What action should you take? You can click on the link in the email to download the client backup application if you have not done so. |
|
Daily User Report (appears as: Email me consolidated email report only at this time daily) |
|---|
|
What is this email about? A consolidated report in PDF format, showing the following categories of information:
|
|
When will you receive it? The daily user report is generated and sent to backup user at the time defined by the system administrator in this menu. |
|
What action should you take? Click on the attachment in the email to get re-directed to the consolidated report page. The report is in interactive format which allows you to click on different tabs/sections for the corresponding report data. |
|
Inactive Backup Report (appears as: Email me inactive backup report when my backup set hasn't run for this number of days) |
|---|
|
What is this email about? A report showing all backup sets under this backup user account that have not been run in the set number of day. |
|
When will you receive it? Inactive Backup Report is generated and sent to backup user every 15 mins (every :00, :15, :30 and :45 of an hour). |
|
What action should you take? You may have to check for the causes for the backup sets, especially scheduled backup sets that are not running. That could be caused by, for example, incorrect login credentials of the client backup application, Internet connection problem, etc. |
BCC Reports to Email
You can add email recipients in this section so that they will receive a blind carbon copy (bcc) of the email reports as well.
-
Click the Add button under the “Bcc reports to email” section.

-
Enter the name of the recipient, email address and other details if necessary.
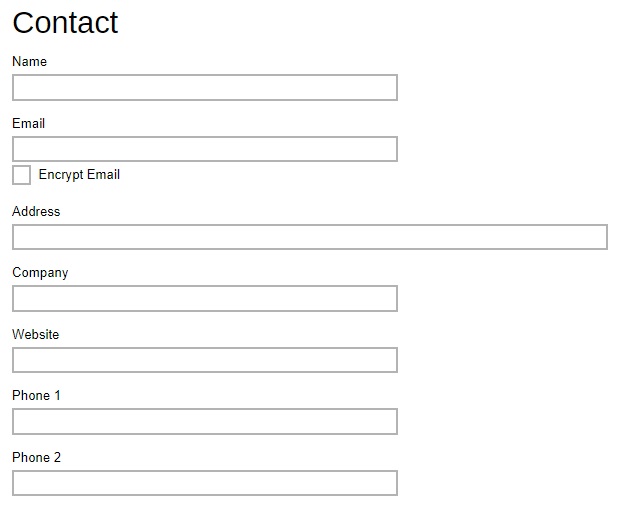
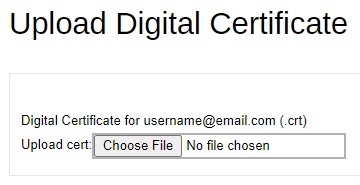
If you wish to encrypt the email, tick the “Encrypt Email” box. You will be re-directed to another page to upload the Digital Certificate. Click the Choose File button to upload the digital certificate, then click the OK button at the bottom of the page to confirm.
- Click Add when you are done with the settings.
- Click Save to save the setting.
ENCRYPTION KEY
Once you enabled the encryption recovery option. The encryption key file will be uploaded to the Backup Server. In case user has forgotten the encryption key, you can still contact us to recover the key.
Slide the switch to the right and then make sure the check box “Upload encryption key after running backup for recovery” is ticked for this feature to work.

It is possible to submit an encryption key recovery request via the AhsayCBS web console. Refer to the Recovering Encryption Key via AhsayCBS Web Console section for detailed instructions.
Client Host Limit
Administrator is able to set the maximum number of host machine for a backup users account.
Slide the switch to the right and then enter the “Maximum number of host”.

Run Direct VM Limit
The administrator can set the maximum number of VM for Run Direct restore.
Slide the switch to the right and then enter the “Maximum number of VM”.

Advertisement
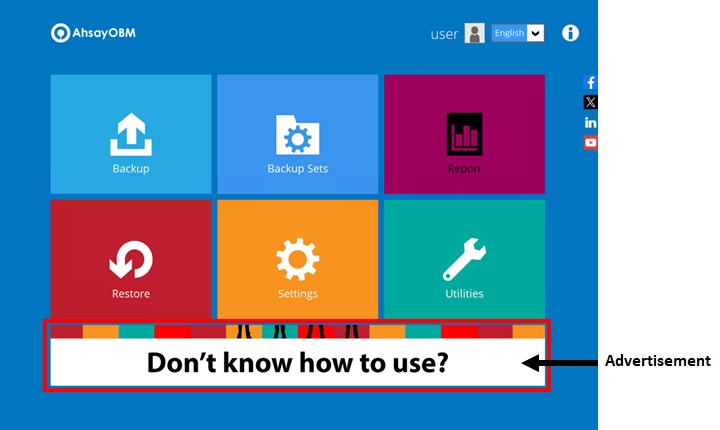
The administrator can customize the advertising banner on the AhsayOBM/AhsayACB interface. AhsayCBS supports both GIF and SWF formats at the size of (830 x 102 px). It can be found in this area:
-
Slide the switch to the right to turn on this feature.

- Click Add to add the advertisement.
-
Enter the details in the following fields below:
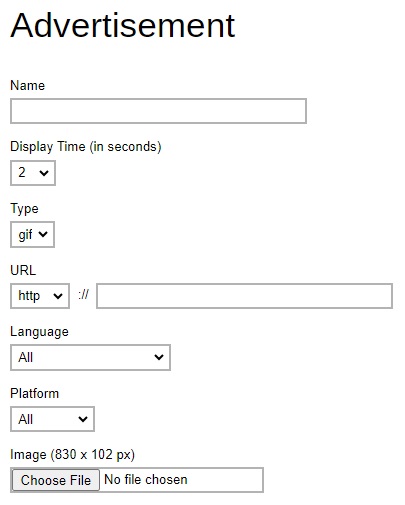
- Name – name of the advertisement banner.
- Display Time (in seconds) – period of time for the advertisement to be shown before it rotates to the next one.
- Type – format of the banner, whether it is in gif or swf format.
- URL - the click through URL of the gif type banner. For flash banner, the click through URL should be coded inside the flash banner.
- Language – select in which language setting in AhsayOBM/AhsayACB will the banner be shown. If All is selected, the banner shows no matter what language is selected in the AhsayOBM/AhsayACB.
- Platform - select on which platform (Windows, Mac & Linux) AhsayOBM/AhsayACB is used for the banner to show. If All is selected, the banner shows no matter what platform the AhsayOBM/AhsayACB is running on.
- Image (830 x 102 px) – click Choose File to upload the banner.
- Click Add when you are done with the settings.
- Click Save to save.
Backup Set Settings
This section allows administrator to set up backup exclusion, backup destination visible to users, backup set type visible to users, cloud file backup source visible to users and Microsoft 365 backup customization.
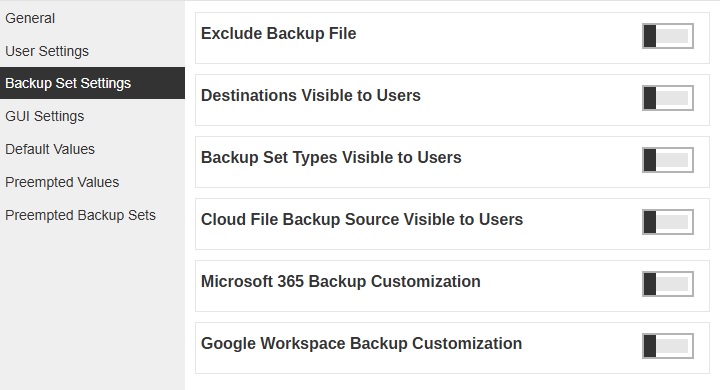
Exclude Backup File
This menu allows you to set filter to exclude files from performing backup job. This feature is disabled by default.

- Files on mapped drive – files from mapped drive will be excluded from backup (applicable only to UNC path on Windows platform). Typical UNC path is in the format of \\drive or IP address\folder name (e.g. \\10.1.0.10\My Documents).
- Files larger than – files larger than the defined size will be excluded from backup.
- Files older than – files created the set period of time ago or before a specific set date will be excluded from backup.
Destinations Visible to Users
There are two kinds of destinations backup users can choose from when creating a backup set, they are the Predefined Destination and Standard Destination. Only the destinations selected in this menu will be available for backup users to choose from when they are creating a backup set. This feature is enabled by default.
Below is a brief explanation on the difference between the Predefined Destination and Standard Destination.
- Predefined Destination - The predefined destination can be a single storage destination on the local drive where AhsayCBS is installed, mapped drive, cloud storage or FTP server, or a destination pool with a mix of storage options mentioned above. Before you can select a predefined destination in this menu, it must first be configured under the System Settings > Backup > Predefined Destinations. Refer to Predefined Destinations Tab and Backup User Settings Tab for details on configuration.
- Standard Destination - Except for the AhsayCBS storage option, all other storage options under the Standard Destination belong to the backup users, whether it could be a single storage destination on the mapped drive, cloud storage or FTP server, or a destination pool with a mix of storage options mentioned above.
-
Slide the switch to the right under “Destinations Visible to Users” section.
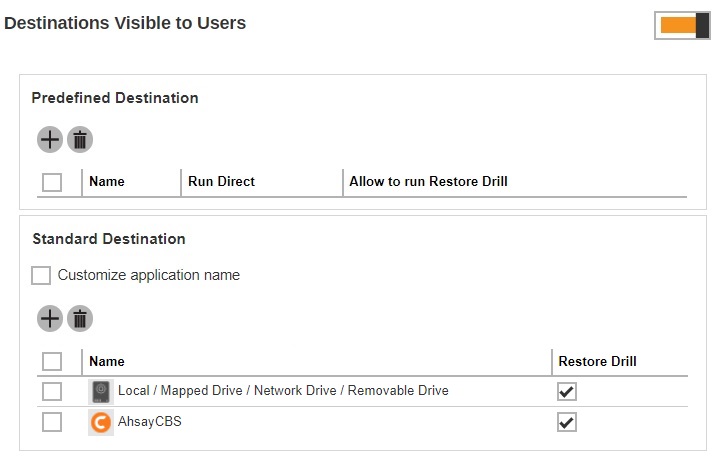
- Click Add under “Predefined Destination” and/or “Standard Destination” to add a destination.
- Select the desired storage option.
- Click Add to confirm adding the destination.
- If you have multiple destinations to add, repeat steps 2 - 4 until all desired destinations have been selected.
- Click Save to save.
Backup Set Types Visible to Users
AhsayCBS supports a wide range of backup set types for backup and restore. This menu allows the administrator to select the backup set types to be displayed for backup users to choose from when they are creating a backup set on AhsayCBS, AhsayOBM or AhsayACB. This feature is disabled by default.
-
Slide the switch to the right under “Backup Set Types Visible to Users” section.

- Click Add.
-
Select the “Backup Set Type” you wish to add from the drop-down menu.
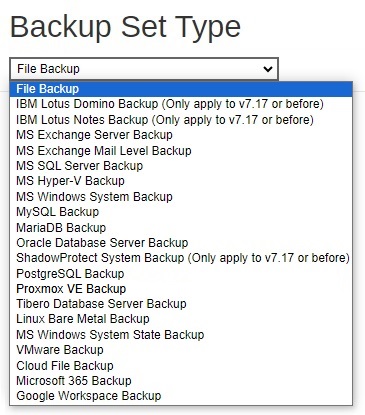
- Click Add to add the selected backup set type.
- If you have multiple backup set types to add, repeat steps 2 - 4 until all options have been selected.
- Click Save to save.
Cloud File Backup Source Visible to Users
This menu allows the administrator to select specific cloud file backup source(s) to be visible to backup users when they are creating a Cloud File Backup Set. By default, this feature is on with all cloud file backup sources pre-selected.
-
Slide the switch to the right under “Cloud File Backup Source Visible to Users section.

- Click Add.
-
Select the “Cloud File Backup Source” you wish to add from the drop-down menu.
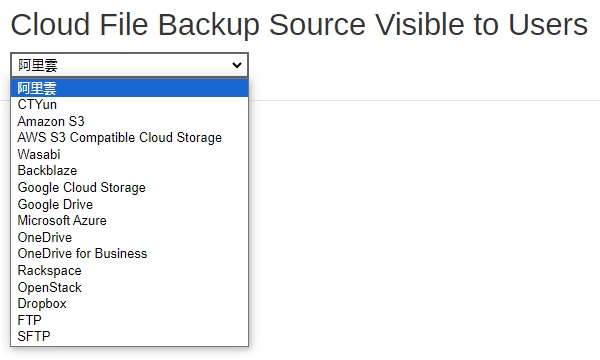
- Click Add to add the selected cloud file backup source.
- If you have multiple cloud file backup source to add, repeat steps 2 - 4 until all options have been selected.
- Click Save to save.
Microsoft 365 Backup Customization
This setting allows the administrator to customize the Authorization code and Admin consent endpoint screen for Microsoft 365 Global and China region. By default this feature is turned off, in which case the default Ahsay branded Microsoft 365 Authorization code and Admin consent endpoint screens will be displayed.
To support the customization of Azure AD App for Modern App Authentication, an Azure AD subscription is required, e.g. for Microsoft 365 Apps, Premium P1 and Premium P2 licenses of Azure AD subscriptions.
As the free version of Azure AD does not support granting Admin consent for the Exchange/SharePoint related APIs via New App Registration.
Please refer to Microsoft for details of Azure AD subscription plans.
-
Slide the switch to the right under "Microsoft 365 Backup Customization" section.

- Tick the checkbox of the region you want to customize.
-
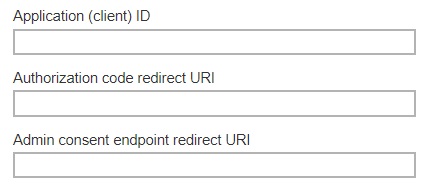
Enter the following information.
-
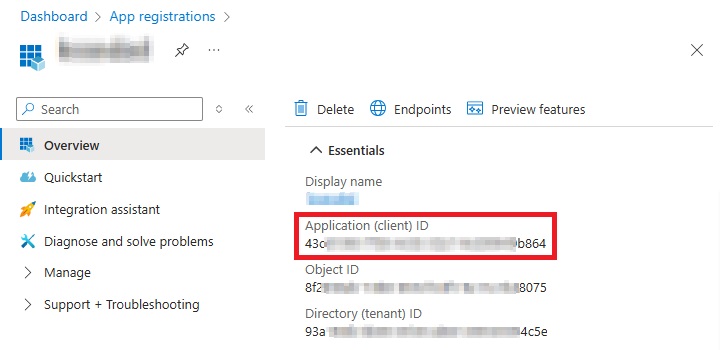
Application (client) ID – application ID used for authentication.
The Application (client) ID can be found on the following location on the MS Azure Dashboard as shown in the following example:
- Authorization code redirect URI – the branded reply URL that the authorization server sends to the user once granted an authorization code.
-
Admin consent endpoint redirect URI – the branded URL that sends the user to the Microsoft identity platform admin consent endpoint.
Both the Authorization code redirect URI and Admin consent endpoint redirect URI can be found on the following location on the MS Azure Dashboard as shown in the following example:
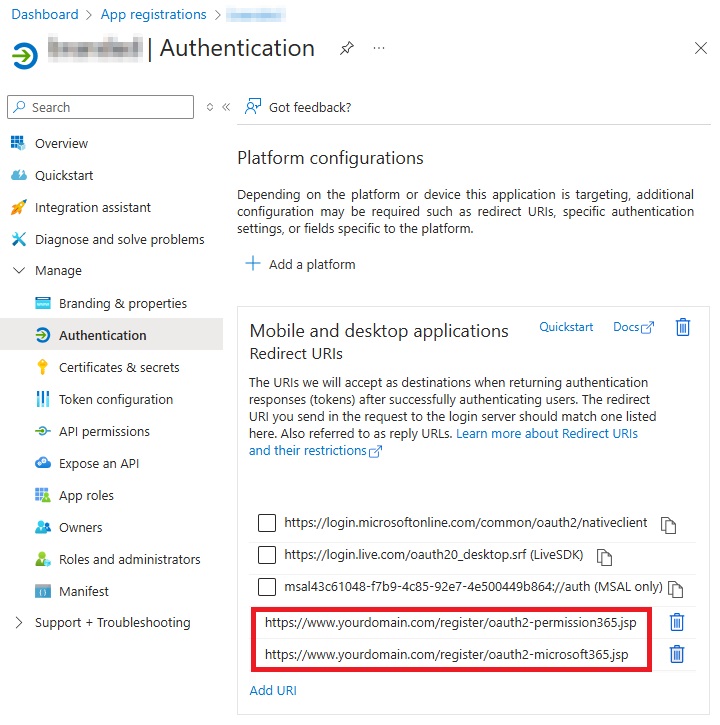 Examples of the oauth2-microsoft365.jsp and oauth2-permission365.jsp files can be downloaded from here.
-
- Click Save to save.
Google Workspace Backup Customization
This setting allows the administrator to customize the Authorization code screen for Google Workspace. By default this feature is turned off, in which case the default Ahsay branded Google Workspace Authorization code screens will be displayed.
-
Slide the switch to the right under "Google Workspace Backup Customization" section.

- Tick the checkbox of the credentials you want to customize.
-
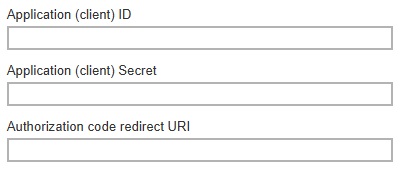
Enter the following information.
-
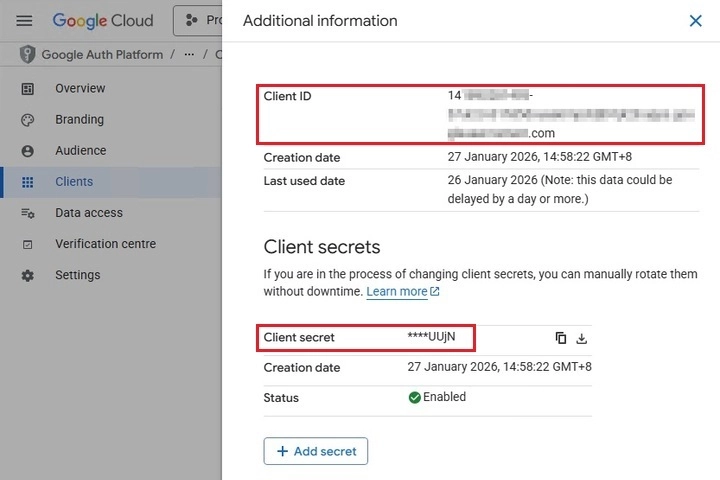
Application (client) ID – application ID used for authentication.
-
Application (client) Secret – application secret used for authentication.
Both the Application (client) ID and Application (client) Secret can be found under "Additional information" in the Clients section of the Google Auth Platform. To display the Additional information, click the Information and summary icon.

-
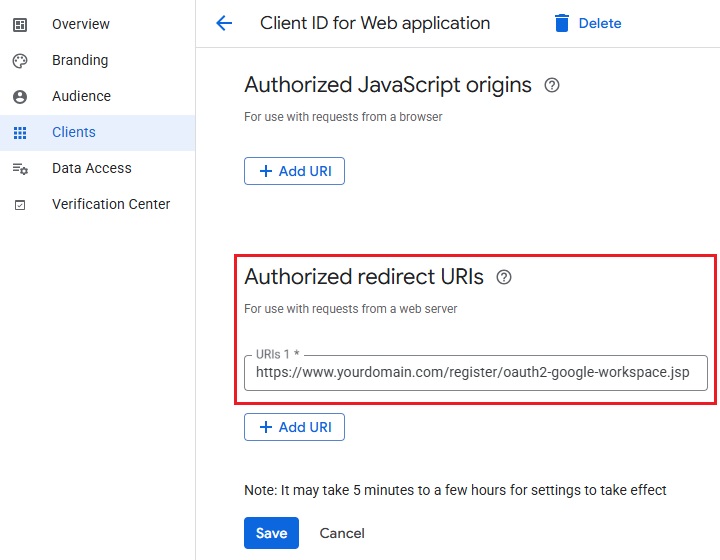
Authorization code redirect URI – the branded reply URL that the authorization server sends to the user once granted an authorization code.
The Authorization code redirect URI can also be found in the Clients section of the Google Auth Platform as shown in the following example:
 Example of the oauth2-google-workspace.jsp file can be downloaded from here.
-
- Click Save to save.
GUI Settings
In this menu, administrator can configure the GUI elements to be shown on the client backup agent (AhsayOBM or AhsayACB) interface for backup users. The View checkbox allows administrator to decide whether to display the GUI item, and for some items, the Edit checkbox is available to enable backup users to change or access the GUI item(s).
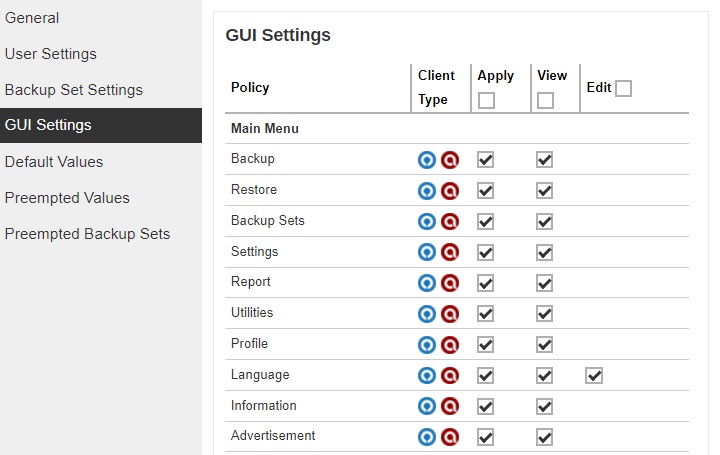
- Policy – the GUI element on AhsayOBM/AhsayACB.
- Client Type – the Client Backup Type (AhsayOBM or AhsayACB ).
- Apply – check this box if you wish to configure the “View” and “Edit” option for the GUI item. If this box is not checked, the GUI item will be shown on AhsayOBM/AhsayACB by default.
- View – enable or disable backup user from viewing the item.
- Edit – enable or disable backup user from editing the item.
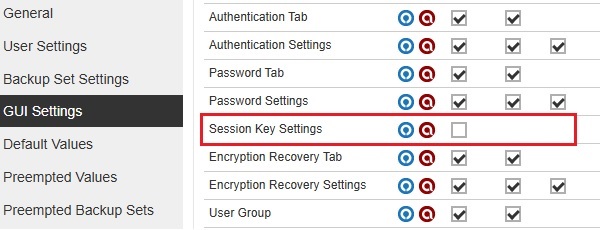
Starting with AhsayCBS v9.13, there are three new GUI settings added which are the following: Session Key Settings, Authentication Tab and Authentication Settings. These settings can be configured to show or hide and enable or disable a certain feature.
Session Key Settings
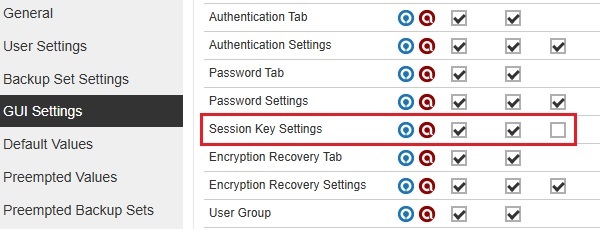
The Session Key will be enabled and can be edited if all three checkboxes are ticked.
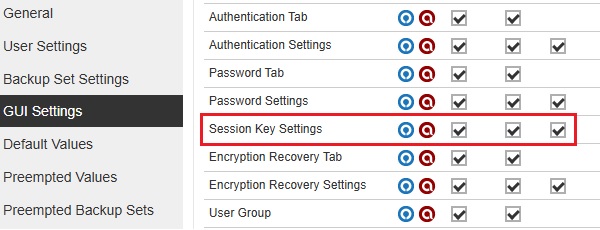
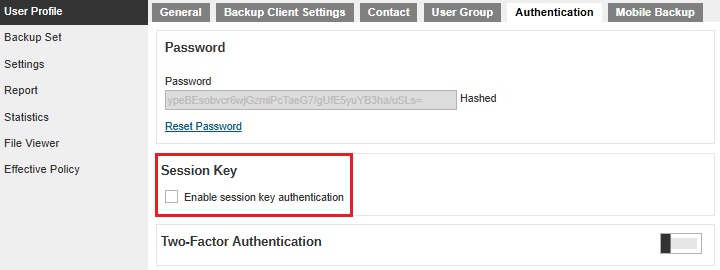
The Session Key will be disabled if the Edit checkbox is not ticked. Once it is disabled, the Enable session key authentication will be grayed out.
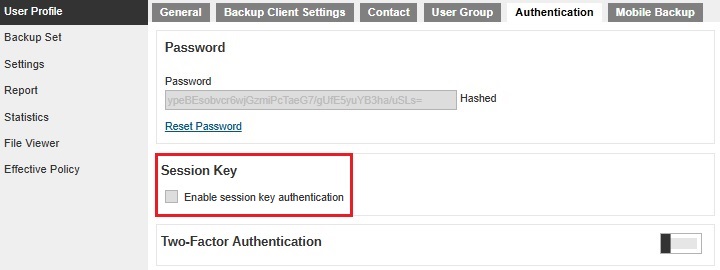
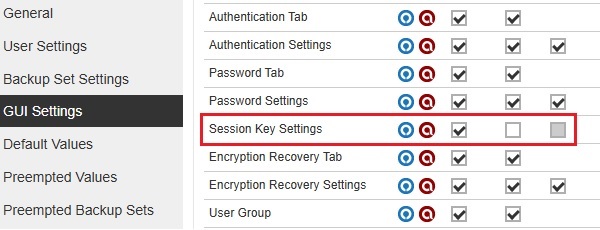
The Session Key will be hidden if the View and Edit checkboxes are not ticked.

The Session Key will be displayed by default if all the checkboxes are not ticked. Also, the View and Edit checkboxes will not be available.

Authentication Tab
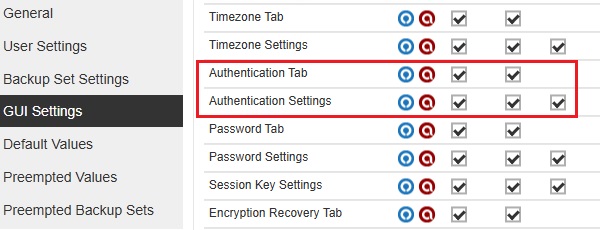
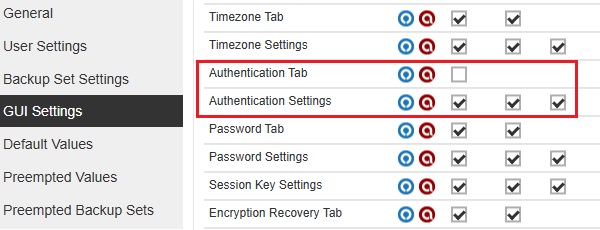
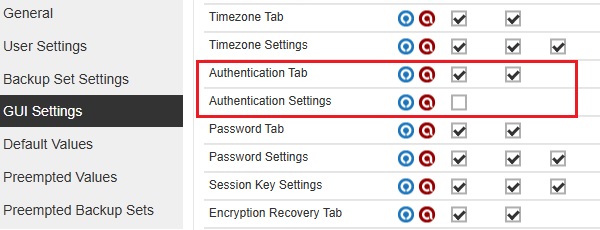
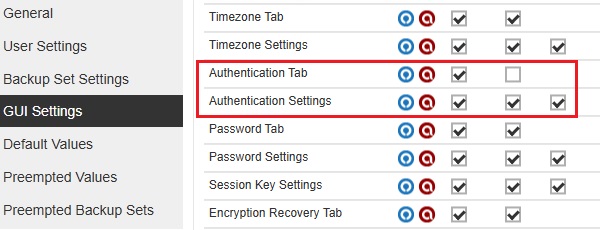
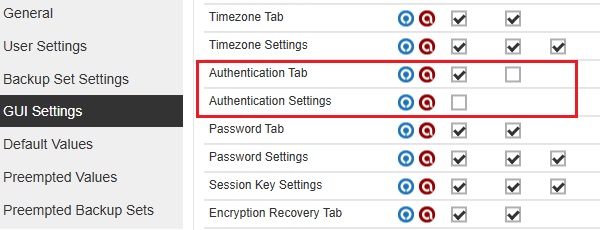
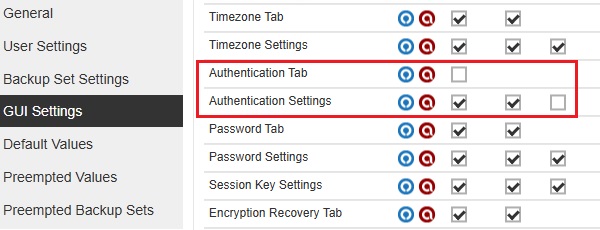
The Authentication Tab and Authentication Settings work together to display or hide the Authentication tab and enable or disable the Reset Password.

The Authentication tab and Password will be displayed and Password can be reset on the following configurations:
-
All checkboxes are ticked.
-
The "Authentication Tab" Apply checkbox is not ticked and all three checkboxes for "Authentication Settings" are ticked.
-
All checkboxes for "Authentication Tab" are ticked and Apply checkbox for "Authentication Settings" is not ticked.
-
All checkboxes for "Authentication Tab" and "Authentication Settings" are not ticked.
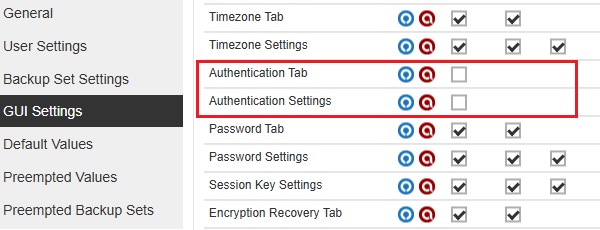

The Authentication tab will be hidden on the following configurations:
-
The "Authentication Tab" View checkbox is not ticked and all three checkboxes for "Authentication Settings" are ticked.
-
The "Authentication Tab" View checkbox is not ticked and all three checkboxes for "Authentication Settings" are not ticked.

The Authentication tab will be displayed and the Password is not allowed to be reset on the following configurations:
-
All "Authentication Tab" checkboxes are not ticked and the Edit checkbox is not ticked from "Authentication Settings".
-
All "Authentication Tab" checkboxes are ticked and only the Edit checkbox for "Authentication Settings" is not ticked.
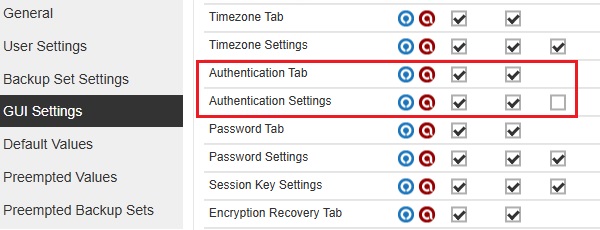

The Authentication tab is available but left blank on the following configurations:
-
All "Authentication Tab" checkboxes are not ticked and only the Apply checkbox is ticked for "Authentication Settings".
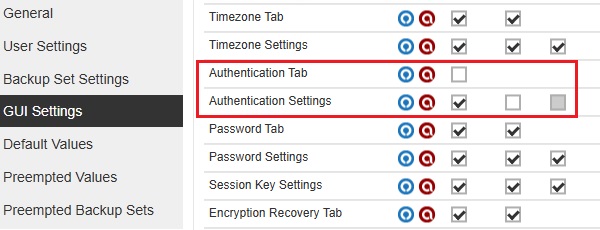
-
All "Authentication Tab" checkboxes are ticked and only the Apply checkbox for "Authentication Settings" is ticked.
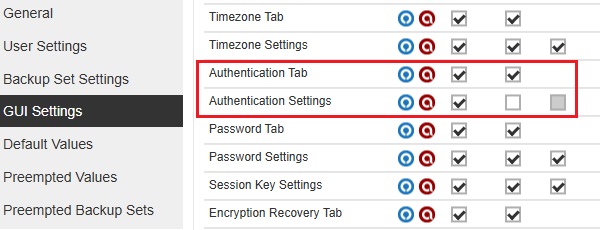
Default Values
This section allows administrator to define the default values for numerous setting items. The default values set under this setting menu will be applied to the backup sets directly. However, users can still override the default values during new backup set creation. As opposed to Preempted Values, which will be introduced later in this chapter, is a set of predefined values by the system administrator where backup users have no right to override the settings.
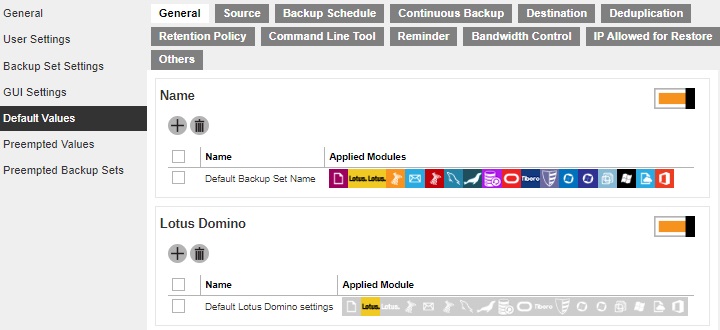
All setting items under the Default Values tab are enabled by default. The default values of the general setting items may be modified by clicking on the item.
General
This section defines the default values of the following general configuration items:
-
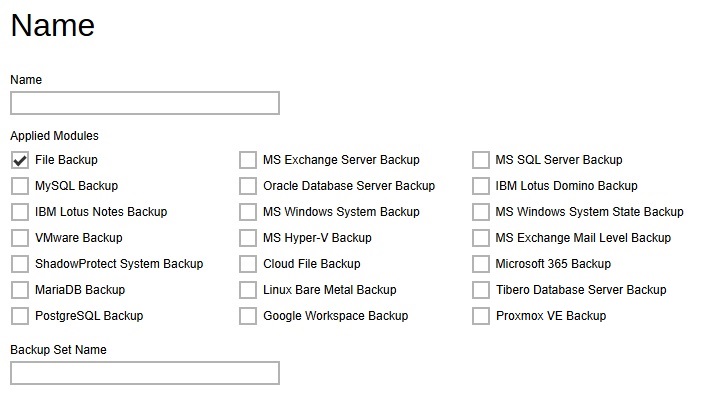
Name – defines the default backup set name when backup users create a backup set. Multiple settings can be created in this menu if you wish to define different default backup set names for different backup modules.
-
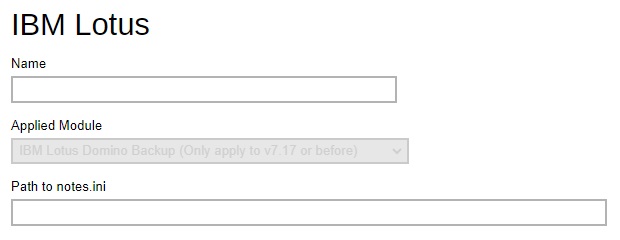
Lotus Domino / Lotus Notes – defines the path to notes.ini. Please exercise extra caution when changing this setting because an accidental or incorrect change of this path may cause unpredictable impact on running the Lotus Domino / Lotus Notes.
-
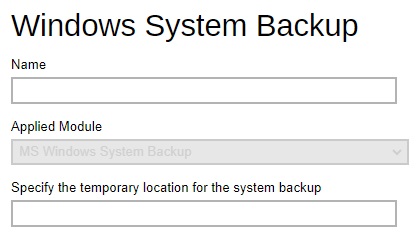
Windows System Backup / Windows System State Backup – defines the default location where you wish to store the system backup for MS Windows System / System State Backup module.
-
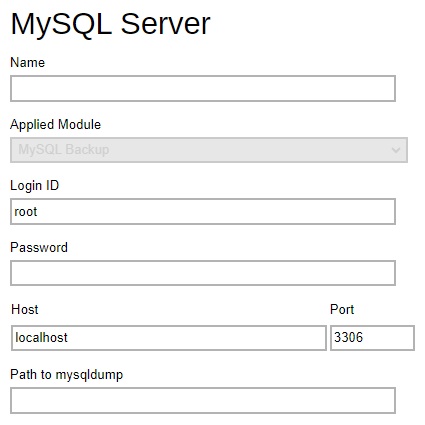
MySQL Server / MariaDB Server – defines the default Login ID, Host name, Port and Path to mysqldump for MySQL / MariaDB server backup module.
-
Oracle Database Server / Tibero Database Server – defines the default Login ID, Host name, Port and SID for Oracle / Tibero Database Server module. Also the Tibero Home for Tibero Database Server module.
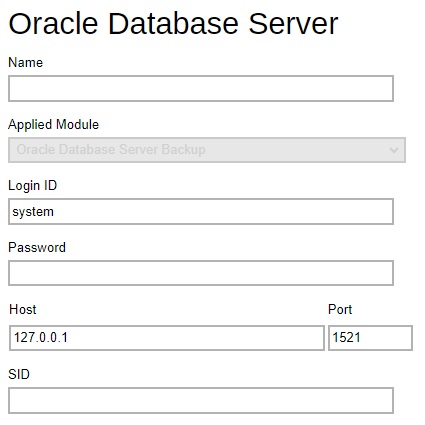
-
PostgreSQL Server – defines the default Login ID, Host name, Port and Path to pg_dump for PostgreSQL server backup module.
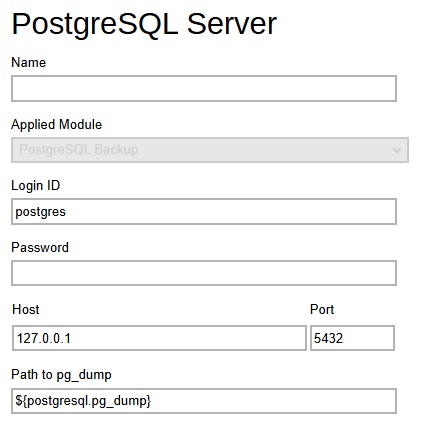
-
VMware Host - defines the default VMware version, host name, port number and SSH port VMware backup module.
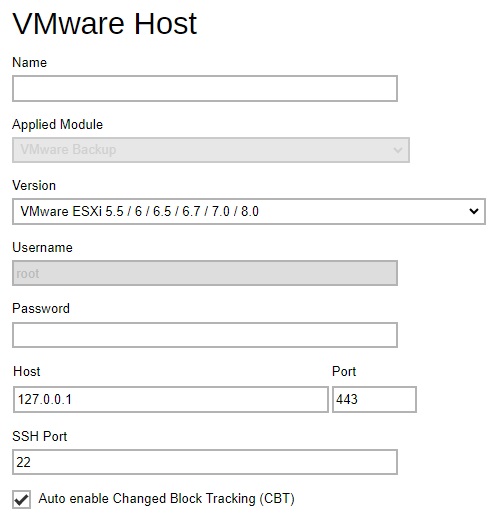
-
Shadow Protect - defines the default installation path of Shadow Protect and whether to encrypt the image file in the temporary directory.
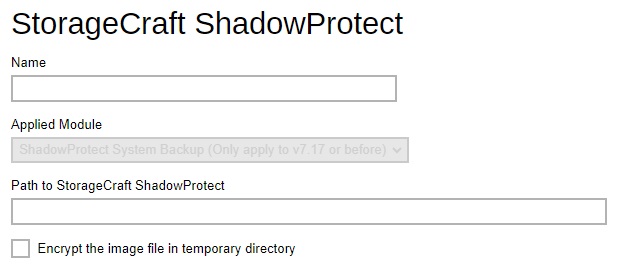
-
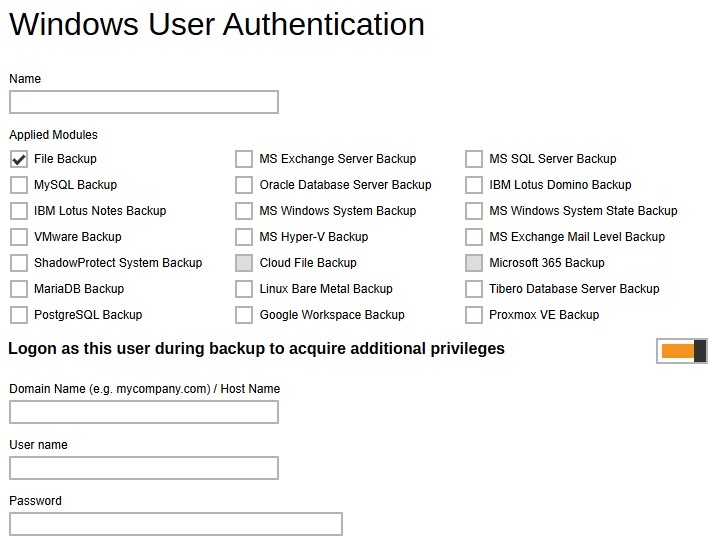
Windows User Authentication - defines the default domain name/host name and user name for backup users to enter the Windows User Authentication details. Multiple settings can be created in this menu if you wish to define different default domain name/host name and user name for different modules.
Source
This section defines the default backup source values of the following:

-
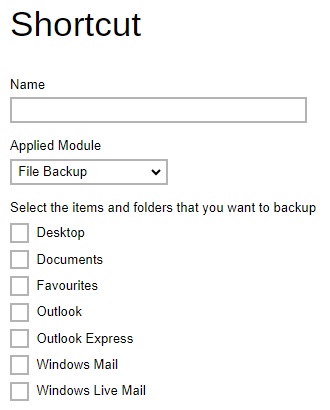
Shortcut - defines the default common files and folders to be selected when user is creating a backup set for File Backup.
-
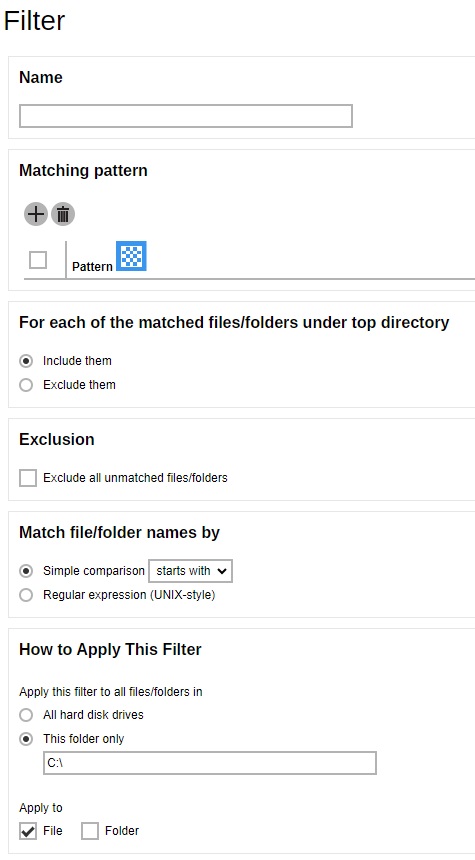
Filter - defines the default filters used to include/exclude files in the backup source from performing backup. This filter applies only to File Backup on Windows platform. Creating multiple filter settings is possible.
-
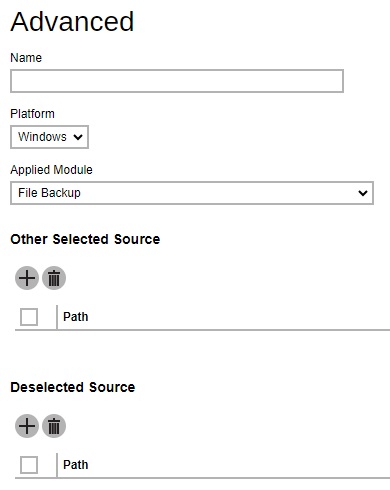
Advanced - defines the default advanced settings, including the platform of the user’s machine, the backup module, selected or deselected source for backup.
Backup Schedule
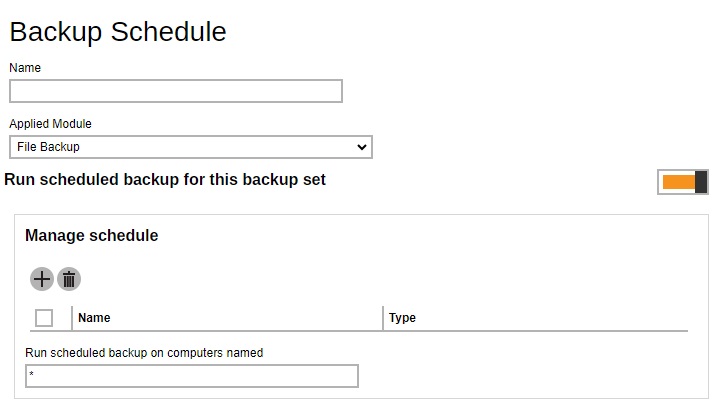
Setting up the backup schedule allows backup sets to run automatically at the specified time. This section allows administrator to define the default backup schedule when backup users create a backup set. Multiple settings can be created in this menu if you wish to define different default backup schedule for different backup modules. Within a backup schedule setting, multiple schedules can be added.

Continuous Backup
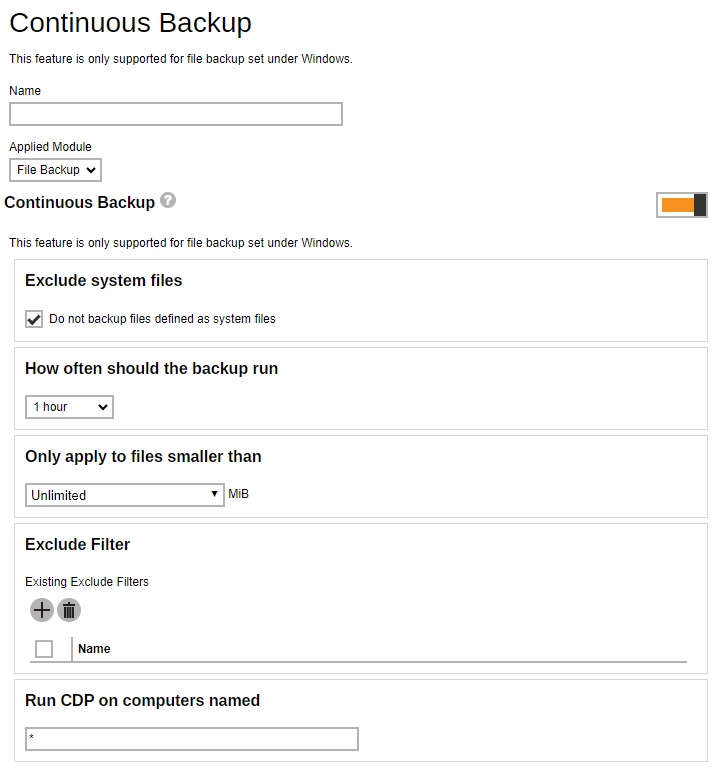
When the Continuous Backup feature is enabled, a backup job will be triggered whenever a change is made in the backup source. This section allows administrator to define whether to exclude system files, frequency of running backup when changes are detected, configure the maximum file size allowed for backup and configure filters to exclude files from backup. Continuous Backup is only available on Windows platform.

Destination
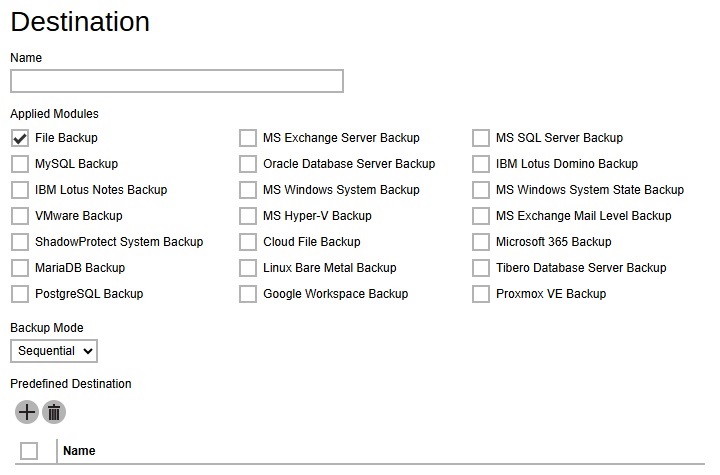
This section allows administrator to define the default backup destination when backup users create a backup set. Multiple settings can be created in this menu if you wish to define different default destinations for different backup modules.

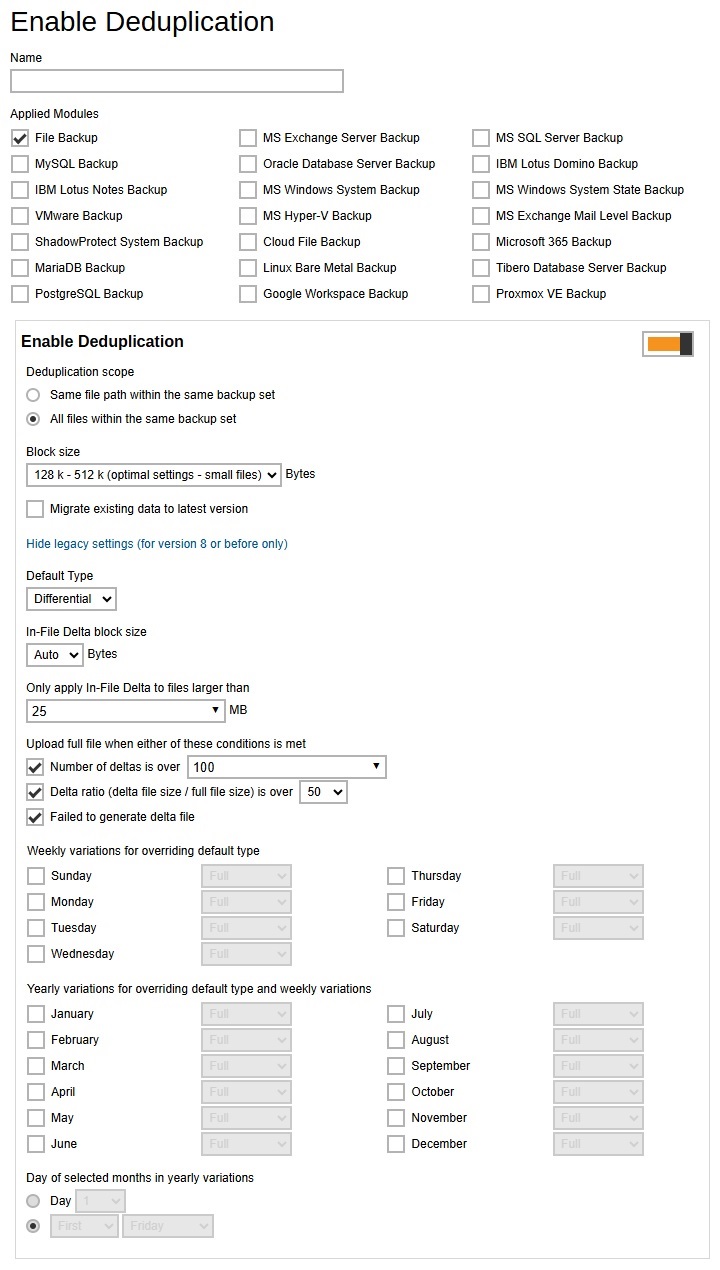
Deduplication
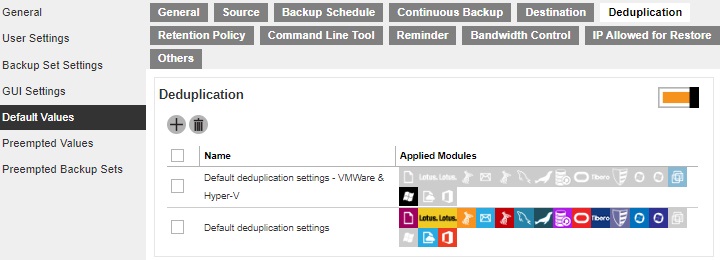
This section allows administrator to define the default deduplication setting when backup users create a backup set. Multiple settings can be created in this menu if you wish to define different deduplication setting for different backup modules.
Retention Policy
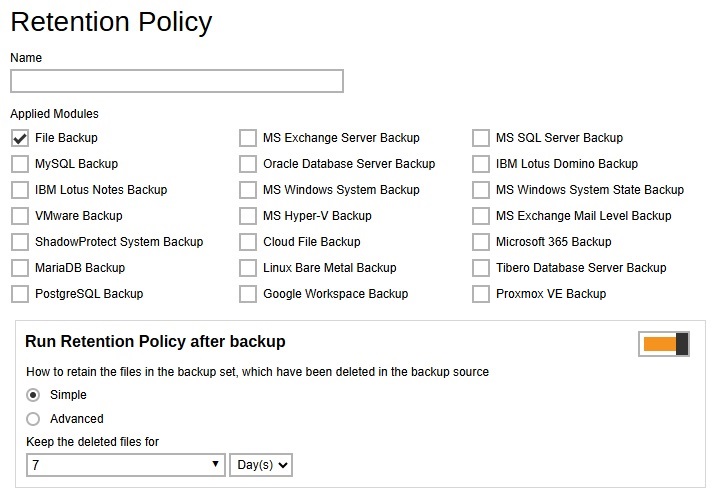
Retention policy defines the policies of persistent data management for meeting business data archival requirements. When a backup job is performed, for data that are modified or deleted on the client computer, their existing versions on the backup server (backup records) will be moved into retention area, while newly backed up files will be placed in the current data area.
Specifically, retention policy setting defines how long are the backup records kept in the retention area before they are deleted permanently from the backup server.
This section allows administrator to define the default retention policy for backup sets when they are created. Multiple settings can be created in this menu if you wish to define different default retention policy for different backup modules.

Command Line Tool
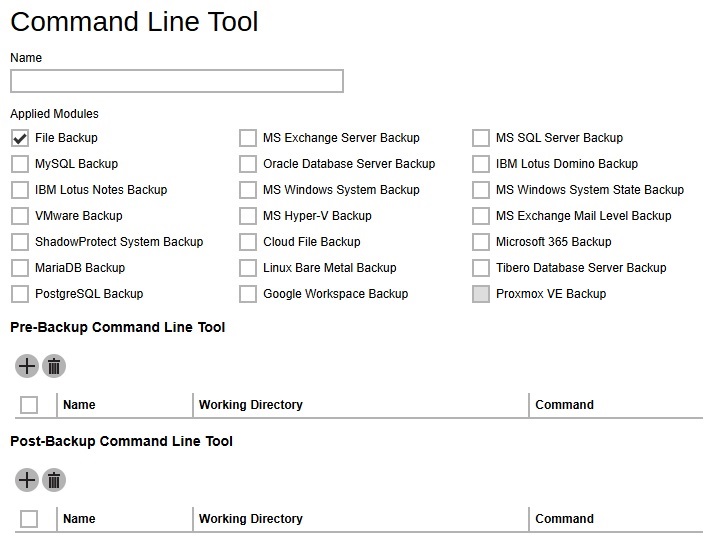
This section allows administrator to configure the default Pre-Backup or Post-Backup command to execute. Command such as batch file to stop and start an application before and after a backup job is completed, or other command such as to shut down the computer when a backup job is completed can be configured. Multiple settings can be created in this menu if you wish to define different default command line for different backup modules.

Reminder
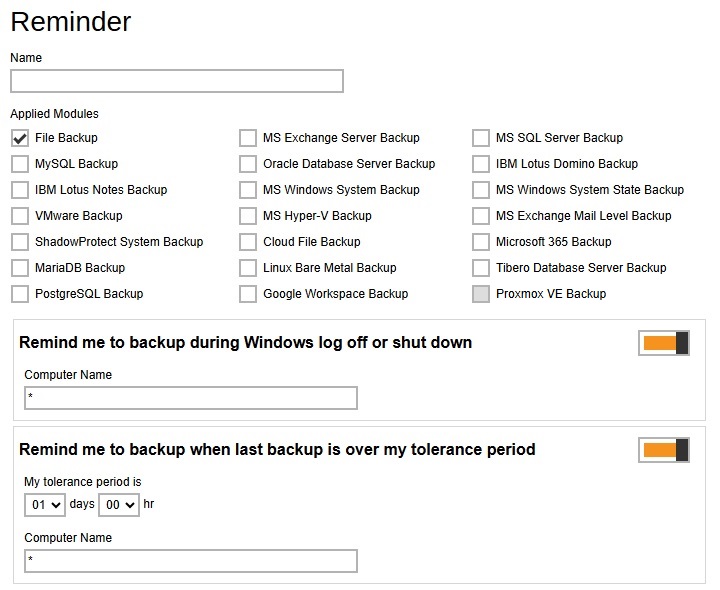
This section allows administrator to enable the backup reminder feature where users will be reminded to run a backup job when they log off or shut down their computers and/or when their last backup is over the tolerance period. Multiple settings can be created in this menu if you wish to define different settings for different backup modules. The reminder feature is only available on Windows platform.

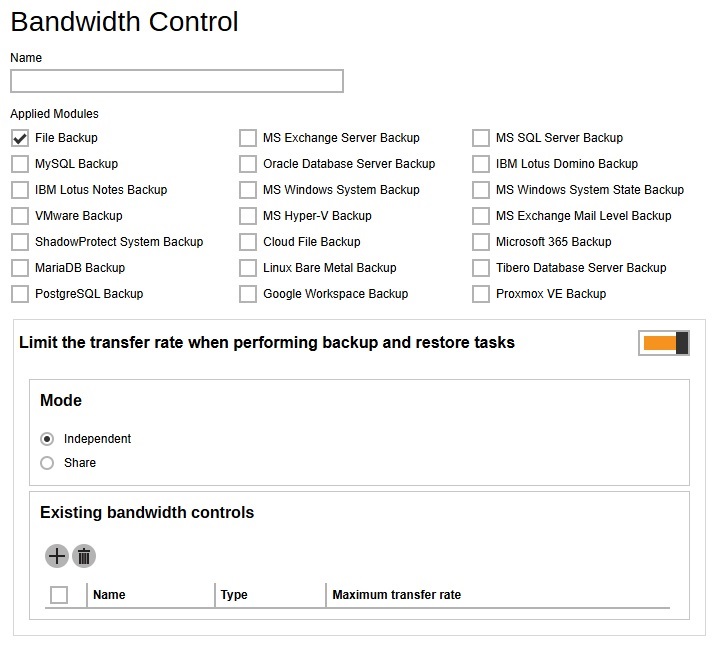
Bandwidth Control
Defines the default settings on limiting the data transfer rate when performing backup and restore jobs. Multiple settings can be created in this menu if you wish to define different settings for different backup modules.

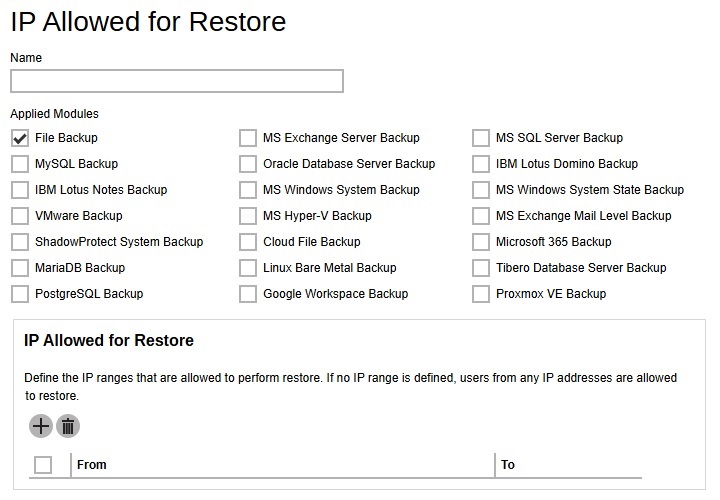
IP Allowed for Restore
This section allows administrator to define IP ranges that are allowed to perform restore. Multiple settings can be created in this menu if you wish to define different settings for different backup modules.

Others

This section allows administrator to configure other default settings like the following:
-
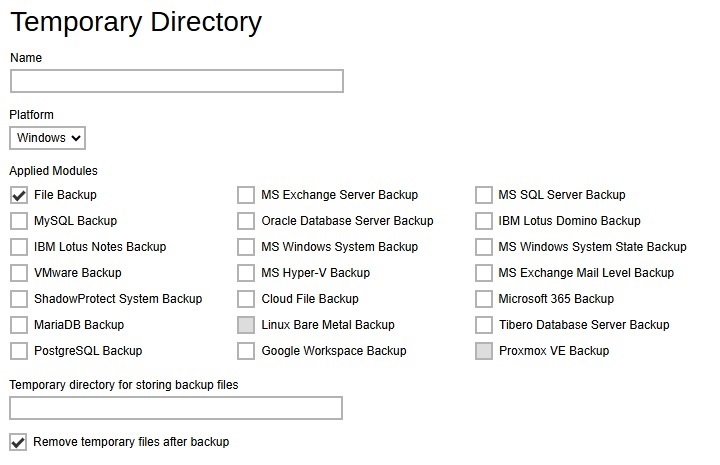
Temporary Directory - used for various purposes, such as storage of temporary spooled file, remote file list, local file list, temporary delta file and other files of temporary nature. Administrator can define the default location of the temporary directory. Multiple settings can be created in this menu if you wish to define different temporary directory locations for different backup modules.
-
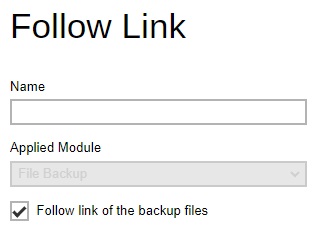
Follow Link - define whether to turn on the Follow Link feature by default. When this feature is on, not only the symbolic link or junction point will be restored, the directories and files that the symbolic link or junction point links to will also be restored. This feature is only applicable to File Backup module.
-
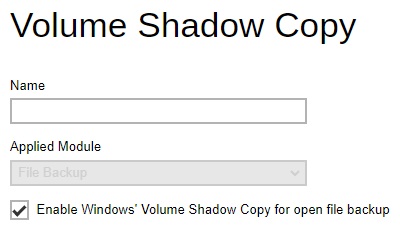
Volume Shadow Copy - enabling the Volume Shadow Copy option will allow backup of local files that are exclusively opened during the backup process (e.g. Outlook PST file). Administrator can define whether to turn on the Volume Shadow Copy feature by default. This feature is only applicable to File Backup module.
-
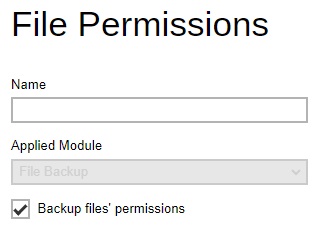
File Permissions - enabling the File Permissions option will back up the file permissions of the operating system. File permission defines, for example, the right to view or change a file by the system owner/group/individual. Administrator can define whether to turn on the backup of File Permissions by default. This feature is only applicable to File Backup module.
-
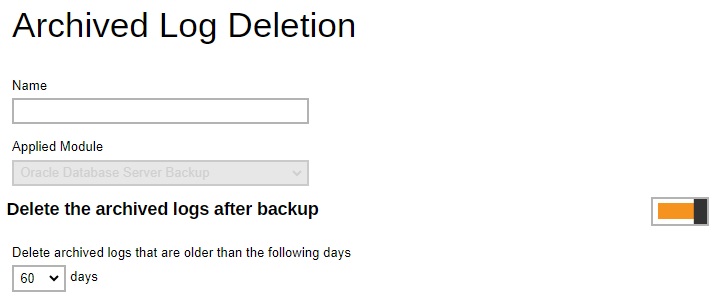
Archived Log Deletion - defines whether the archived log files will be deleted after backup by default. This feature is only applicable to Oracle Database Server Backup module.
-
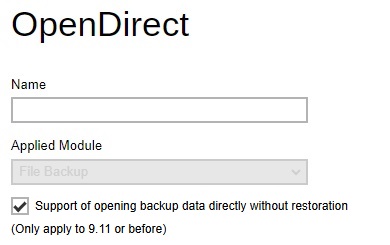
OpenDirect - enabling the OpenDirect setting for Windows File backup sets on AhsayOBM and AhsayACB will support restoring of selected files/folder within a compressed or image file without the need to restore the compressed or image file first.
-
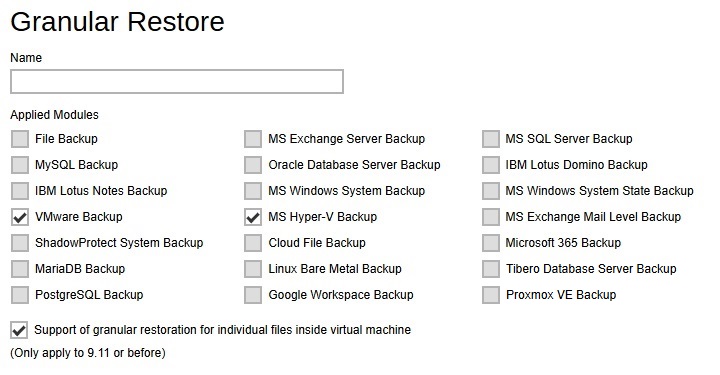
Granular Restore - enabling the Granular Restore setting for VMware ESXi/vCenter and Hyper-V guest VM backup sets will support restoring of selected files/folder within a virtual disk of a guest VM without the need to restore the guest VM file first.
-
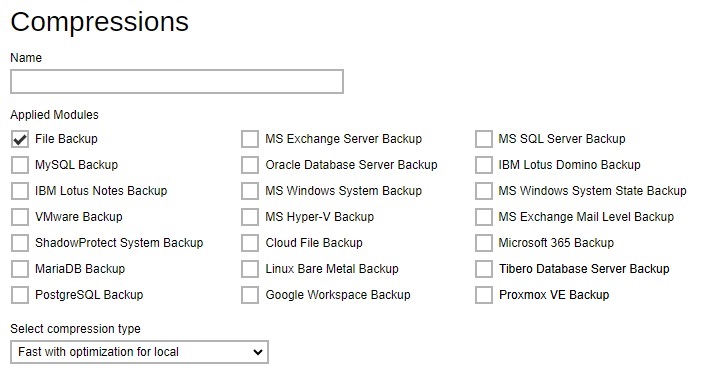
Compressions - compressing data before they are backed up brings faster backup and restore time and save storage space on the backup destination. Compression does not apply on Run direct backup sets for Hyper-V and VMware even if this feature is on. Administrator can define the default compression type for backup set. Multiple settings can be created in this menu if you wish to define different default compression types for different backup modules.
-
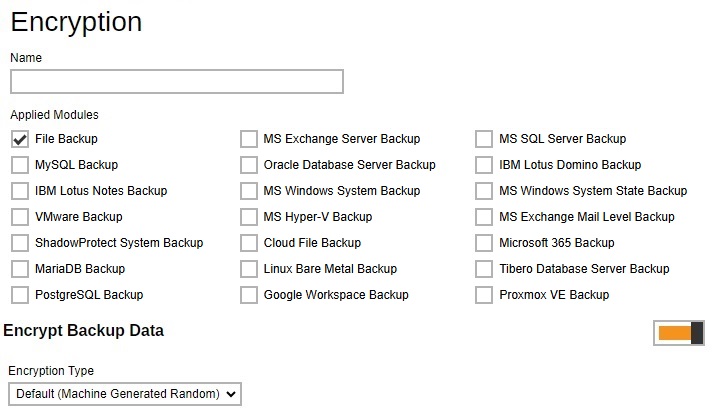
Encryption - for better security reason, backup users can choose to encrypt their backup data with an algorithm, mode and key of their choice. Encryption does not apply on Run direct backup sets for Hyper-V and VMware even this feature is on. Administrator can define the default encryption setting for backup set. Multiple settings can be created in this menu if you wish to define different default encryption settings for different backup modules.
-
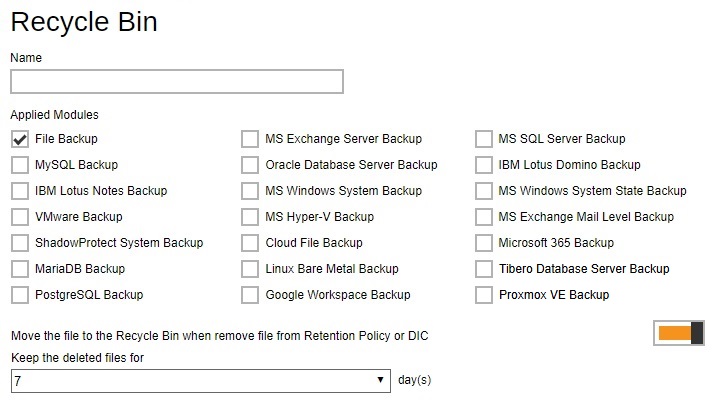
Recycle Bin - once BAK files are deleted based on Retention Policy or Data Integrity Check there is no way to retrieve it, by enabling the Recycle Bin users can ensure that the file will be kept for a specified period as added protection. Administrator can define the default Recycle Bin settings for the backup set. Multiple settings can be created in this menu if you wish to define different default Recycle Bin settings for different backup modules.
-
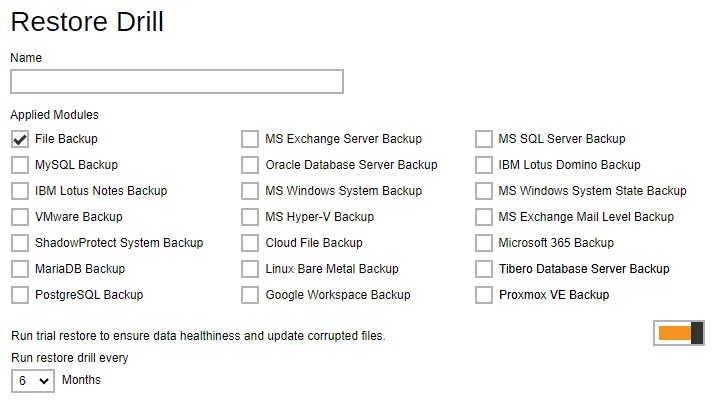
Restore Drill - used to run a trial restore to check if there are corrupted files in the backup job. Administrator can define the default setting for the restore drill. Multiple settings can be created in this menu if you wish to define different restore drill settings for different backup modules.
-
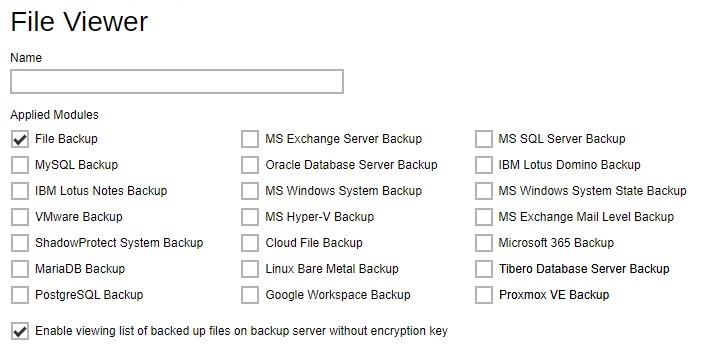
File Viewer - allows viewing of backed up files on the backup server. Administrator can define the default File Viewer settings for the backup set. Multiple settings can be created in this menu if you wish to define different File Viewer settings for different backup modules.
Preempted Values
This section allows administrator to define the predefined values for backup users’ backup sets. The preempted values set under this setting menu will be applied to the backup sets directly. Backup users can add additional values on top of the preempted values when creating a backup set but CANNOT remove the preempted values preset by the system administrator.
All setting items under the Preempted Values tab are disabled by default. Slide the switch to the right of each setting item to enable them. Then refer to the Default Values for the discussion on the configurable values.

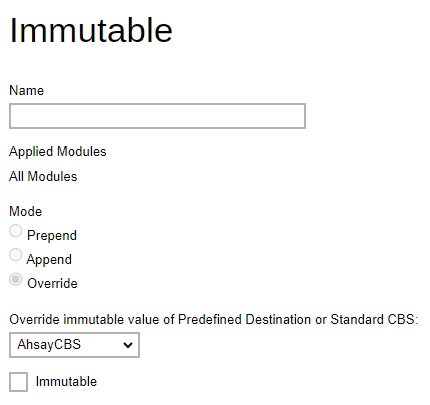
In all the setting items in the Preempted Values section, there is a Mode setting item that contains three options on how these preempted values are applied to user defined settings.
- Prepend – the preempted values will be applied as the first user defined settings.
- Append – the preempted values will be applied as the last user defined settings.
- Override - override all user defined settings.
There is an additional setting in the Destination tab which is Immutable. This will define the preempted immutable predefined destination that will be available to backup users when they create a backup set. Multiple settings can be created in this menu if you wish to define different preempted immutable predefined destinations for all backup modules.

Preempted Backup Sets
This section allows you to predefine a backup set that will be run as default backup set for backup user with this policy group setting. Backup user CANNOT remove this preempted backup set from their backup job once it is preset by the system administrator.
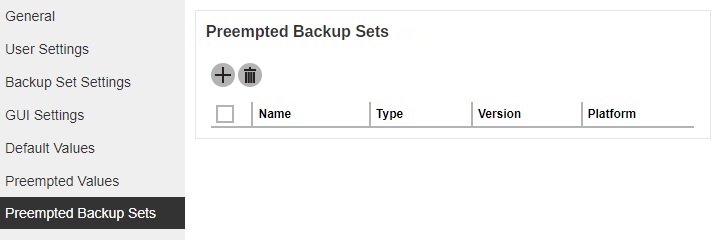
- Click Add under “Preempted Backup Sets” section.
-
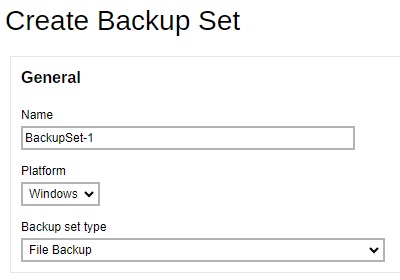
Enter a name for the preempted backup set, then select the platform on which the backup set will run on and the backup set type. In our example, the preempted backup set is called BackupSet-1 which is a File Backup type that will be run on Windows. Click Next to continue.
-
Specify the backup source for the new backup set. The selection items of this page varies depending on the backup set type you have chosen. Below is an example for a File Backup set.
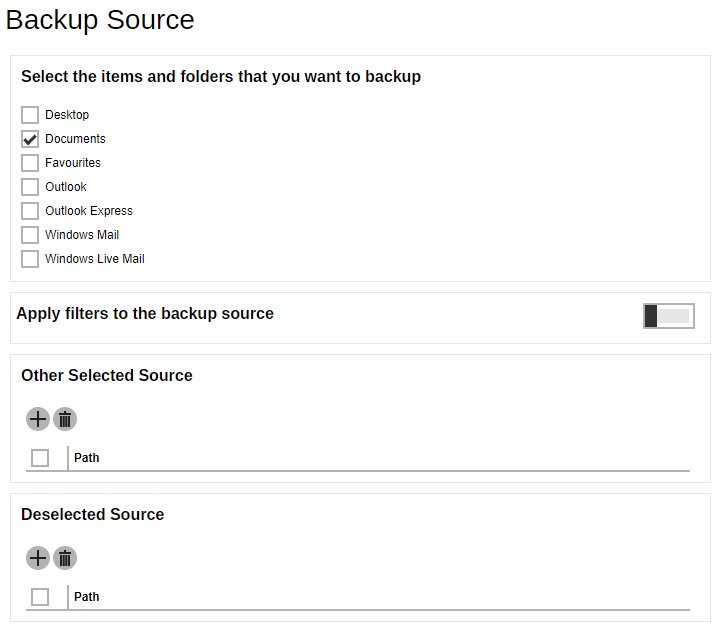
You can apply filters to the backup source by enabling the switch then configure the filter that will be used. Select other backup source or deselect backup source. Click Next to continue.
-
If necessary, add a backup schedule by sliding the switch to the right and click Add.
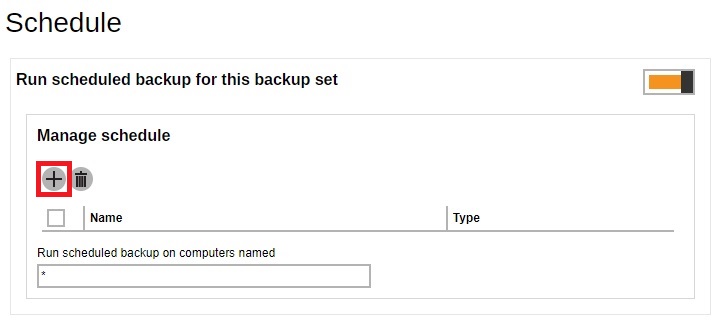
Configure the backup schedule then click Next to continue.
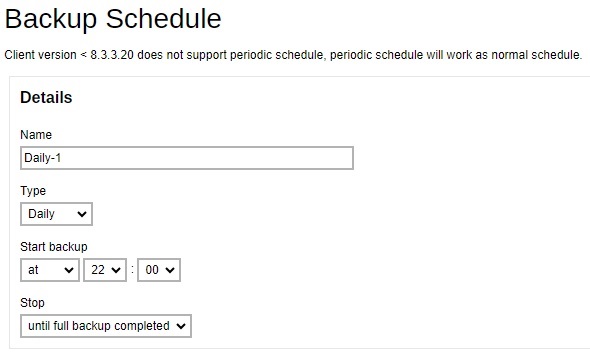
Please refer to the Overview part for more details.
-
Add a new backup destination for this backup set.

Select the backup mode. If Concurrent is selected, specify the number of concurrent backup destinations.
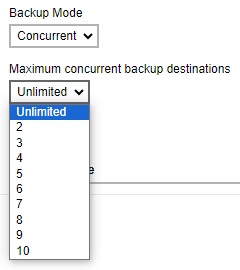
Click Add to add a destination. Tick the box next to the destination, once done click Add then Next to continue.

-
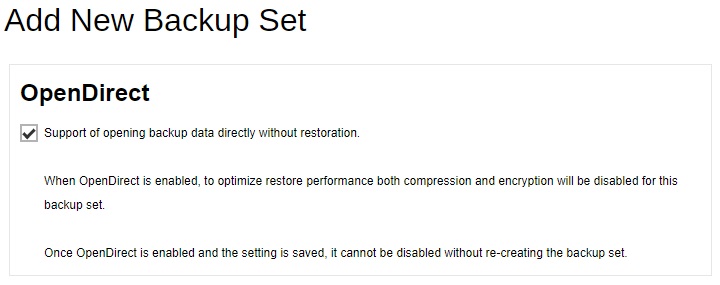
By default “OpenDirect” is already enabled, untick the box if you want to disable it. Click Next to continue.
-
Enter the Windows User Authentication information. This is needed for backup set with backup schedule and network shared drive selected as backup source. Enter the domain name and user name for AhsayOBM to access the network location.
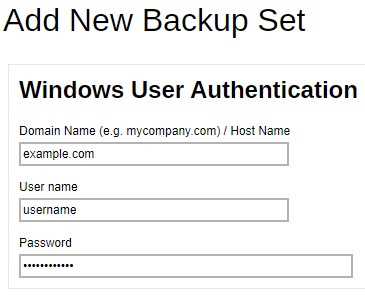
For the “User name”, the local account or a Microsoft account may be used. The Microsoft account is supported for AhsayOBM installed on Microsoft Windows version 8, 8.1 and 10.
Some users prefer to use a pin to login to Windows, this cannot be used for the Windows User Authentication. The pin can only be used for logging in to Windows and is not applicable for the Windows User Authentication. The password of the account must be provided instead of the pin to access files and/or folders in the network location.
Examples:
- Using a local account = username
- Using a Microsoft account = username@outlook.com
Click Save to save.
-
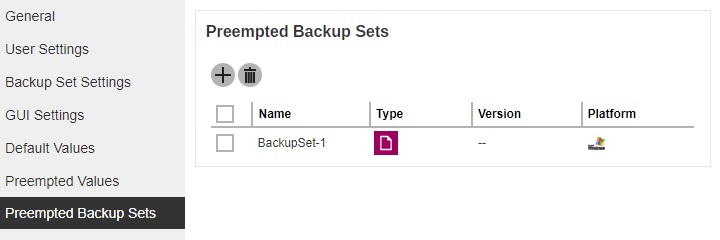
A new backup set called BackupSet-1 is created and can be seen in the Preempted Backup Sets list.

 AhsayCBS