
 AhsayCBS
[v9] Backup Source Selection

The three (3) ways to select files and/or folders to backup:
| Option | Description |
|---|---|
| Quick or Shortcut | This allows the user to back up files and/or folders in the selected backup source entirely. |
| Filter | This allows the user to select or exclude files and/or folders from the backup job. |
| Advanced Backup Source | This allows the user to select files and/or folders individually to back up. |
Quick or Shortcut
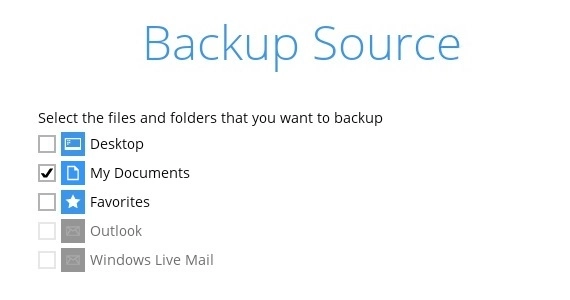
This option allows the user to quickly select a backup source to be backed up.

To know the locations of the folder(s) that will be backed up for each selected backup source, refer to the following table:
| Backup Source | Description |
|---|---|
| Desktop | If Desktop is selected, all files and/or folders in the following location will be backed up: |
| My Documents | If Documents is selected, all files and/or folders located in the following location will be backed up: If the Follow Link is enabled, all files and/or folders located in the following locations will also be backed up:
The Follow Link is enabled by default, found under Backup Sets > %backupset_name% > Others > Follow Link.
|
| Favorites | If Favorites is selected, all files and/or folders located in the following location will be backed up: |
| Outlook | If Outlook is selected, all files and/or folders located in the following location will be backed up: |
| Windows Live Mail | If Windows Live Mail is selected, all files and/or folders located in the following location will be backed up: |
To select files and/or folders to back up using the Quick or Shortcut option, follow the steps below:
Select a backup source.
 The Outlook and Windows Live Mail will be disabled if they were not installed on the machine.
- Click the Save button to store the selected backup source.

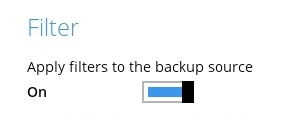
Filter
The “Filter” backup source is an alternative way to select a backup source which does not require Windows User Authentication login password even if the backup schedule is enabled unless the “Filter” backup source is located on a network drive.

To select files and/or folders to back up using the “Filter” backup source, follow the steps below:
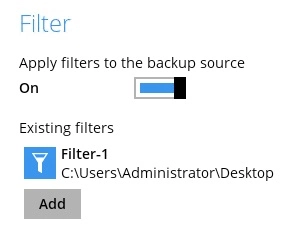
Swipe the lever to the right to turn on the “Filter” setting.
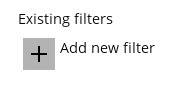
Click the + button to create the filter.
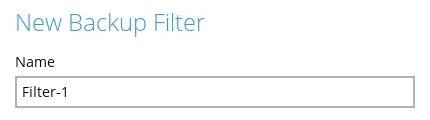
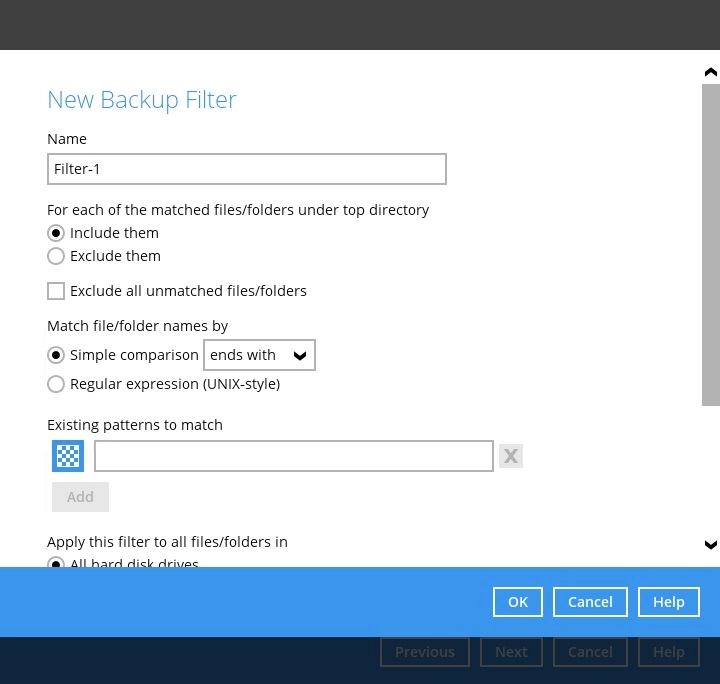
Enter the name of the backup filter.
Select from the options below.
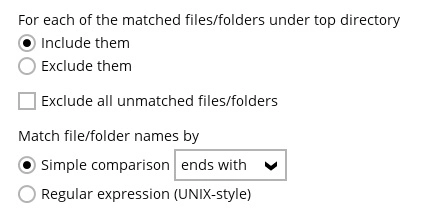
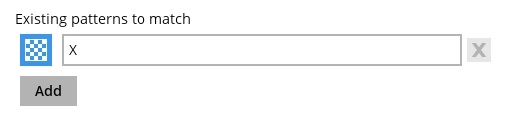
In this example, all files and/or folders that end with the letter ‘X’ will be included to the backup job. You can add multiple patterns here.
Select whether you would like to apply the filter to all files and/or folders in all hard disk drives or to a specific folder only. If This folder only is selected, click the Change button to select the specific folder or input the local / network address that you would like to apply the filter to.
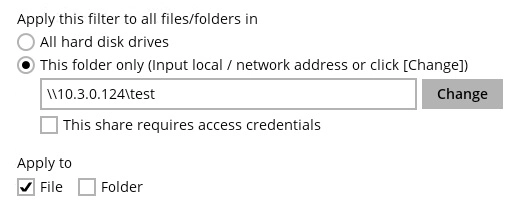
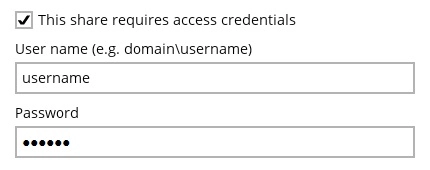
If “This share requires access credentials” is checked, enter the “User name” and “Password” of the local or network drive. This checkbox will only be enabled if a local or network address is detected.
Click the OK button to save the created filter, then click the Save button to save the settings. Once you run a backup, all files and/or folders that match the applied filter will be backed up.
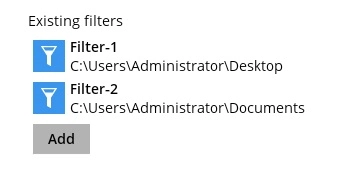


Multiple backup filters can be created by clicking the Add button.
For more details about backup source filtering, refer to Backup Source Filter.
Advanced Backup Source
The “Advanced Backup Source” is another way to display the locations in the backup source to select files and/or folders to backup.
Here is the “Advanced Backup Source” window for the following:
Windows
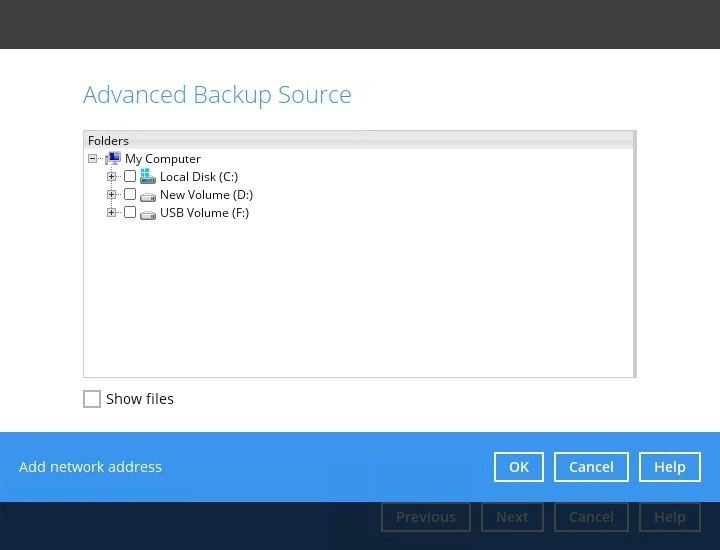
- The “Add network address” option is only available on Windows.
- The “Advanced Backup Source” is another way to select a backup source which does not require Windows User Authentication login password even if the backup schedule is enabled unless the backup source is located on a network drive.
macOS
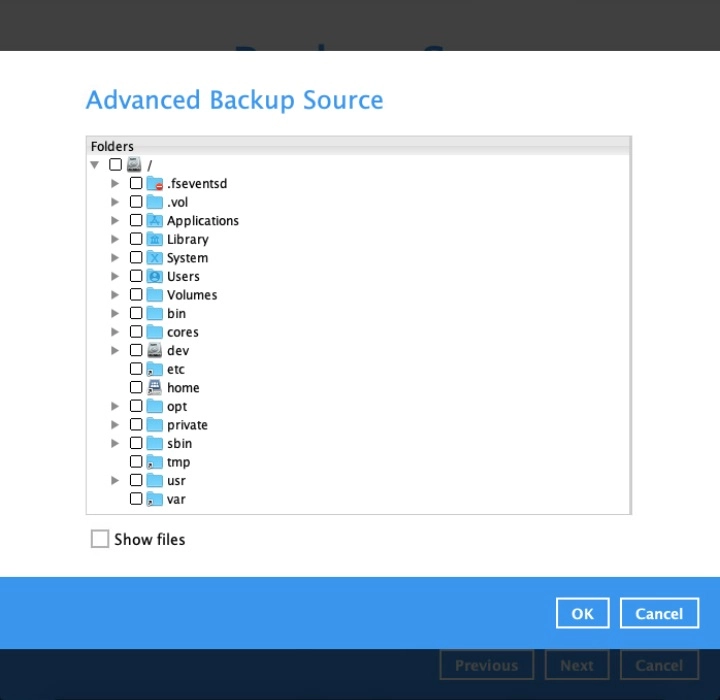
Linux (GUI)


The following table shows the list of options in the “Advanced Backup Source” which require and does not require Windows User Authentication login password for Windows only:
| Advanced Backup Source | Description |
|---|---|
| Local Disk | Does not require Windows User Authentication login password. |
| Network Drive | Requires Windows User Authentication login password. For network drive/s, you will need to enter the login credentials which has permission to access network resources in order to back up selected files and/or folders. |
| Libraries | Does not require Windows User Authentication login password.
This type of backup source may not be supported on other versions of Windows.
This feature is not supported on:
Supported on:
|
| Add network address | Requires Windows User Authentication login password. For network drive/s, you will need to enter the login credentials which has permission to access network resources in order to back up selected files and/or folders. |
To select files and/or folders using the Advanced Backup Source, follow the steps below:
- In the Backup Source window, click I would like to choose the files to backup.
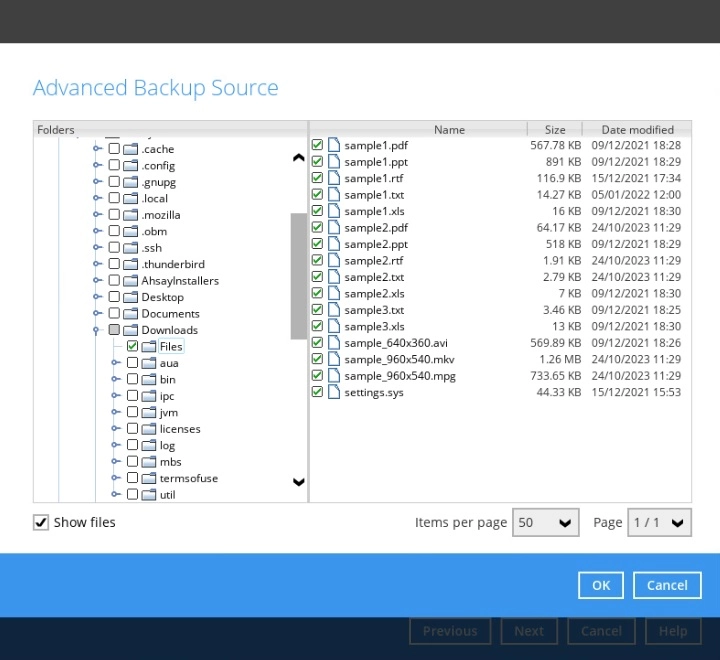
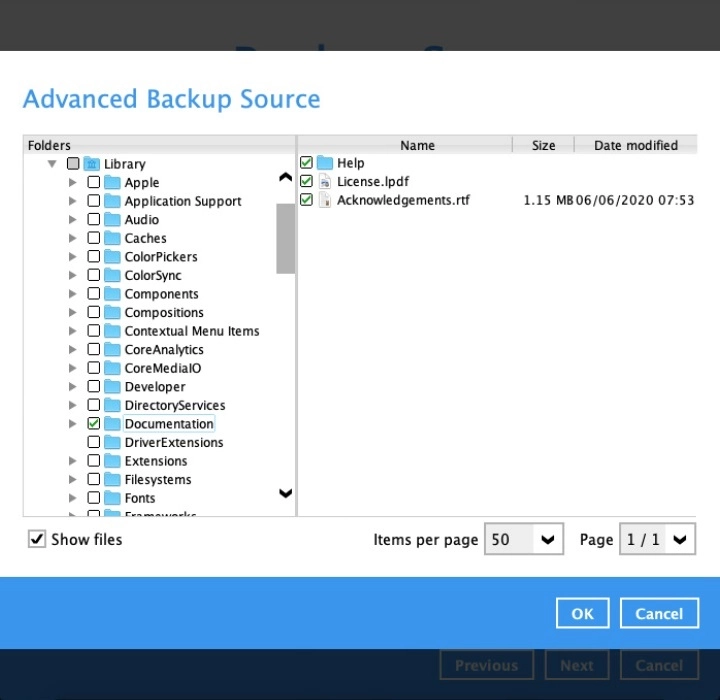
For Linux (GUI) and macOS, tick the Show files checkbox at the bottom of the screen. A list of files will appear on the right-hand side. Select the checkbox(es) next to the file(s) to back up.
Example of “Advanced Backup Source” window in Linux (GUI)
Example of “Advanced Backup Source” window in macOS
For Windows, there are two (2) ways to select files and/or folders, one is when the files and/or folders are located in the local machine and another way is when the files and/or folders are located in the network.
To select folder(s) to backup all files in the folder(s) and/or backup only individual file(s) in the local machine, tick the Show files checkbox at the bottom of the screen. A list of files will appear on the right-hand side. Select the checkbox(es) next to the file(s) to back up.
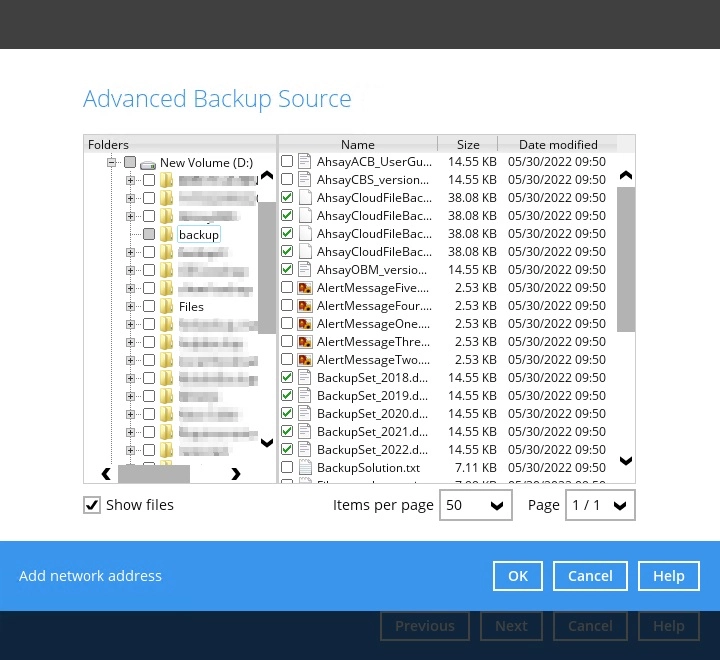
Backup file(s) and/or folder(s) located in a network drive. Click the Add network address link at the bottom of the screen. In the “Network Address” window, enter the network address.
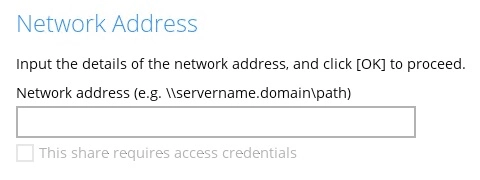
Once a network address is entered, “This share requires access credentials” will be enabled. Check the box beside it if access credentials are required to backup and enter the “User name” and “Password”. Otherwise leave it unchecked and click OK.
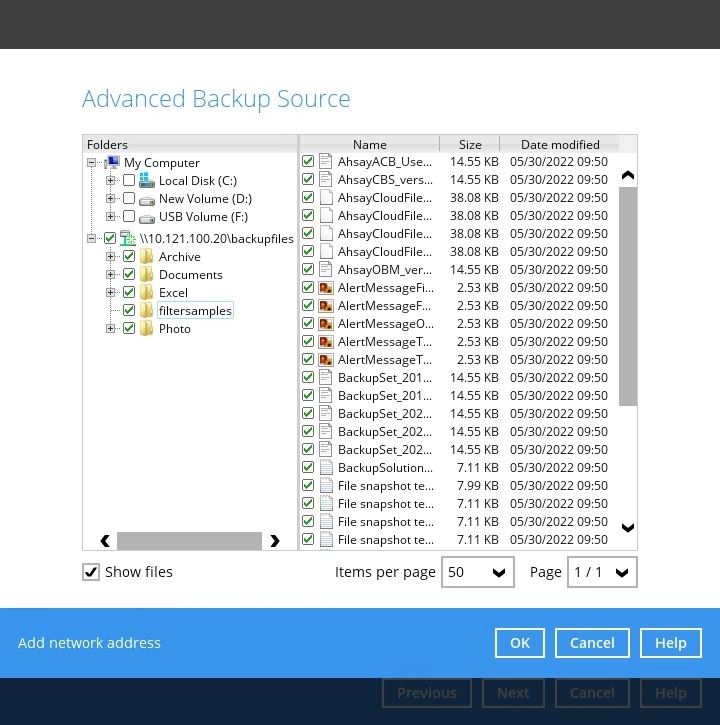
The network drive will now be added and automatically selected. There is also an option to select only specific file(s) to back up by checking the Show files checkbox.
- Click the OK button to save the selection, then click the Save button to store settings.


In selecting files and/or folders to back up, the three (3) options can be used simultaneously. For more details, please refer to the example scenarios below:
Scenario 1 (Quick or Shortcut + Filter)
You can use the quick or shortcut option and apply filter to the selected backup source at the same time. To use this type of combination, follow the steps below:
Choose a backup source.
Create a filter which will be applied to the backup source.
Click the OK button to save the created filter, then click the Save button to store settings.

Scenario 2 (Quick or Shortcut + Advanced Backup Source)
You can use the quick or shortcut option and and select files and/or folders in the advanced backup source at the same time. To use this type of combination, follow the steps below:
Choose a backup source.
In the source window, click I would like to choose the files to backup and select the files and/or folders that you would like to back up. Or click Add network address to backup files and/or folders located in a network drive.

Click the OK button to save the created filter, then click the Save button to store settings.

Scenario 3 (Filter + Advanced Backup Source)
You can use the “Filter” backup source and select files and/or folders in the “Advanced Backup Source” at the same time. To use this type of combination, follow the steps below:
Create a filter.
In the source window, click I would like to choose the files to backup and select the files and/or folders that you would like to back up. Or click Add network address to backup files and/or folders located in a network drive.
Click the OK button to save the created filter, then click the Save button to store settings.
