AhsayCBS
Ahsay Go Settings Overview
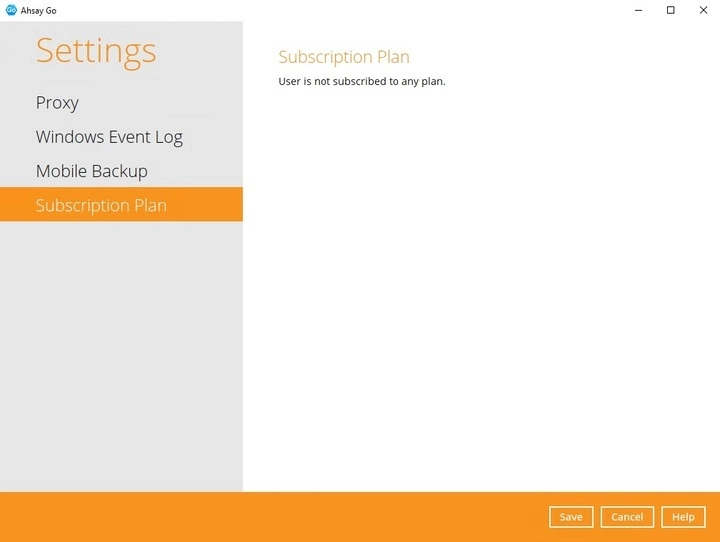
This feature allows the user to enable the Proxy settings and Windows Event Log. It also allows the user to register a device for mobile backup. And displays the details of the subscription plan.

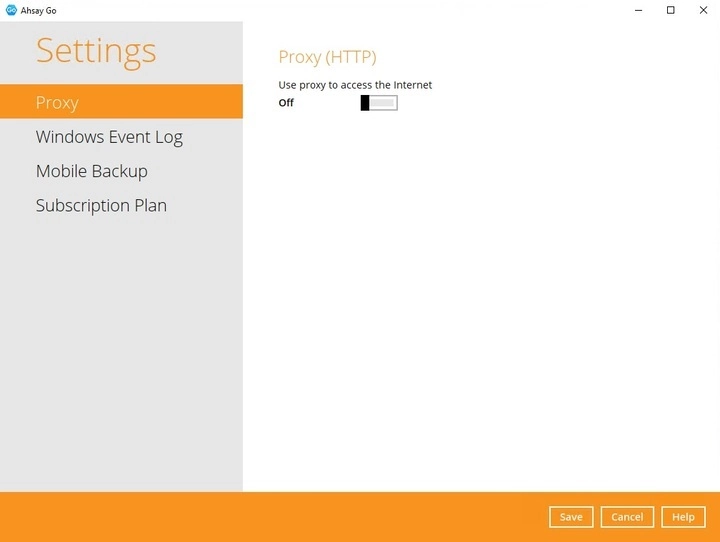
There are four sections available for this feature:
Proxy
When this feature is enabled, Ahsay Go will use a proxy to gain access to the internet.
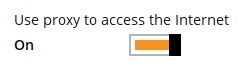
Slide the lever to the right to enable this feature.
-
Complete the following fields:
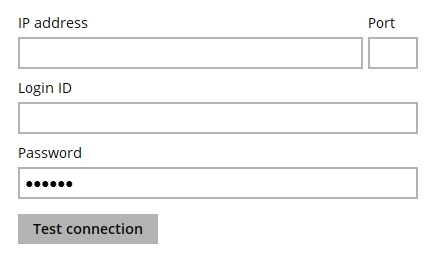
- IP address - IP address of the proxy server
- Port - listening port of the proxy server
- Login ID - Login ID of the proxy server
- Password - password of the proxy server
- Click the Test connection button to validate the connection.
- Click the Save button to apply the settings.
Windows Event Log
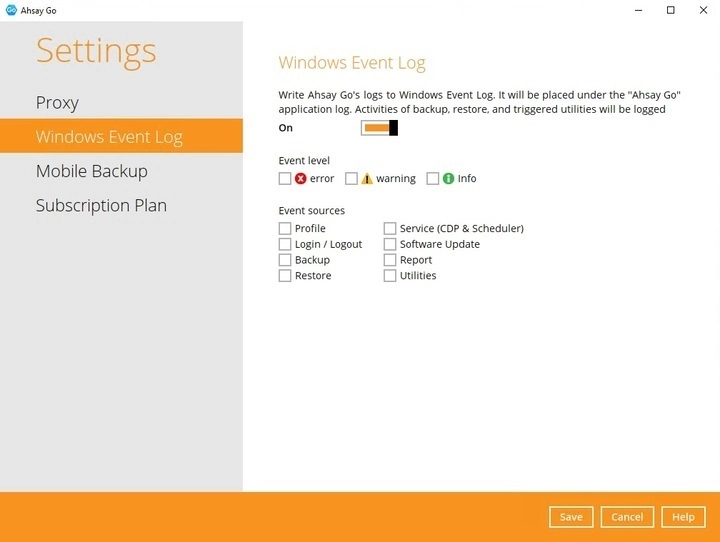
When this feature is enabled, all Ahsay Go system log information will be written under Applications and Services Logs. The user may access them through Windows Event Viewer in the local machine.
Mobile Backup
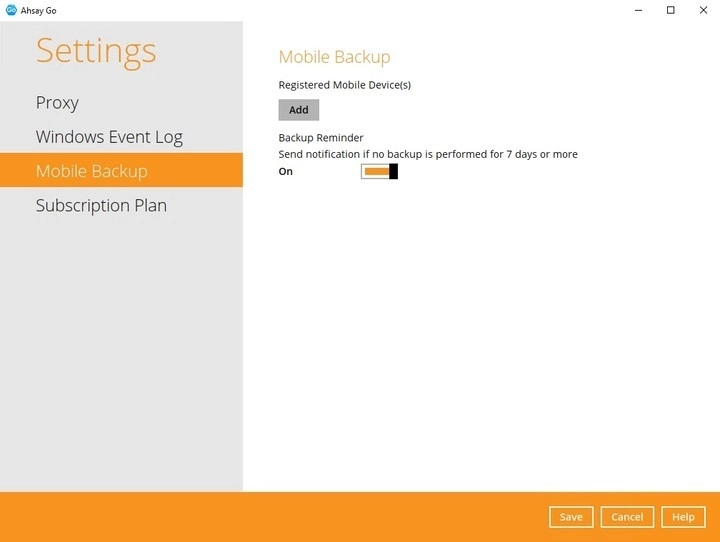
The Mobile Backup section is used to register mobile devices for mobile backup. Here you can:
Add one or more device(s) for mobile backup.
Please refer to the Ahsay Mobile Guide for detailed step-by-step procedure.- View backed up photos, videos, and documents saved in the mobile backup destination.
Change the mobile backup destination to:
- new location in the same machine.
- new machine.
- Remove one or more device(s) registered for mobile backup.
- Enable or disable the backup reminder.
View Backed up Photos, Videos, and Documents in Backup Destination
To view backed up photos, videos, and documents saved in the mobile backup destination, follow the instructions below:
-
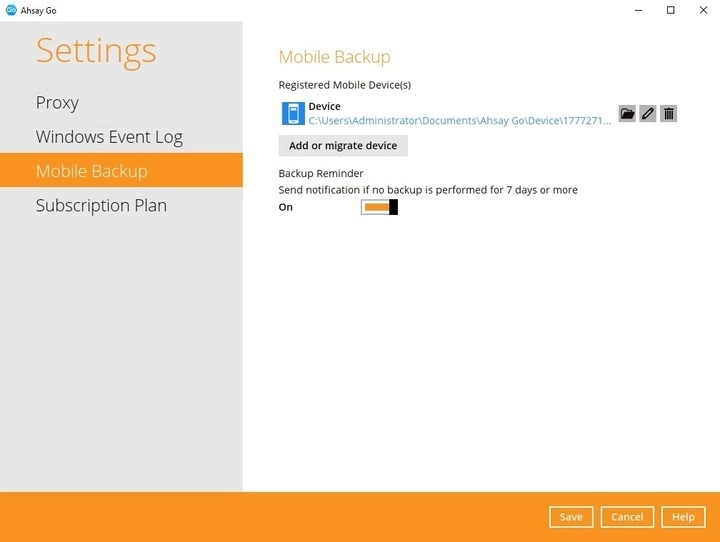
Either click the link under the registered mobile device or click the Browse icon on the right side of the registered mobile device.
-
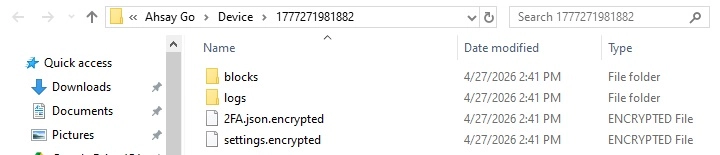
A new window will be displayed, double-click the blocks folder, then open the folder with the filename YYYY-MM-DD-hh-mm-ss, which is the date and time of the backup. This contains the folders where the photos, videos, documents, and 2FA accounts are saved.


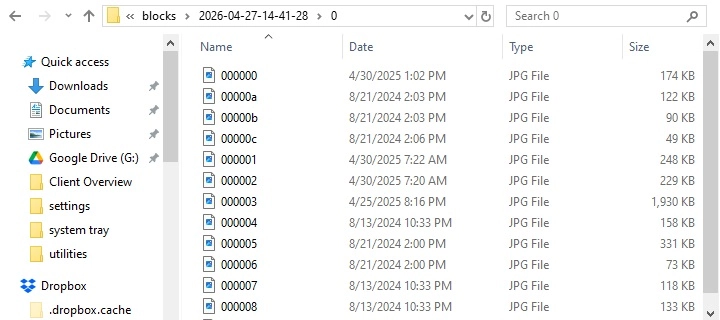
- Once done, click the X button to exit.
Change Mobile Backup Destination Location to new Location in Same Machine
There are two (2) options available when changing mobile backup destination. You can copy the previously backed up photos, videos, documents and 2FA accounts to the new location or continue to back up in the new location.
In case the previously backed up photos, videos, documents and 2FA accounts were not copied to the new location, the backup will re-upload all the photos, videos, documents and 2FA accounts again from the mobile device.
To change the mobile backup destination to another drive or folder on the Ahsay Go machine, follow the instructions below:
Example: change the backup destination from:
C:\Users\Administrator\Documents\Ahsay Go\%registered_mobile_device%\%backupsetID%to:
D:\MobileBackup- From the old location, secure a copy of the previously backed up photos, videos, documents, and 2FA accounts.
- Copy the previously backed up photos, videos, documents, and 2FA accounts from the original location to the new mobile backup destination (if applicable).
-
Go to Settings > Mobile Backup. Click the Edit icon on the right side of the registered mobile device.
In this example, the old mobile backup destination is:
C:\Users\Administrator\Documents\Ahsay Go\%registered_mobile_device%\%backupsetID% -
"Change path for Backup Destination" screen will be displayed. Select a new mobile backup destination then click OK.
In this example, the new mobile backup destination will be:
D:\MobileBackup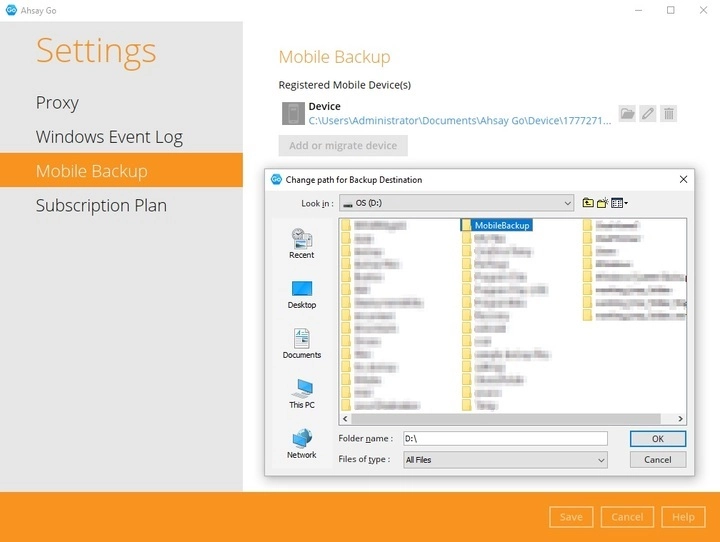
Click OK to continue.

-
Click Save to store the changes made.
Mobile backup destination is successfully changed to:
D:\MobileBackupAll mobile backups will now be saved to this destination.
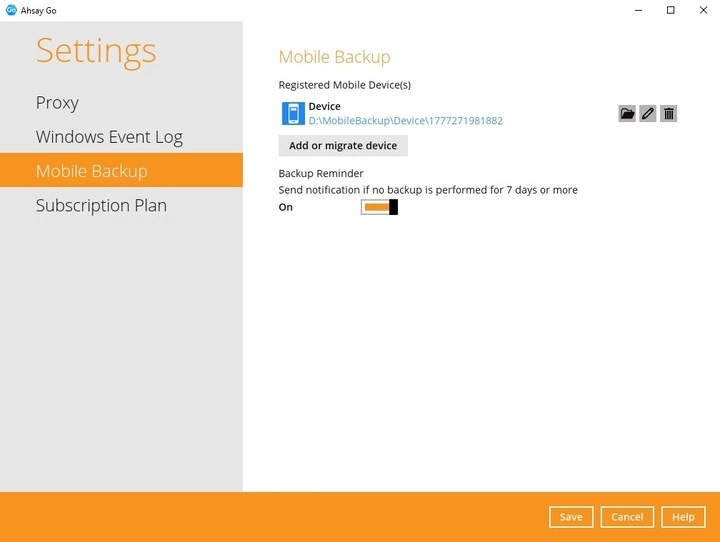
The %registered_mobile_device% and %backupsetID% will be appended automatically to the new mobile backup destination.
Change Mobile Backup Destination Location to New Machine
If the machine needs upgrading, the previously backed up photos, videos, documents, and 2FA accounts are still available.
It is strongly recommended to copy the previously backed up photos, videos, documents and 2FA accounts to the new machine to prevent missing data. Otherwise, the backed up photos, videos, documents and 2FA accounts on the mobile device will be backed up again from scratch.
- If the machine is lost or stolen, changing the mobile destination is not supported as it is required to re-register your mobile device on AhsayOBM and perform backed up photos, videos, documents, and 2FA accounts again.
- Changing the mobile backup destination to a new machine with a different operating system is supported, e.g., from a Windows machine to macOS machine or macOS machine to Windows machine etc.
To change the mobile backup destination to a new machine, follow the instructions below:
Example: Change the mobile backup destination from an old Windows machine to a new Windows machine.
-
On the new machine, install Ahsay Go.

-
Copy the .obm folder from the old Windows machine to the new Windows machine. The .obm folder is found under:
C:\Users\&username&
Copy the .obm folder to the same path in the new Windows machine.
-
Copy the previously backed up photos, videos, documents and 2FA accounts from the old machine to the new mobile backup destination
During machine upgrade, make sure to uninstall the Ahsay Go from the old machine to avoid any interruptions while backing up on the new machine.
-
Restart the Ahsay Go Services because copying the .obm folder on a newly installed Ahsay Go will not trigger the MBS.
#cd /Applications/AhsayGo.app/bin #sh StopScheduler.sh #sh Scheduler.sh -
Login to Ahsay Go.
-
Go to Settings > Mobile Backup. Click the Edit icon on the right side of the registered mobile device.
-
A new screen will be displayed, select the new mobile backup destination then click OK.
In this example, the new mobile backup destination will be:
C:\Users\Administrator\Documents\MobileBackup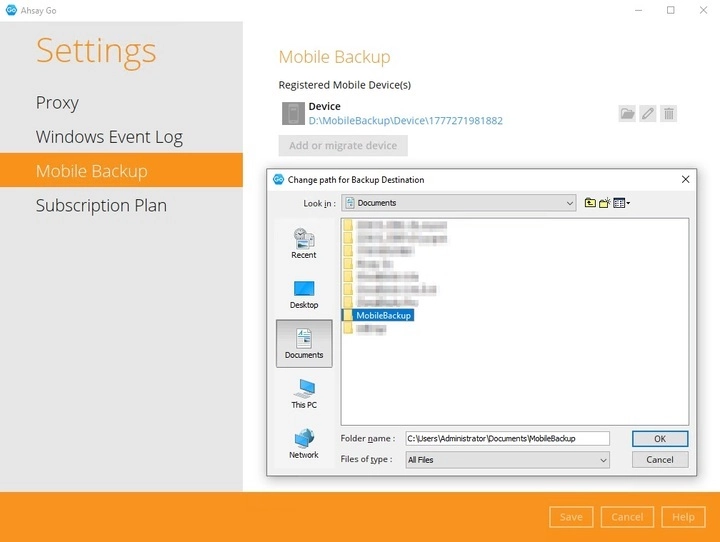
Click OK to continue.
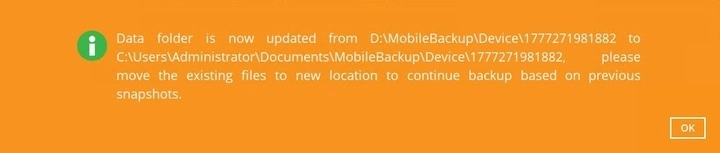
-
Click Save to store the changes made.
Mobile backup destination is successfully changed to:
C:\Users\Administrator\Documents\MobileBackupAll mobile backups will now be saved to this destination.
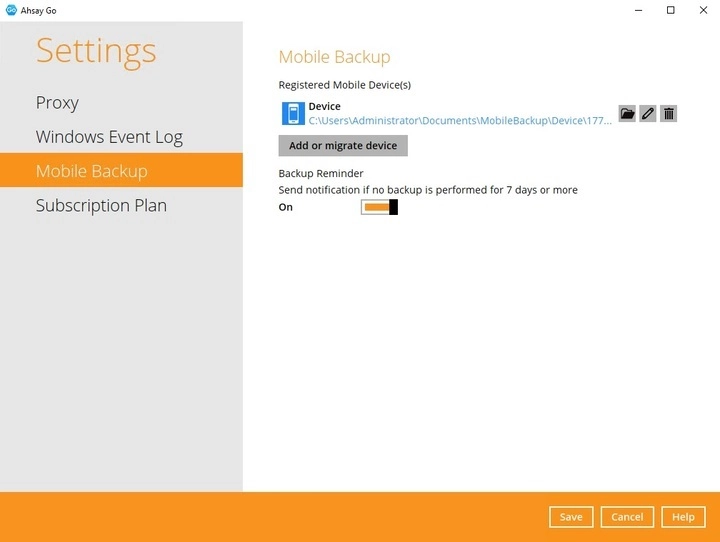
The %registered_mobile_device% and %backupsetID% will be appended automatically to the new mobile backup destination.
Remove One or More Device(s) Registered for Mobile Backup
-
Click the Delete icon on the right side of the registered mobile device.
-
A confirmation message will appear, click Yes to proceed. Otherwise, click No.
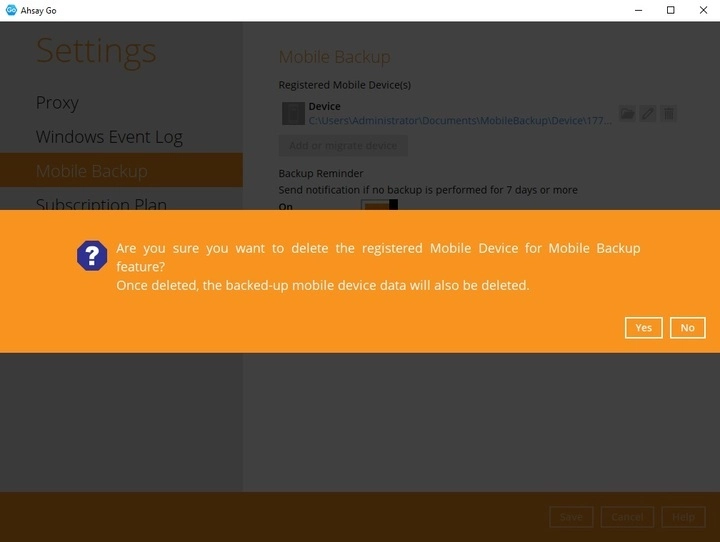
- Mobile device is successfully removed along with any photos, videos, documents, and 2FA accounts backed up in the mobile backup destination.
Configure Backup Reminder
This feature allow users to control whether they will receive a push notification if they have not performed a backup of their mobile device for 7 days onwards.
By default the Backup Reminder is enabled. To stop receiving a notification, simply disable it by switching it off.

Here is a sample notification that will be received if backup has not been done for the past 9 days.
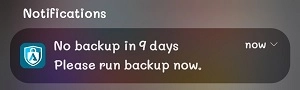
Subscription Plan
The Subscription Plan section will display the details of the plan availed by the user. It would show the storage and modules available for the user.
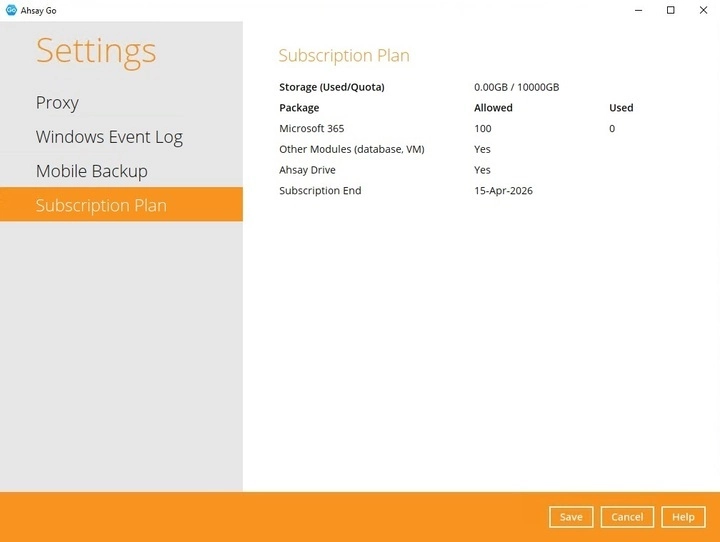
For a trial account, this will be the screen displayed.