

 AhsayCBS
Ahsay Go - Proxmox Restore
There are three (3) major types of restore options, namely:
- Traditional Restore
- Run Direct Restore
- Granular Restore
| Traditional Restore |
|---|
| This is the conventional restore method where VM data is restored from the backup destination to the original VM host, another datastore of the original Proxmox host or another Proxmox host. |
| Pros |
| Complete VM restore can be done in one take; no data migration needed afterwards. |
| Cons |
|
| Run Direct Restore |
|---|
| This restore method can power up a VM instantly by running it directly from the backup files in the backup destination. |
| Pros |
|
| Cons |
| Changes made to the running VM during Run Direct power up process will be lost when the VM is powered down if not committed to the VM by completing a successful migration. |
| Granular Restore |
|---|
|
Ahsay Go makes use of granular restore technology to enable a file level restore from a virtual disk file (VHD) of guest VM backup possible. It is particularly useful if you only need to restore individual file(s) from a guest VM, which would normally take a long time to restore and then power up before you can gain access to the files on the virtual disks. Granular restore gives you a fast and convenient way to recover individual files on a guest VM. |
| Pros |
|
To restore a virtual machine, follow the steps below for:
Traditional and Run Direct Restore
-
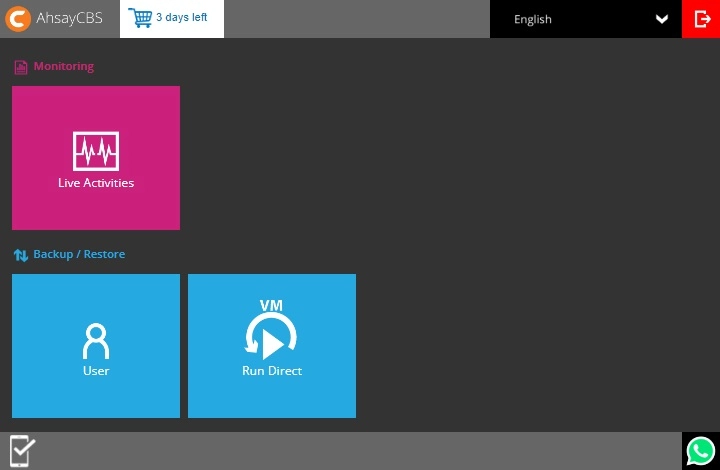
Click User on the Ahsay Go web console.
-
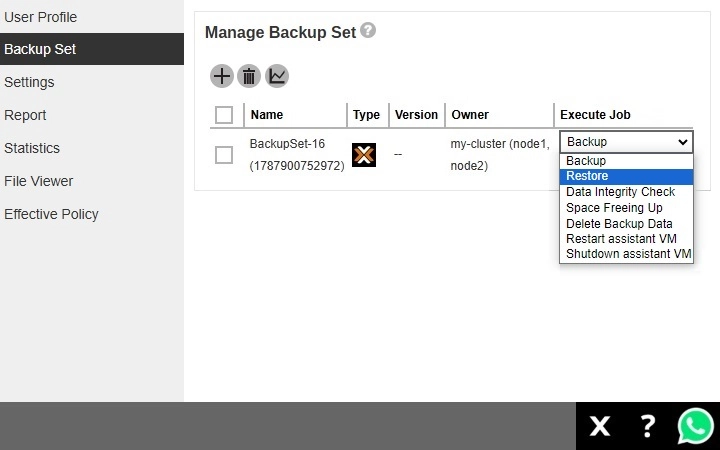
Click Backup Set from the left panel, then select Restore under “Execute Job” drop down menu and click Run.
-
Select the backup job where the VM will be restored from. Then select the location where the VM will be restored to from the drop-down list.
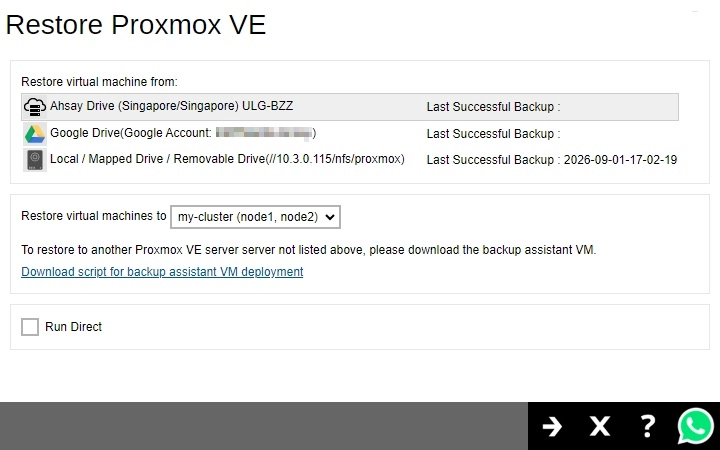
When restoring to an Alternate location, the alternate Proxmox server will only appear in the drop-down menu if a backup assistant VM has been deployed to that server.

Run Direct
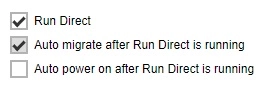
By enabling this option, the VM will be up instantly by running it directly from the backup files and it will automatically be migrated to a permanent location on the Proxmox VE server.
Once the Run Direct checkbox is ticked a bandwidth control option will be displayed before the restore job is started. There will be different bandwidth limit options to choose from.
Auto migrate after Run Direct is running
This option is enabled by default and cannot be changed, the VM will be automatically migrated to a permanent location. This will only be displayed once the “Run Direct” option is ticked.
Auto power on after Run Direct is running
By enabling this option, the VM will automatically be powered on. This will only be displayed once the “Run Direct” option is ticked.
-
Select the date and time of the backup job to be restored from the drop-down list. Select the Proxmox VM to be restored.
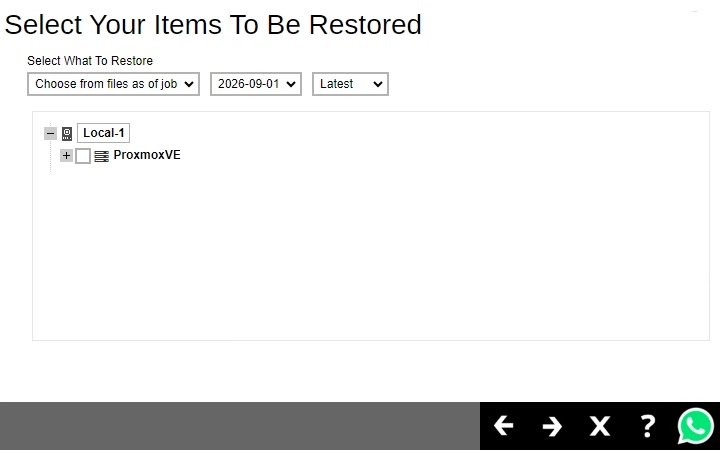
Click Next to proceed.
-
In the following page, there are several options that can be configured before starting the restoration process.
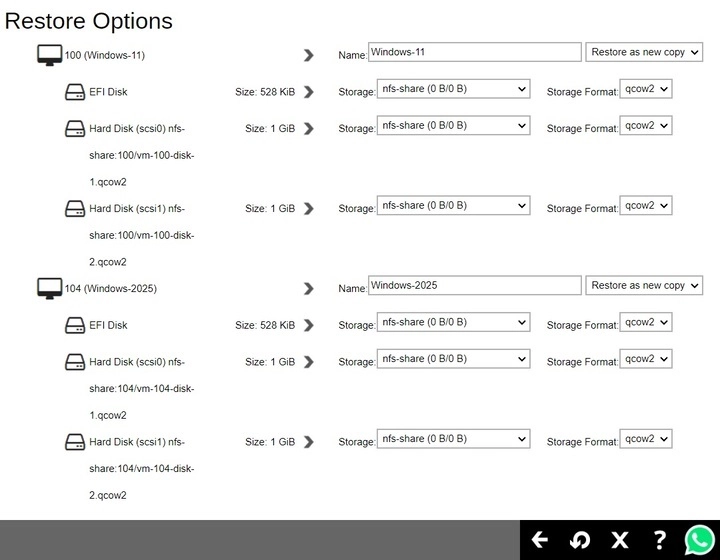
Name

Enter a new name for the VM.
Restore Options
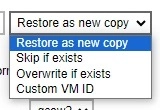
To the right of the name field, there is a drop-down list of restore options to choose from. These options are:
-
Restore as new copy
This option will restore your Proxmox VM as a new copy of the original to either the original or alternate location.
-
Skip if exists
This option will skip any of the selected VMs from the previous page if it already exists in your target location.
-
Overwrite if exists
This option will overwrite the data of the chosen VMs from the previous page.
-
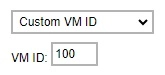
Custom VM ID
This option is similar to Restore as new copy, with the difference being that a custom VM ID can be assiged to this new copy.
Selecting this option will cause a text field to appear below the drop-down list where the custom VM ID may be typed.
Storage
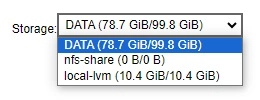
This drop-down lists the available storage that can be used to restore the VM.
Storage Format
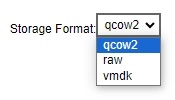
The content of the “Storage Format” drop-down list is dependent on the selected option from “Storage”. The default value would depend on the default loaded storage and original disk format.
Node
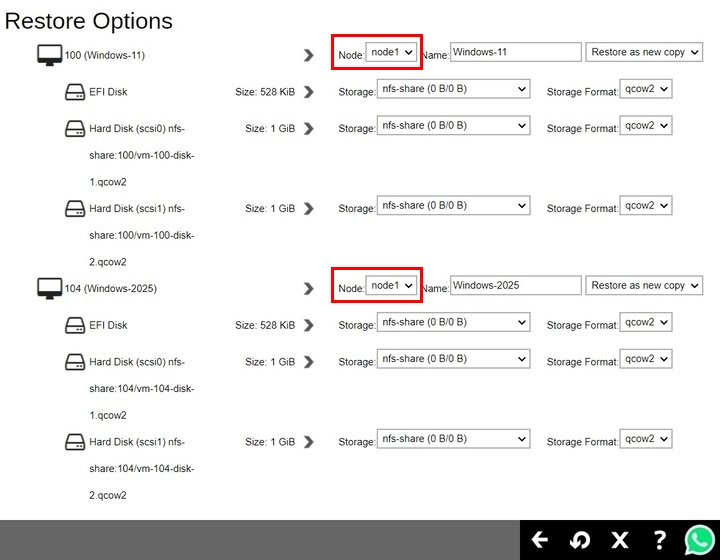
The “Node” field will only be available when restoring VMs that belongs to a cluster. Select from the drop-down list the node where the VM will be restored. The content of the “Node” will be dependent on the available nodes on the Proxmox server. The selected node will also affect the available storage that can be selected.
Once all the settings have been configured, click Restore to start the restore process.
If the Run Direct option is ticked in step 3, the “Bandwidth Control” option will be displayed before the restore job is started.
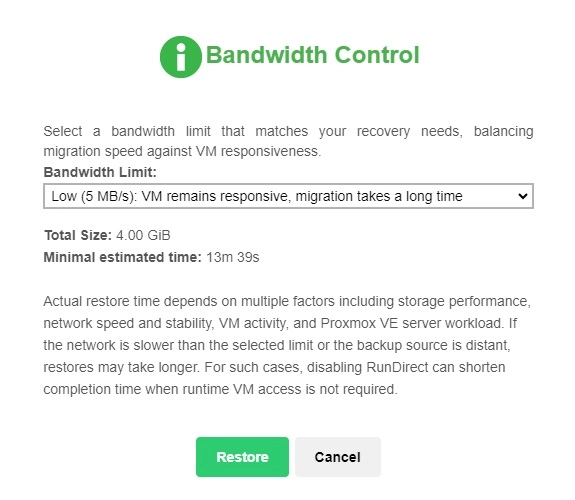
There are five options which are the following:
- Minimal (1 MB/s): VM is very responsive, migration is extremely slow
- Low (5 MB/s): VM remains responsive, migration takes a long time
- Moderate (10 MB/s): VM responsiveness slightly affected, migration completes at a moderate pace
- High (20 MB/s): VM is less responsive, migration finishes faster
- Unlimited: VM responsiveness most affected, migration completes in the shortest time
-
-
The status of the restore job will be displayed.
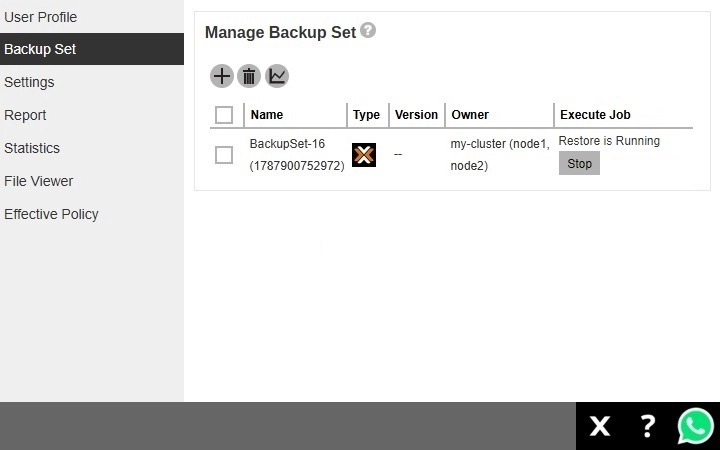
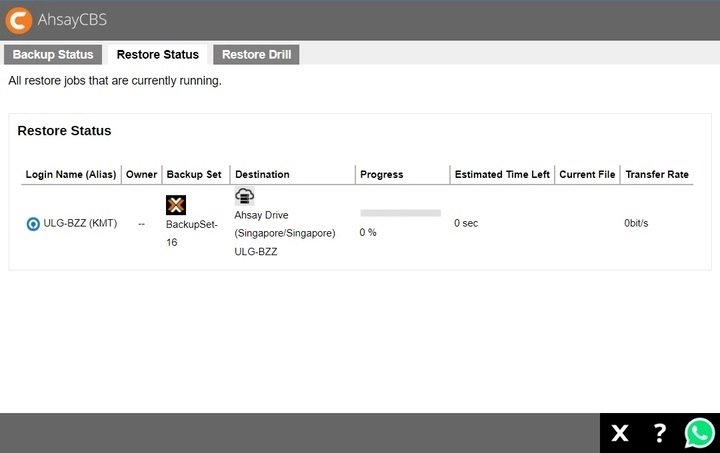
Another way of checking the progress of the restore is from Live Activities.

Granular Restore
-
Click the Restore icon on the main interface of Ahsay Go.
-
Select the backup set and destination.
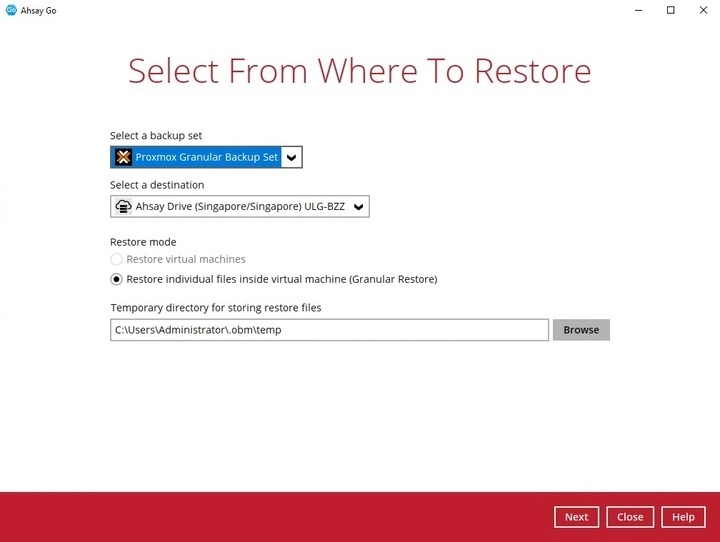
For “Restore mode”, as a limitation of Ahsay Go, only Restore individual files inside virtual machine (Granular Restore) will be available. This cannot be changed. For more information, please refer to the Limitations page.
The path under “Temporary directory for storing restore files” can be changed by clicking the Browse button. Select the directory that will be used to store the temporary files.

Click Next to proceed.
-
Enter the encryption key then click OK to continue.
 To get the encryption key, please refer to View the Encryption Key section.
 -
The following screen will only be displayed if Granular Restore is performed on the machine for the first time. Make sure to click Install to confirm installation of the driver on the machine. Clicking No will exit the restore process.

-
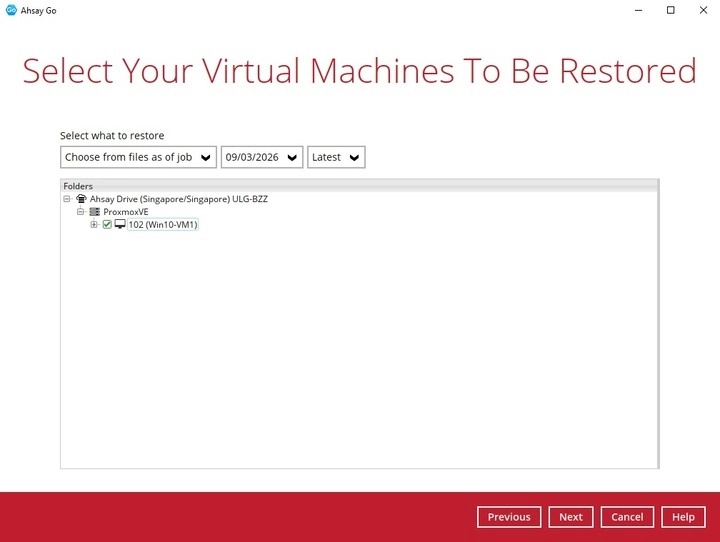
Select the virtual machine that will be restored. Click Next to proceed.
-
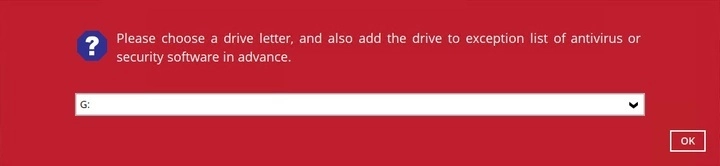
Select the drive where the mounted image will be mapped on the machine, then click OK to proceed.
-
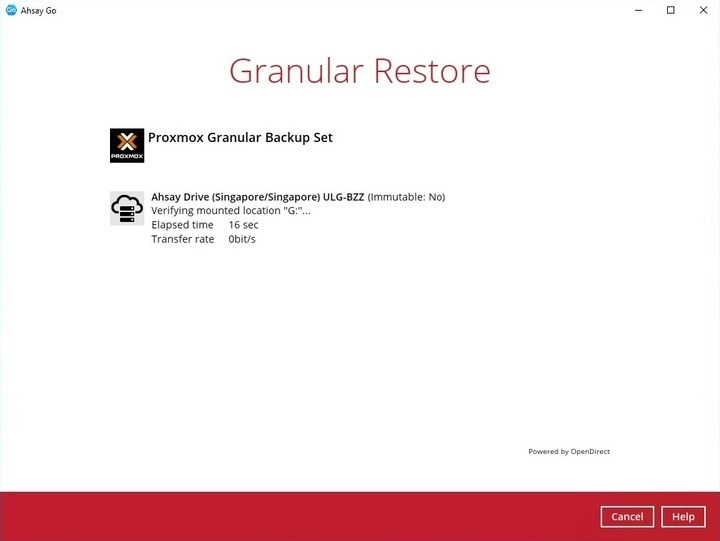
When the virtual disk(s) are in the process of being prepared for mounting, this screen will be displayed.
-
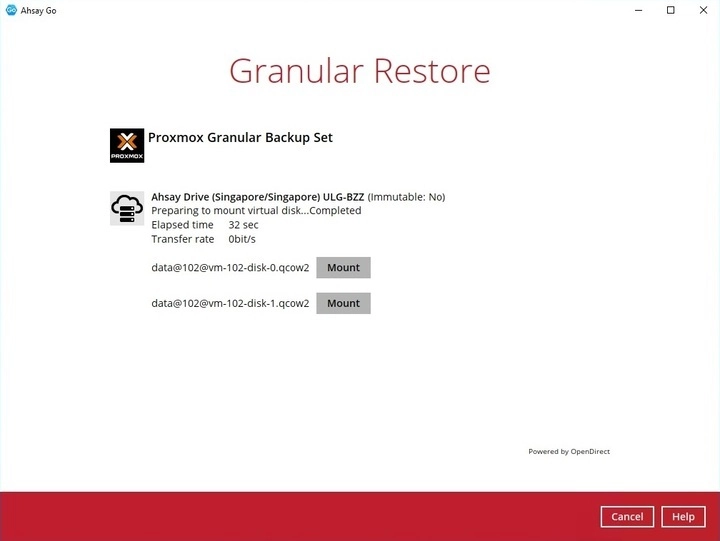
The list of disks that can be mounted will be displayed, select a disk, then click the Mount button.
-
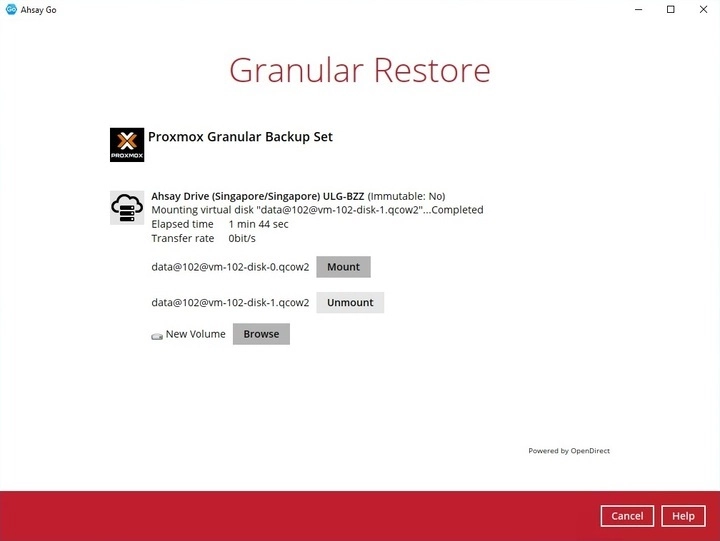
After mounting a disk, a list of available volumes will be displayed beneath each mounted disk. Click the Browse button to view the available files that can be viewed, copied or deleted.
-
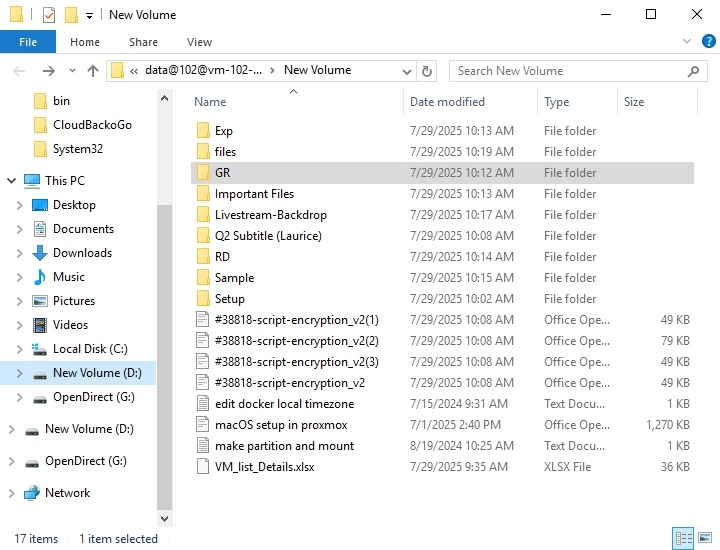
The list of files will be displayed in the File Explorer, select the files to view, copy or delete.
-
Once done go back to Ahsay Go and click Cancel, then Stop the granular restore to conclude the restore process.

Due to the limitation of the virtual file system library, the mounted virtual disks will only be unmounted from your machine when you exit Ahsay Go.
