

 AhsayCBS
Ahsay Go - Microsoft Exchange Restore
Pre-Restoration Requirements for MS Exchange Server
Standalone Microsoft Exchange Server
2007/2010/2013/2016/2019
Before you get started with restoring your database using Ahsay Go, there are a couple of steps you may need to perform first.
- Prepare the operating system for the Exchange Server restore (if required). Install the original version of Windows and Exchange Server (with the same level of service pack installed as in the original system).
- Restore Windows Active Directory (if required). Restore the System State data from the backup server, and then restore the System State using WBAdmin.exe.
- Install Ahsay Go (if required). Refer to the Download & Install section for more information.
-
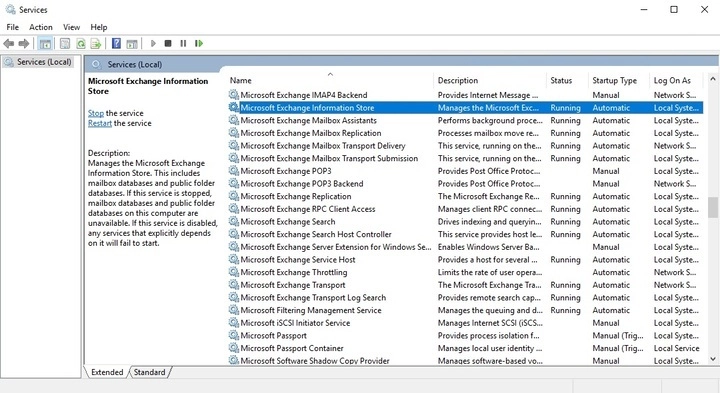
Make sure the Microsoft Exchange Information Store services from Windows Services is started.
Launch Services in Windows by clicking Start then typing "Services" in the search box. After launching the Services window, look for Microsoft Exchange Information Store and check the Status column to confirm if it is started. If it is not, right-click the item, then select Start.
Database Availability Group (DAG) Microsoft Exchange Server
2007/2010/2013/2016/2019
The database restoration is required to restore on the active database only. You can identify the Exchange server with the active database from the Exchange Management Shell.
Type the following command in Exchange Management Shell:
Get-MailboxDatabase | ft name, serverIt will show which Exchange server is hosting the active mailbox database, i.e. Mailbox Database 01 and 03 are hosted on EX1, while Mailbox Database 02 and 04 are hosted on EX2.
[PS] C:\>Get-MailboxDatabase | ft name, server
Name                       Server
---                        ---
Mailbox Database 02        EX2
Mailbox Database 01        EX1
Mailbox Database 03        EX1
Mailbox Database 04        EX2
When you can identify which Exchange server is hosting the active database, you can logon to that Exchange server to restore the database.
Follow the steps below to restore your Microsoft Exchange Server:
-
Click the Restore icon.
-
Select the backup set and destination. You can also select the temporary directory for storing temporary files by clicking Browse. Click Next to proceed.
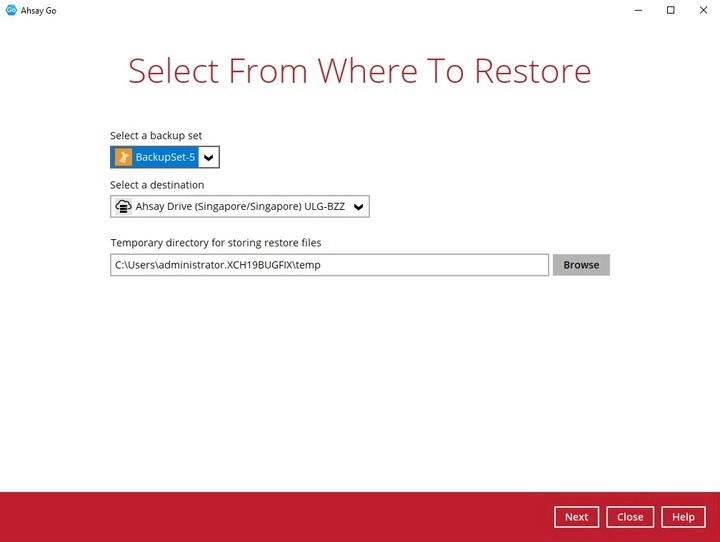
For succeeding steps, the screenshots used for this guide are based on MS Exchange Server and will include screenshots for MS Exchange Mail Level if applicable.
-
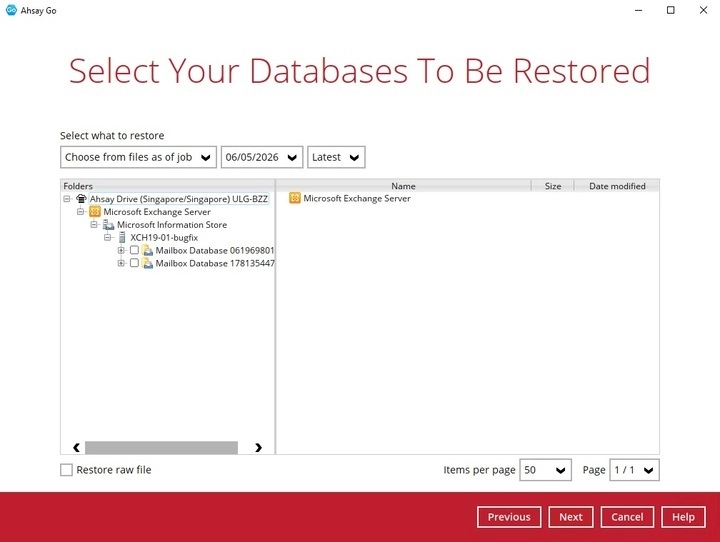
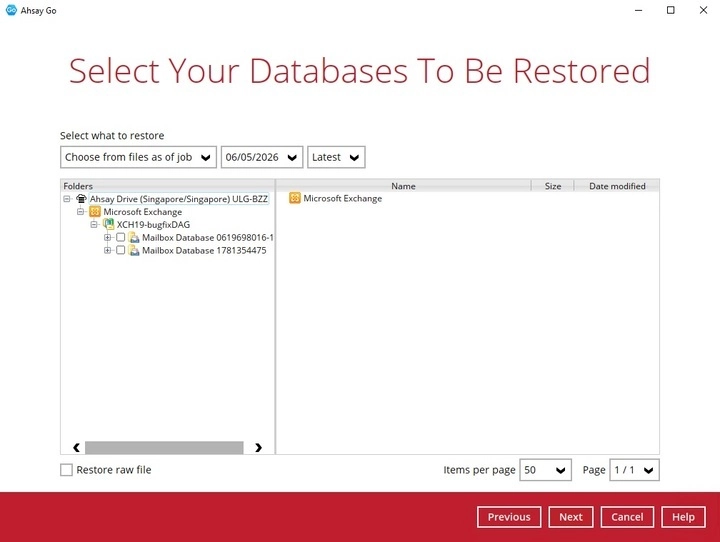
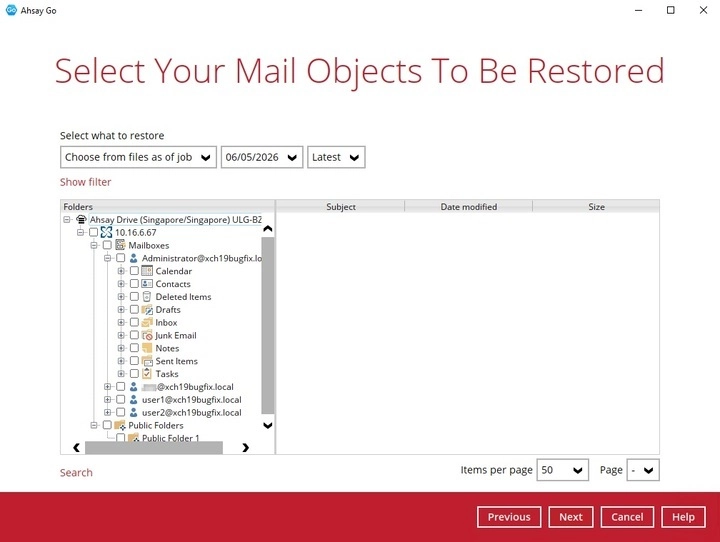
Click to expand the menu tree to select which Microsoft Information Store or Mailbox to restore.
-
MS Exchange Server
-
Standalone
-
Database Availability Group (DAG)
-
-
MS Exchange Mail Level
-
Standalone / Database Availability Group (DAG)
-
FOR MICROSOFT EXCHANGE SERVER ONLY: You can also select individual database file to restore by clicking the Restore raw file checkbox at the bottom left corner.
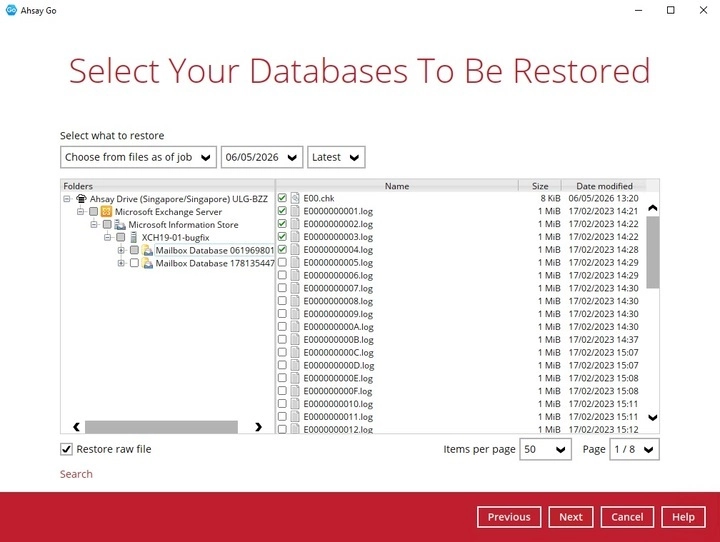
In addition, you can also choose to restore backup item(s) from a specific backup job using the drop-down menu at the top. Click Next to proceed when you are done with the selection.
-
-
Select where to restore the database / mail: Restore raw file, Original location, Alternate location, or to an Alternate host.
-
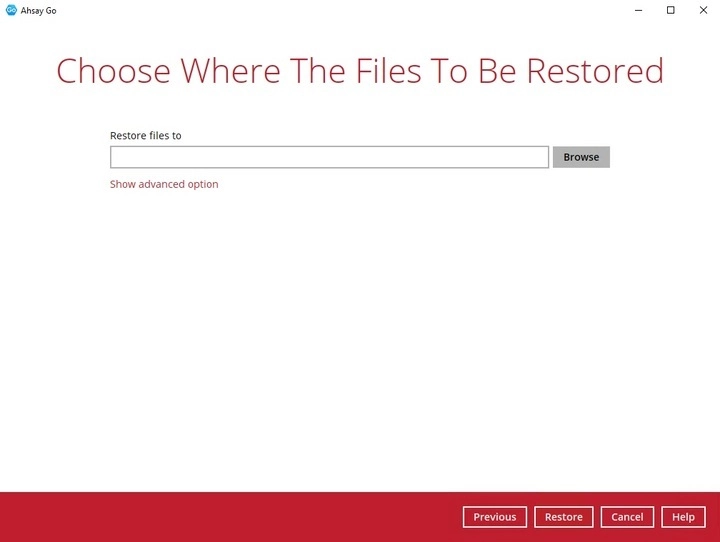
Restore raw file
If Restore raw file is ticked in the previous step, click Browse to select the path where the database will be restored.
-
Restore to Original Location
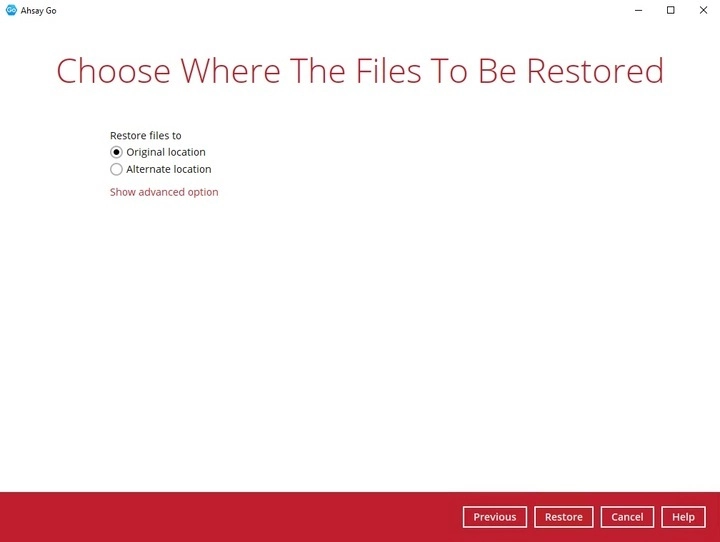
-
Restore to Alternate location
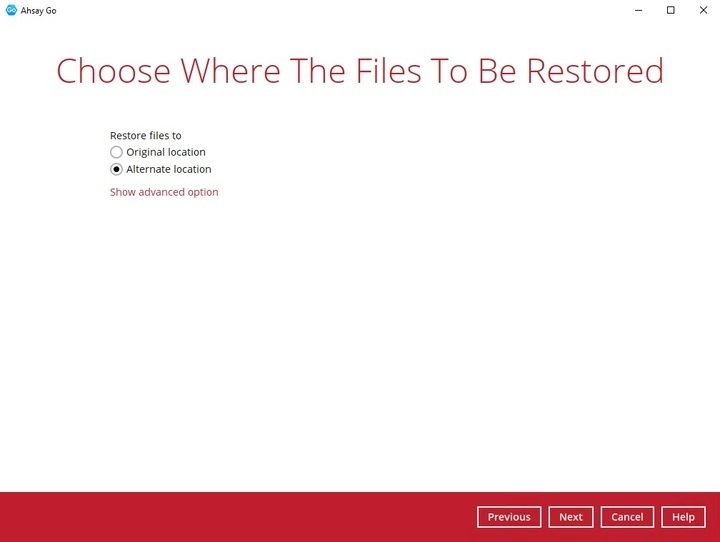
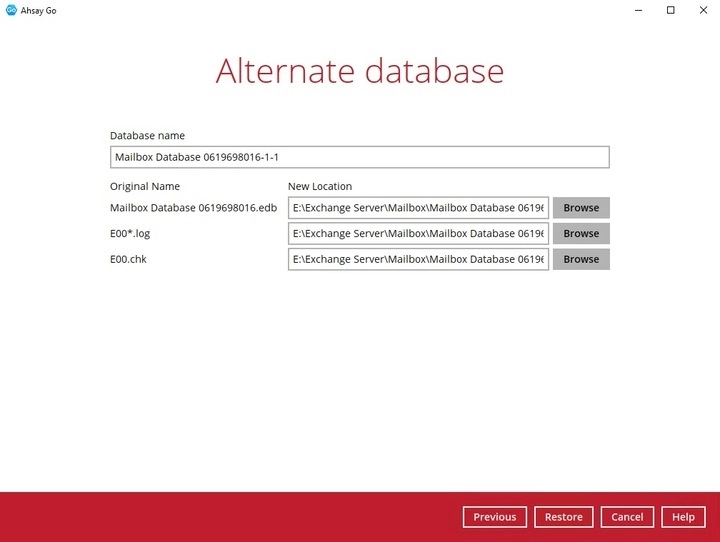
When restoring to an alternate location, only one database can be restored at a time, if several databases are selected, this message will be displayed upon clicking the Next button.

Select the locations where you would like to restore the database to. Name the new mailbox store, then click Browse to modify the database, log and checksum file location if necessary.
-
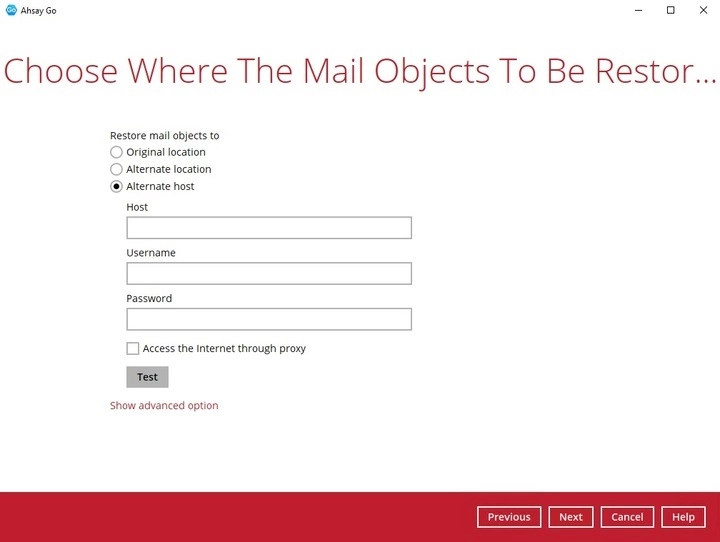
Restore to Alternate host (for Microsoft Exchange Mail Level only)
-
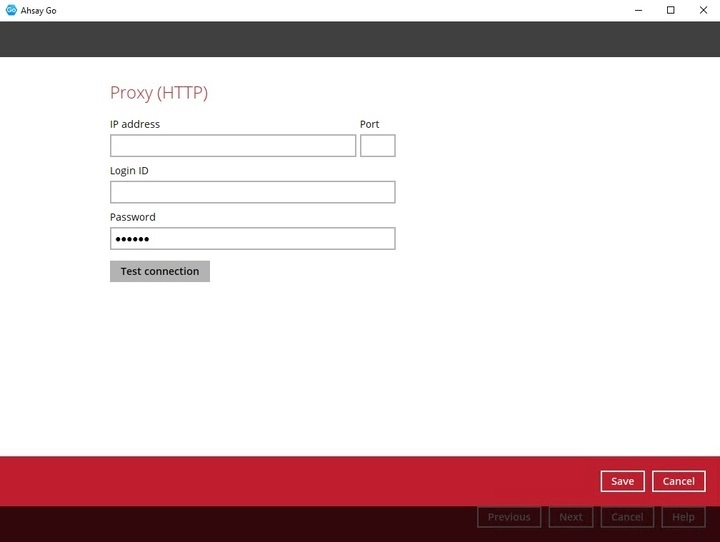
Enter the hostname, username and password of the alternate Exchange server. If you will “Access the internet through proxy”, check the box beside it and set the configuration for the proxy server and click Save.
If you will “Access the internet through proxy”, check the box beside it and set the configuration for the proxy server and click Save. Click Next to proceed.
-
The following message will be displayed when restoring multiple mailbox, Click Yes to proceed, otherwise click No.

-
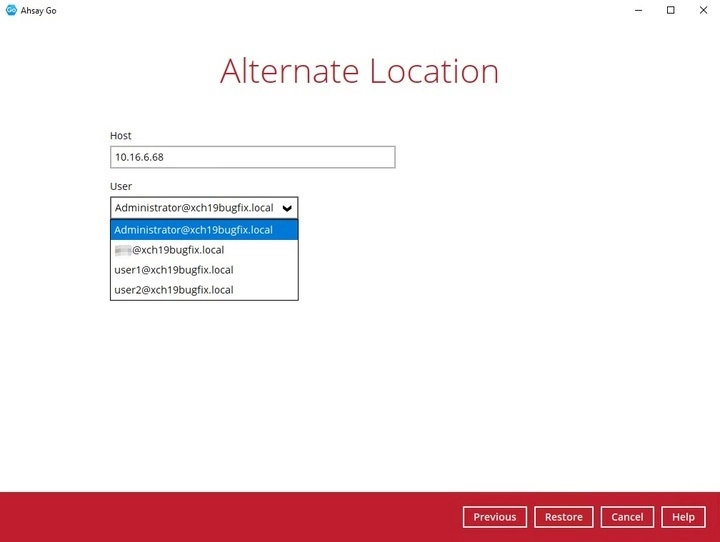
Select the desired mailbox destination.
-
To configure other restore settings, click Show advanced option, then tick Verify checksum of in-file delta files during restore.

Click Restore to start the restoration.
-
-
The following screen with the text “Restore Completed Successfully” shows when the restoration is completed.
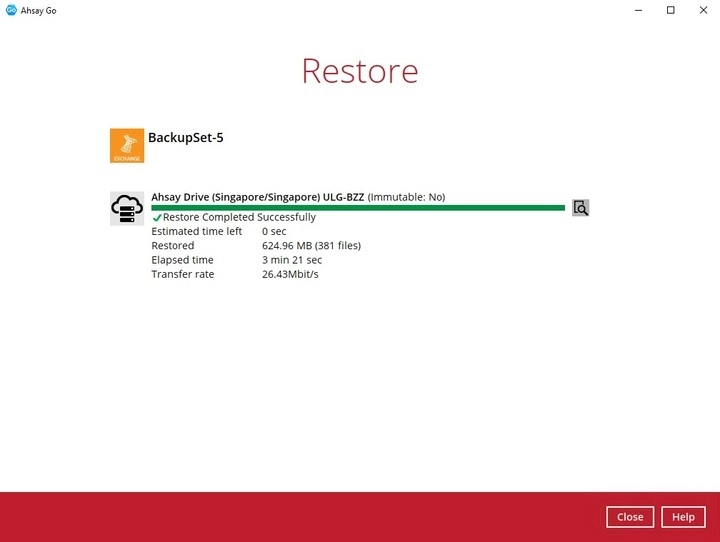
You may click the icon to the right of the progress bar to check the restore log. Once you are done checking the restore log, click the Close button to return to the previous screen.
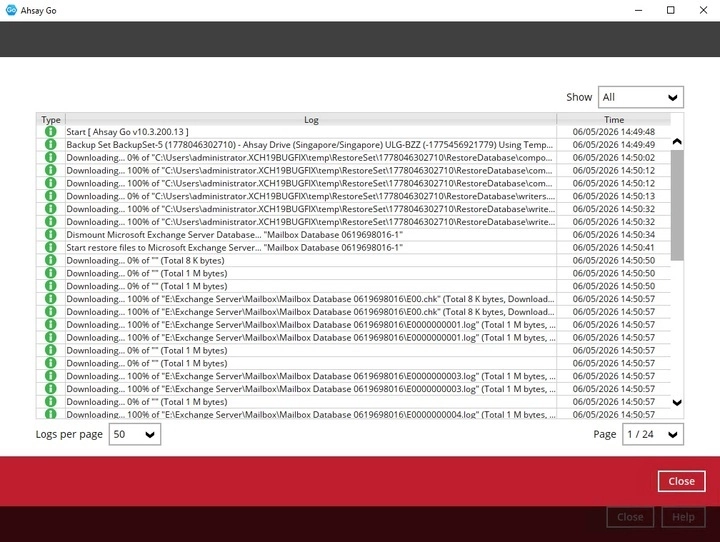
For details regarding verifying the restoration activities log between Ahsay Go and the Exchange Server, refer to Microsoft Exchange Restore Activities Log.