AhsayCBS
Ahsay Go - Create File Backup Set
Aside from selecting files/folders to backup from your local drive, the network drive support allows users to access different network drives not limited to Windows-based backup source.
The following are supported
- Network drives with different login credentials instead of limited to Windows User Authentication login or network drives without login credentials.
- Network drives without the need for them to be set up first on Windows.
- Network drives as Backup Source (including filter), Backup Destination, and Restore Location (Original or Alternate).
To create a File backup set, follow the steps below:
-
Click the Backup Sets icon.
-
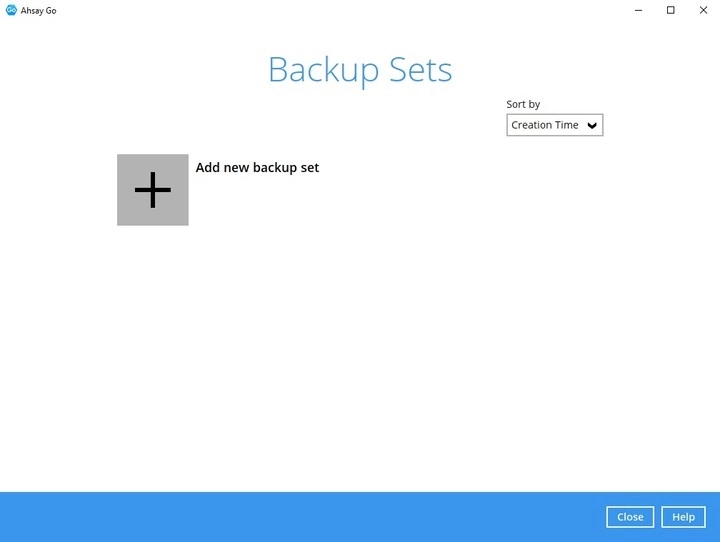
Create a new backup set by clicking the + icon next to "Add new backup set".
-
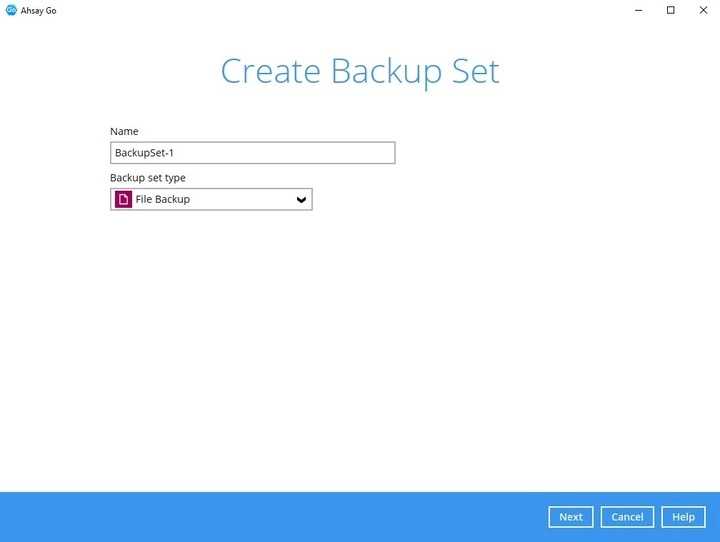
When the “Create Backup Set” window appears, name your new backup set, and select the “Backup set type” which is File Backup. Then click Next to proceed.
-
In the “Backup Source” window, select the files and folders for backup. Once done, click Next to proceed.
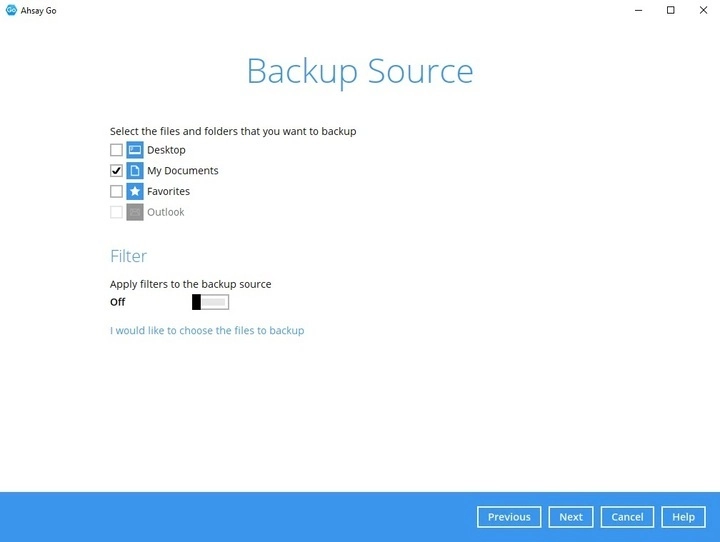
There are three ways to select files and/or folders to backup:
Quick or Shortcut
This allows the user to backup files and/or folders in the selected backup source entirely.
Filter
This allows the user to select or exclude files and/or folders from the backup job.
Advanced Backup Source
This allows the user to select files and/or folders individually to backup.
For more details on using the different ways to select files and/or folders for backup, please refer to Backup Source Selection.
-
When the “Schedule” window appears, you can configure a backup schedule to automatically run a backup job at your specified time interval. The “Run scheduled backup for this backup set” is Off by default.
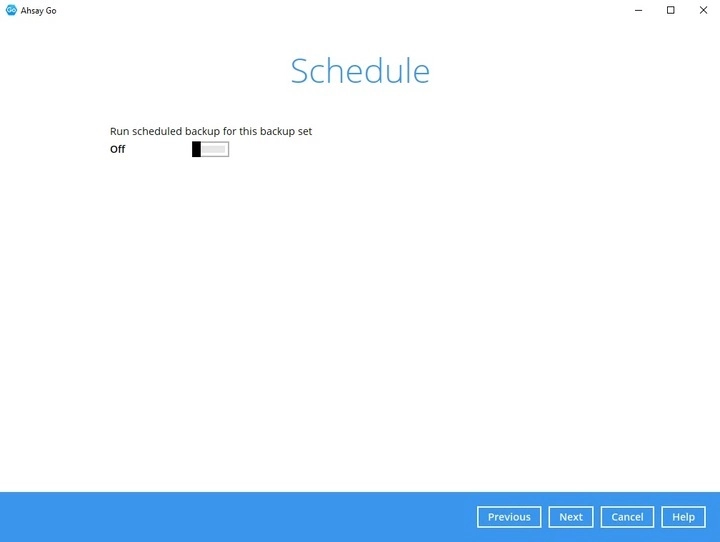
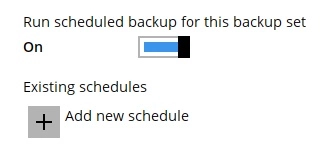
To configure a backup schedule, slide the switch to the right to turn it on. Click the + icon next to “Add new schedule”.
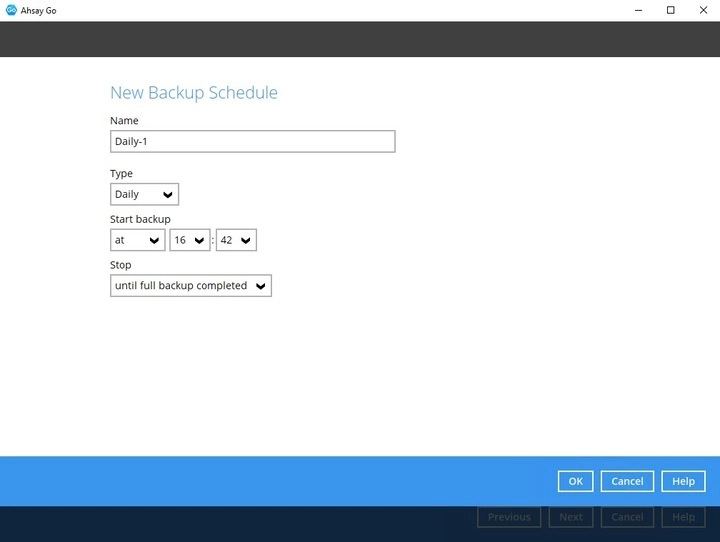
When the “New Backup Schedule” window appears, configure your backup schedule. Then, click OK to save your changes and close the “New Backup Schedule” window.
Click Next to proceed once done.
For backup sets with multiple backup schedules configured at the same time, this will be the order of priority to determine which schedule will be run.
- Backup Type: Full < Differential
- Stop: after X hours < after Y hours until full backup completed (where X<Y)
- Run Retention Policy after backup: enabled < disabled
- Schedule Type: Daily < Weekly < Monthly < Custom
- Creation order
Examples:
- If there are 2 backup schedules with Full backup type and with Stop after 2 hours and 4 hours respectively. The backup schedule with Stop after 2 hours will be run.
- If there are 2 backup schedules with any Run Retention Policy enabled, it will have priority and execute the Schedule in this instance and ignore Schedule Type prioritization.
- For backup sets with backup schedules Daily and Weekly, the Daily backup schedule will be run.
-
In the “Destination” window, select the appropriate option from the “Backup mode” dropdown menu. The Ahsay Drive selected during account creation will already be available as a storage destination.
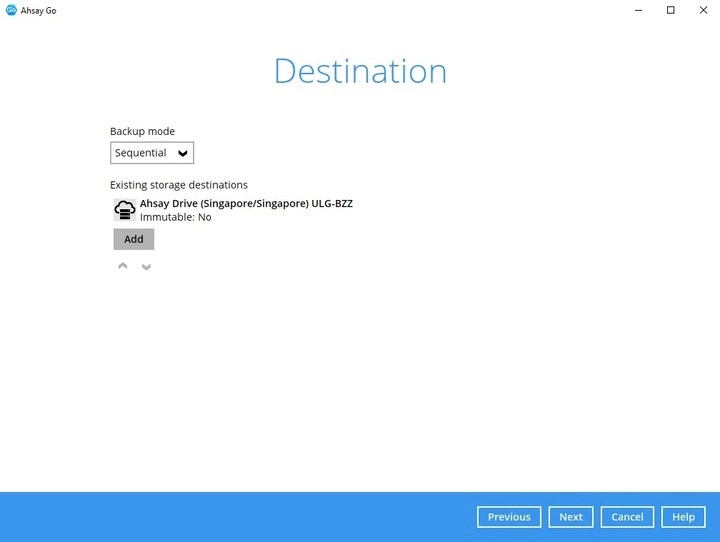
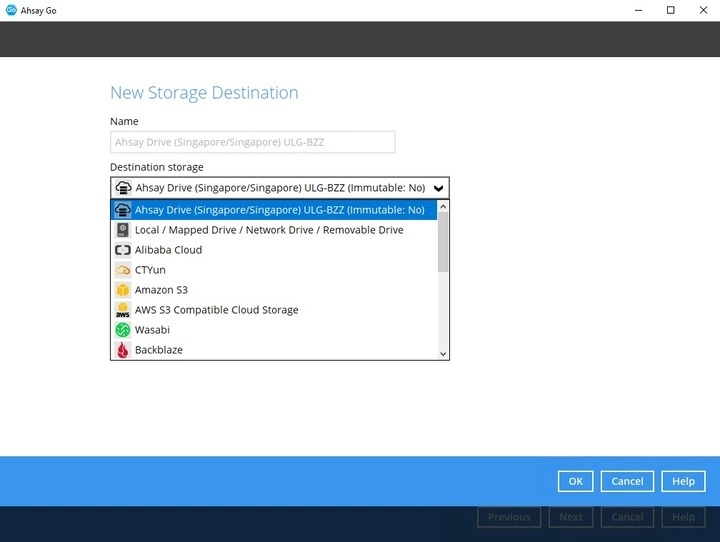
To add another backup destination, click Add then select the storage destination. Click OK then Next to proceed once done.
-
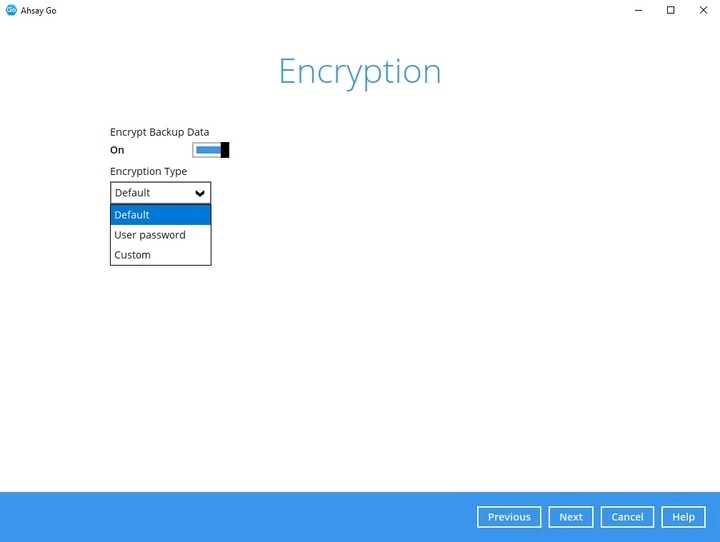
In the “Encryption” window, the default “Encrypt Backup Data” option is enabled with an encryption key preset by the system which provides the most secure protection. Select the “Encryption Type” to be used then click Next.
-
If the Encryption Key feature was enabled in the previous step, the following pop-up window will be displayed regardless of the selected encryption type.
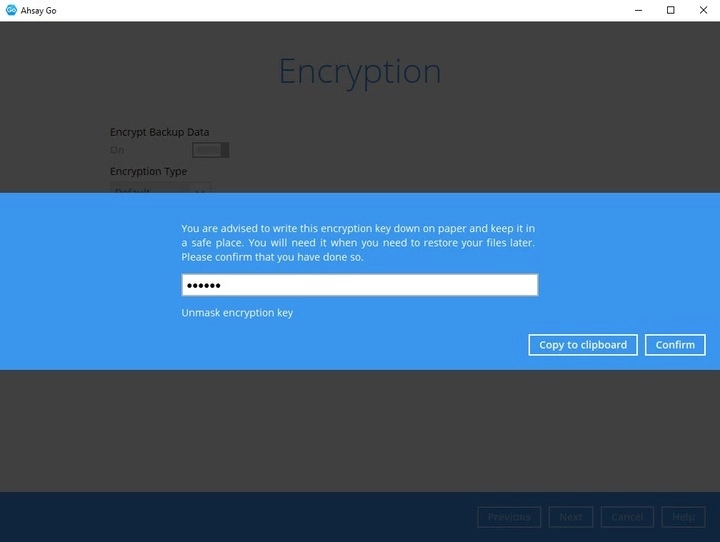
The pop-up window has the following three options to choose from:
Unmask encryption key
The encryption key is masked by default. Click this option to show the encryption key.

Copy to clipboard
Click to copy the encryption key, then you can paste it into another location of your choice.
Confirm
Click to exit this pop-up window and proceed to the next step.
-
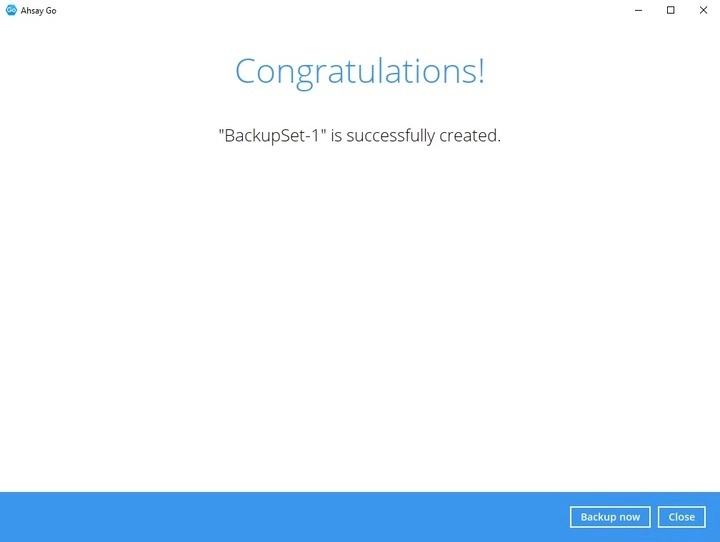
Upon successful creation of the backup set, the following screen will appear. You can click Backup now to back up your data or click Close to exit or to edit additional Backup Set settings before running your first backup.
-
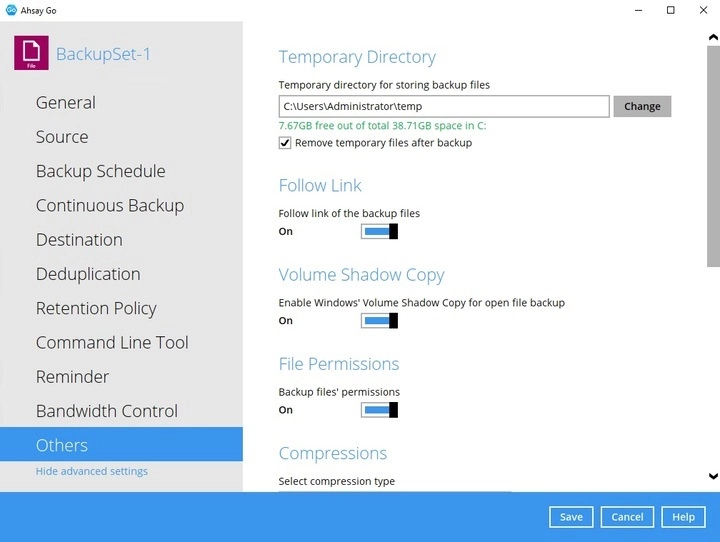
Based on Best Practices and Recommendations, it is highly recommended to change the “Temporary Directory”. Select another location with sufficient free disk space other than:
- drive C:\ for Windows
- /root/temp for Linux
- /Users/admin/.obm/temp for Mac
Open the Backup Set, then go to Others > Temporary Directory. Click Change to browse for another location.
-
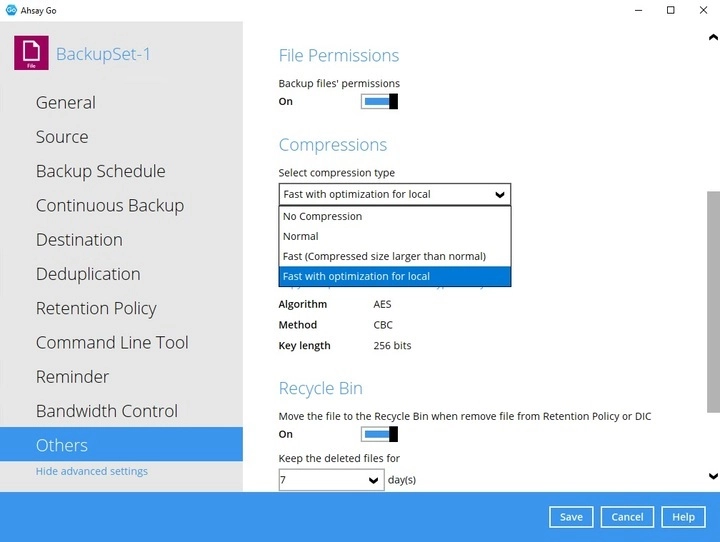
Optional: Select your preferred Compression type. For newly created backup sets, Fast with optimization for local is selected by default.
Go to Others > Compressions, then select the compression type.