AhsayCBS
Ahsay Go - Microsoft SQL Restore
-
In the Ahsay Go main interface, click the Restore icon.
-
Select the backup set and destination.
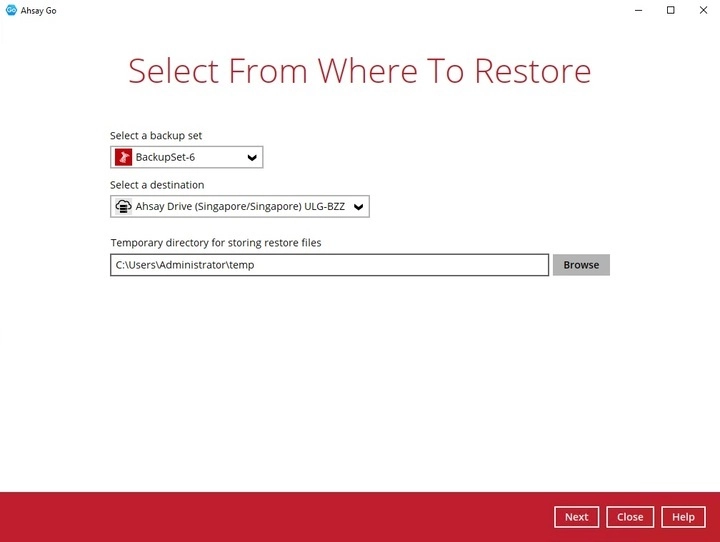
You can select the temporary directory that will be used to store temporary files by clicking Browse.

-
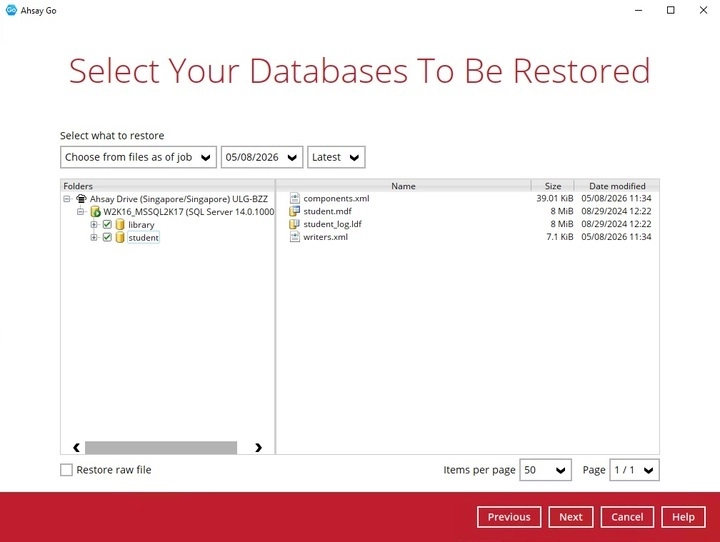
Select the database(s) or raw file(s) you would like to restore. You can also choose to restore backed up database or raw file from a specific backup job of your choice using the “Select what to restore” drop-down menu at the top. Click Next to proceed when you are done with the selection.
For VSS Mode
For ODBC Mode
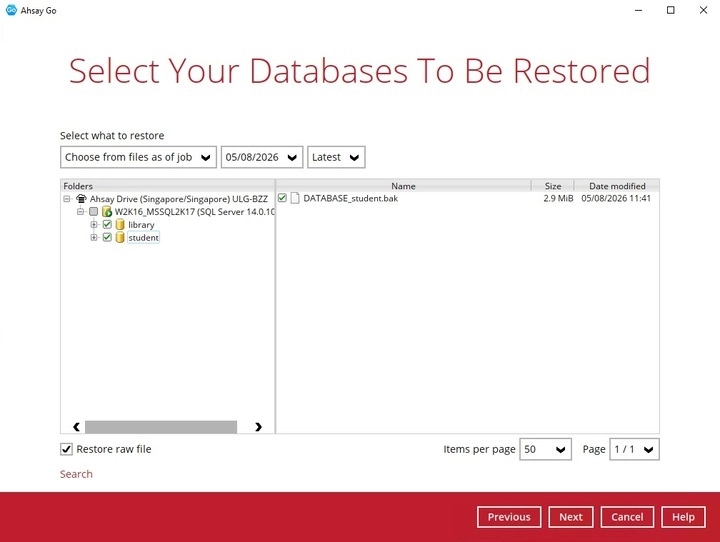
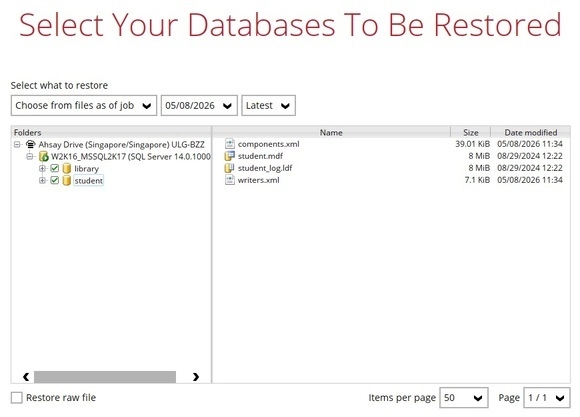
You can only restore data as raw file for ODBC backup set. Restore raw file is automatically selected, once you unselect Restore raw file the following screen will be displayed:

-
Restoring database - expand the menu tree to select which database to be restored
-
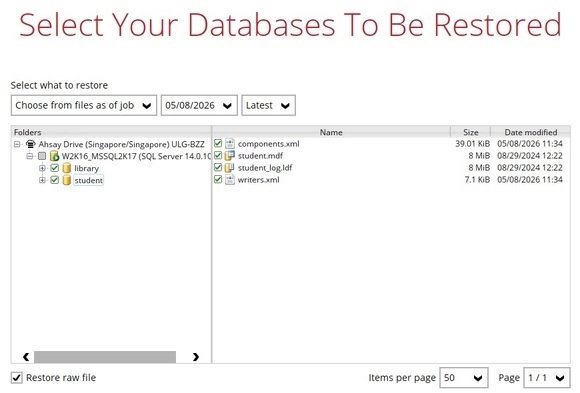
Restoring raw file - you can select individual raw database file to restore by clicking the Restore raw file checkbox at the left bottom corner.
LIMITATIONS
-
If you would like to restore database with the Alternate location option, you can only choose to restore one database at a time.

- If you would like to restore database to an alternate SQL server with the Restore raw file option, make sure you have checked the Restore raw file option.
-
-
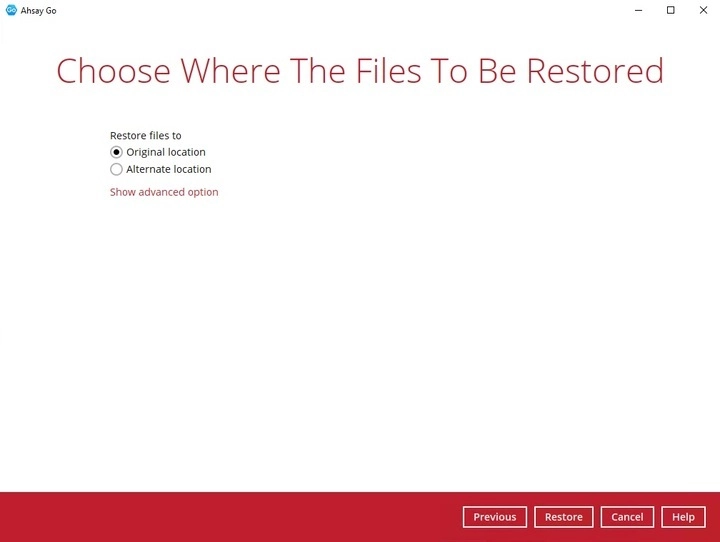
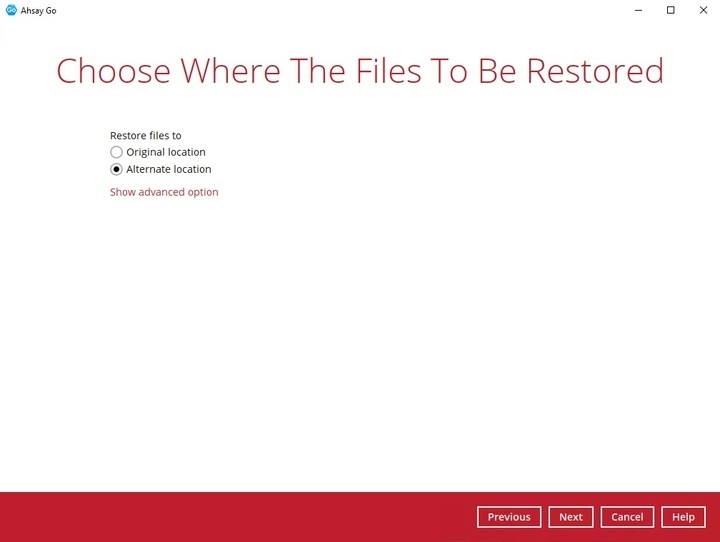
Select the destination to restore the MSSQL database automatically by selecting “Restore databases to” Original location, Alternate location, or select location path where you would like the raw file(s) to be restored for manual restore:
Restore to Original SQL Server
Select the Original location option, then click Restore to proceed.
Restore to Alternate SQL Server
-
Select the Alternate location option, then click Next.
-
Name the new database under “Database name”. Click Browse to select the locations where you would like to restore the database and log files to.
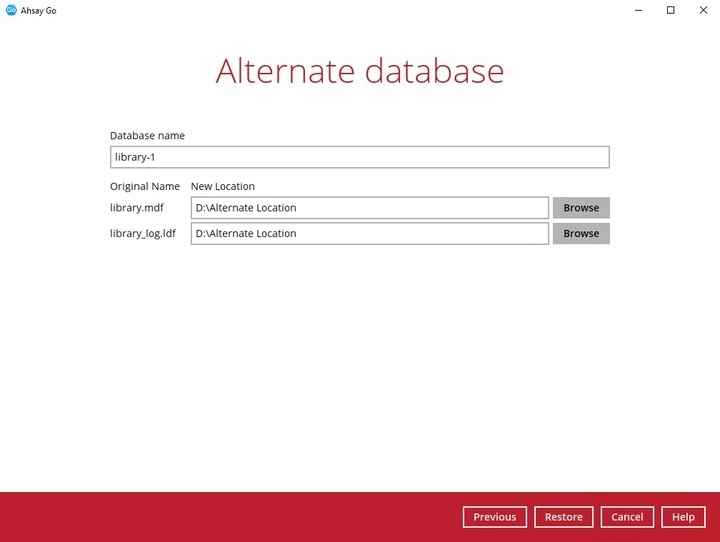
- Click Restore when you are done with the settings.
Restore Raw File
If you have chosen to restore raw file, choose the location path where you would like the raw file(s) to be restored to. Click Restore to proceed.
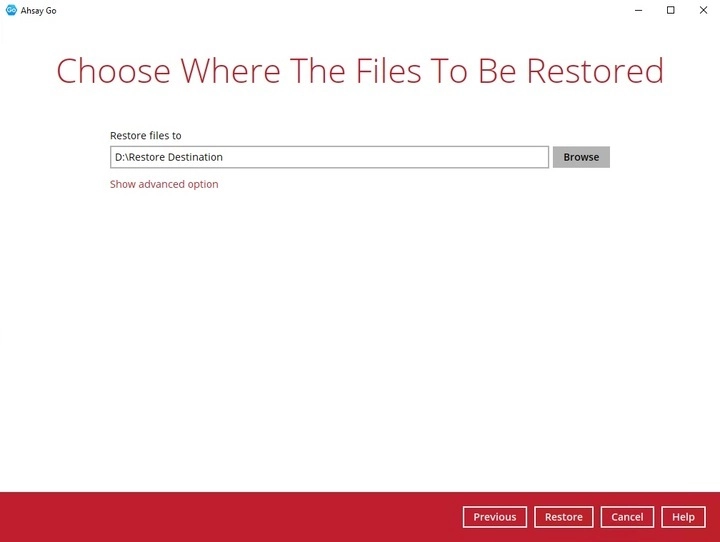
Then restore the database manually with the restored database file via the SQL Server Management Studio. Refer to the article below for instructions:
Restore a Database Backup (SQL Server Management Studio)
Click Show advanced option to configure other restore settings.

Verify checksum of in-file delta files during restore
By enabling this option, the checksum of in-file delta files will be verified during the restore process. This will check the data for errors during the restore process and will create a data summary of the in-file delta files which will be included in the report.
-
-
The following screen with the text “Restore Completed Successfully” shows when the restoration is completed.
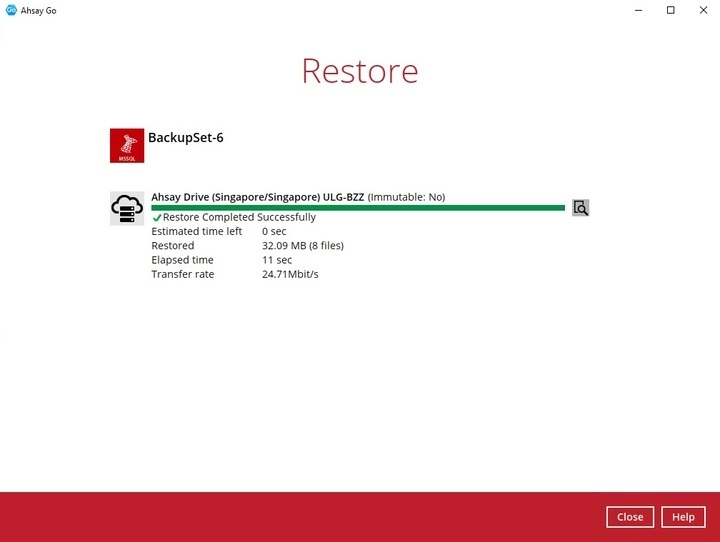
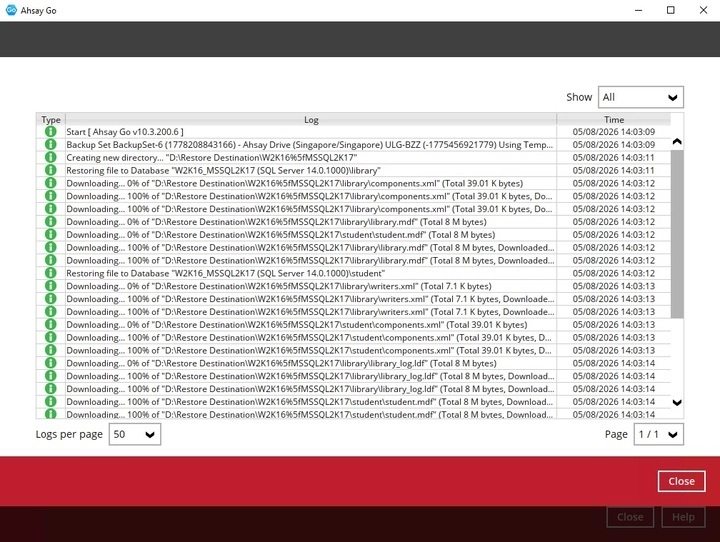
The following screen will be displayed after the restore process is complete. You may click the icon to the right of the progress bar to check the restore log. Once you are done checking the restore log, click the Close button to return to the previous screen.