
 How-To
Windows System Restore on AhsayACB
Windows System Restore
Restore the System Image
Click the Restore icon on the main interface of AhsayACB.

Select the backup set and destination.
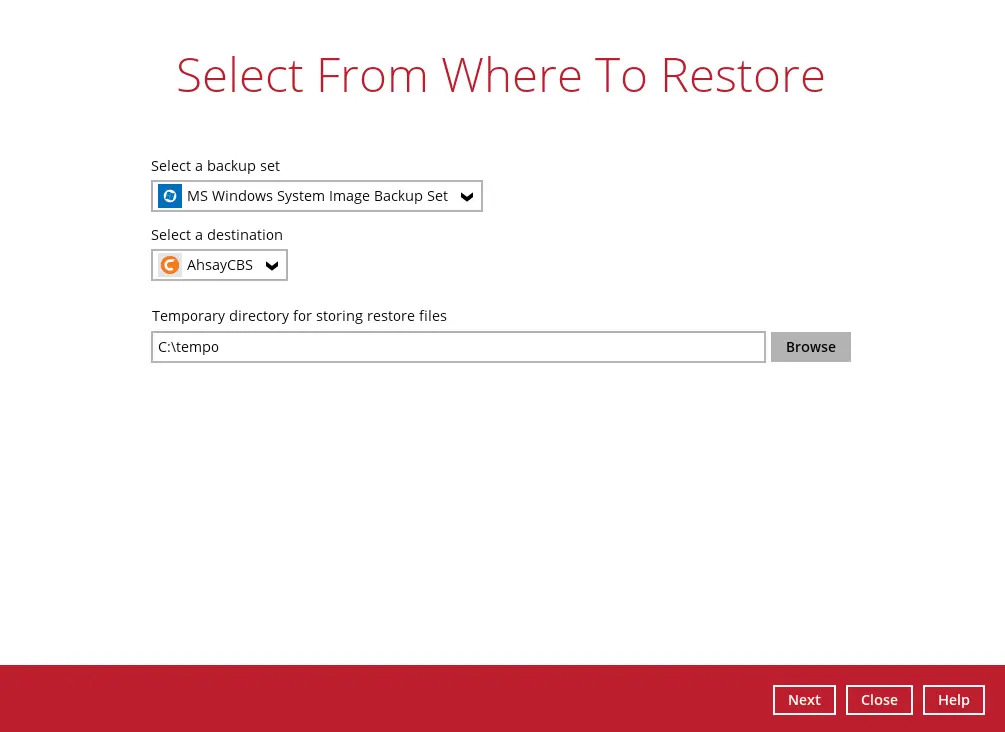
You can select the temporary directory that will be used by clicking the Browse button.

Click Next to proceed.
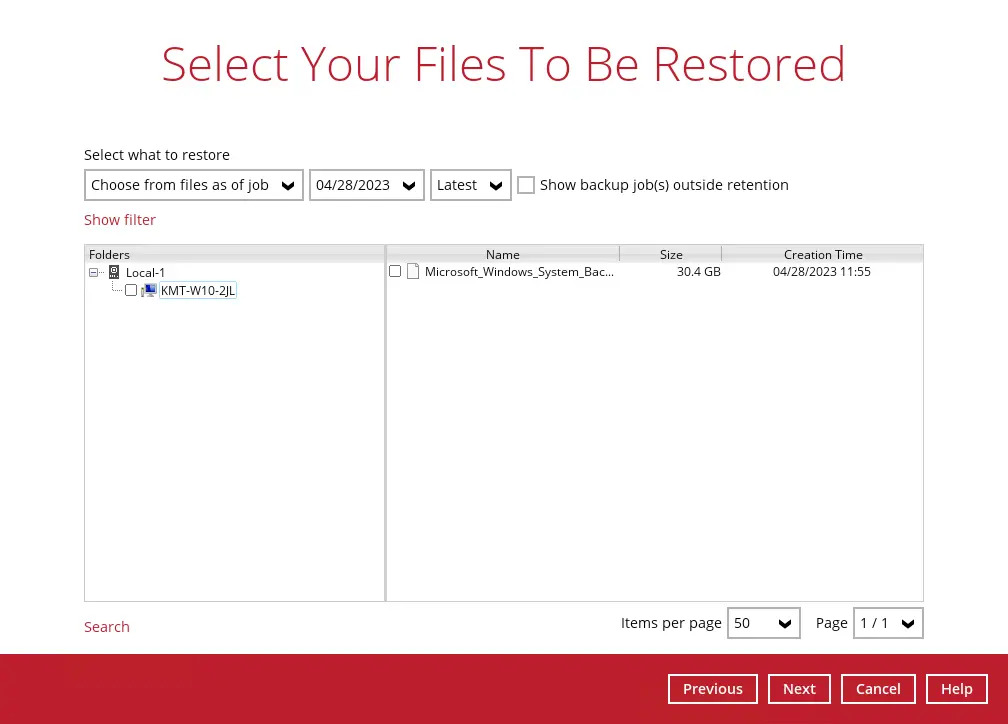
Select to restore from a specific backup job, or the latest job available from the “Select what to restore” drop-down menu.
Select the Microsoft Windows System Backup, then click Next to proceed.
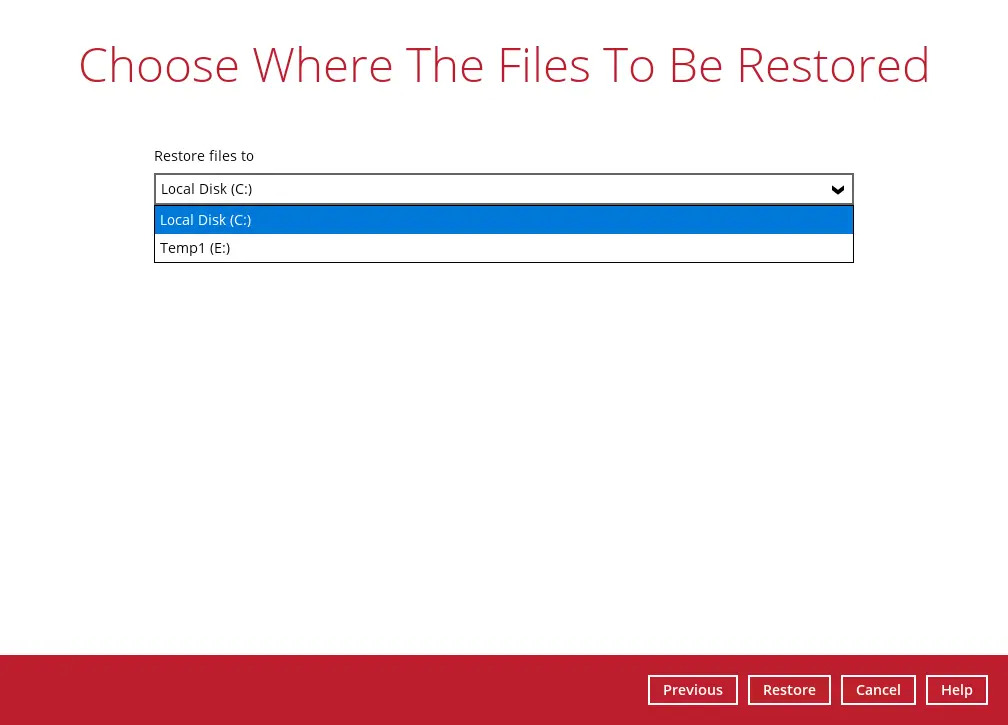
Select to restore the system image to a local volume or to a removable drive. Click Restore to start the restoration process.
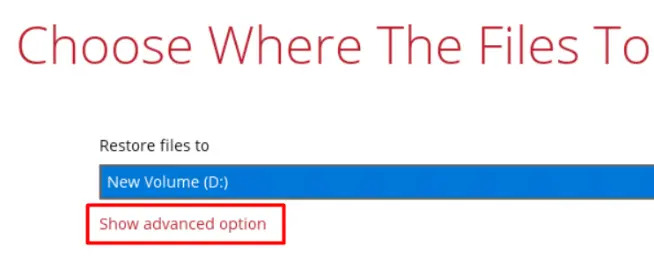
Click Show advanced option to configure other restore settings.
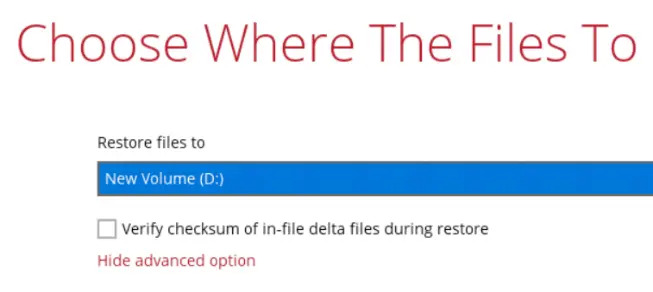
Verify Checksum of In File Delta Files During Restore
By enabling this option, the checksum of in-file delta files will be verified during the restore process. This will check the date for errors during the restore process and create a data summary of the in-file delta files which will be included in the report.
The following screen will be displayed to indicate that the restore job is successfully completed. You may click the search button to check for the restore log.
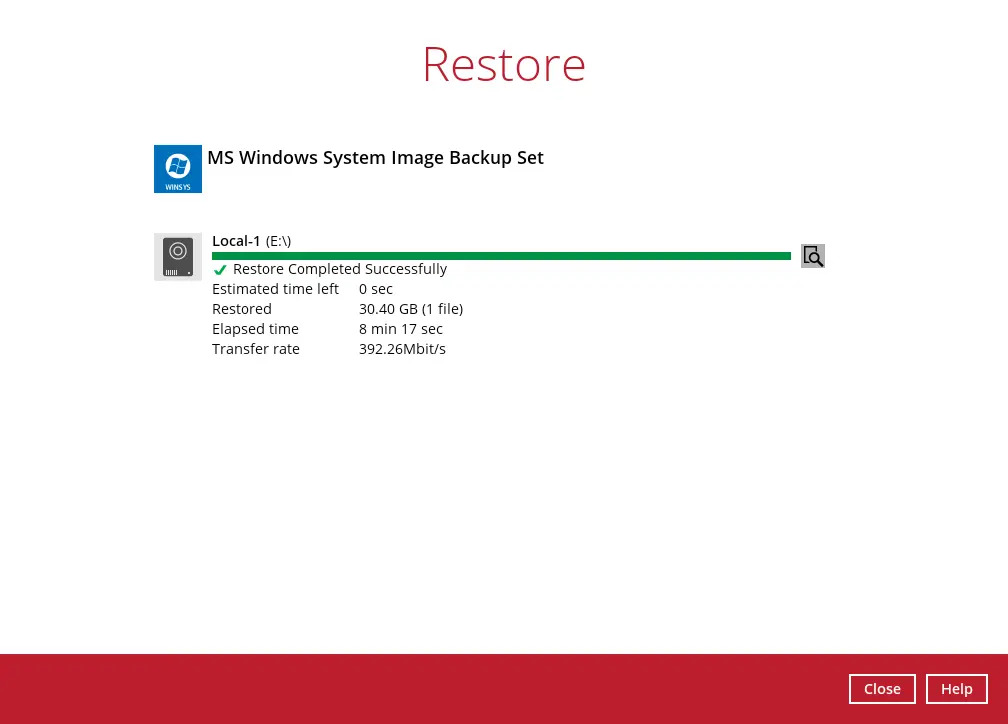
Once you are done with checking the restore log, click the Close button to return to the previous screen.
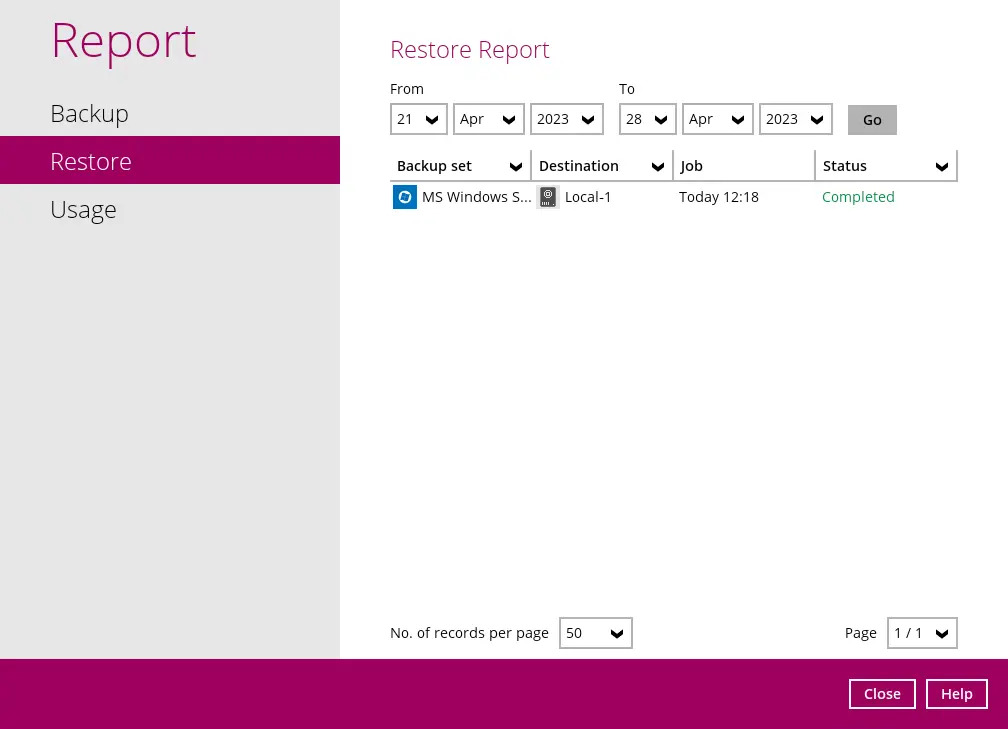
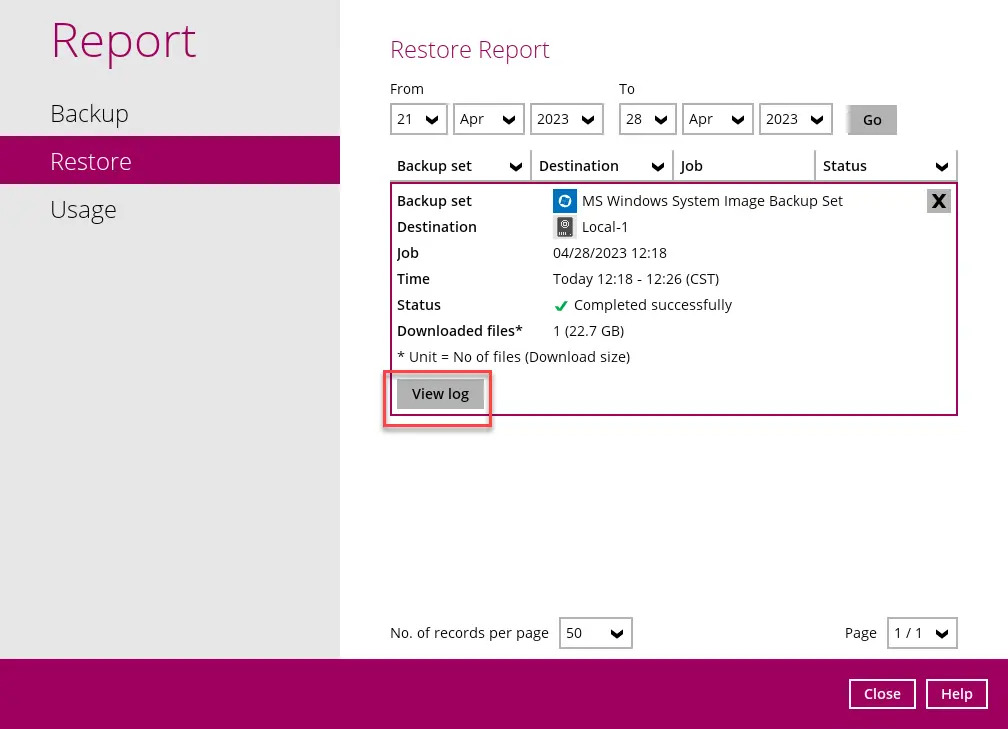
To view the restore report(s), go to AhsayACB’s main interface and then go to Report > Restore.

In the “Restore Report” screen, you will see the backup set with corresponding destination, completion date and time, and status. Click the restore report to display the summary of the restore.
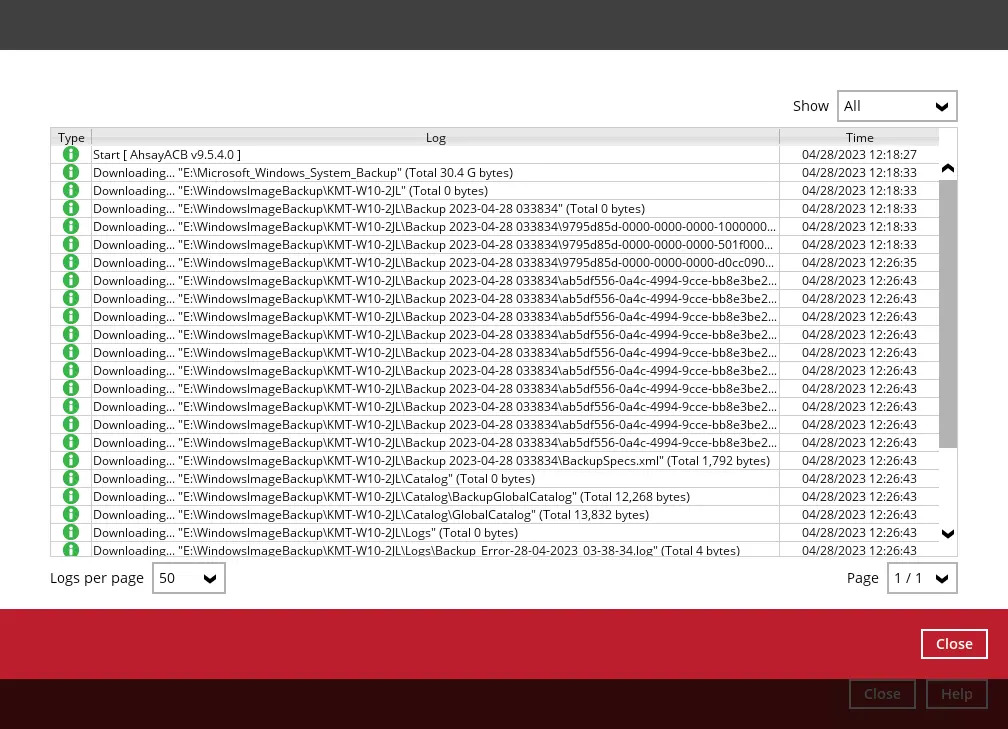
Click the View Log button; this will redirect you to the log summary of the restore report.

The restored system image files are stored in the WindowsImageBackup folder in the restore location.

In addition to the system image files, the WindowsImageBackup folder includes catalog files that contain information about all backups in there up to the current backup, and MediaId, that contains the identifier for the backup storage location.
This information is required to perform a recovery. Do not alter the directory structure or delete any file / folder within the WindowsImageBackup folder.
Copy the WindowsImageBackup folder with its content to the server that you want to perform the restore for or copy to a network drive that is accessible to the server that you want to perform the restore for.
WindowsImageBackup folder must be stored at the root level of a volume (e.g. top-most level), unless you are copying the folder to a network drive.
- Continue to the next section of the guide.
Recover a Full System
A full system (bare-metal) can be recovered with the following tools:
| Tool | What you can recover |
|---|---|
| Advanced startup option (in safe mode) | Full system recovery |
| Advanced startup option (Windows installation media) | Full system recovery |
You can also perform the above tasks using wbadmin command. For the syntax of the command, refer to the following: wbadmin.
You can recover a full system using the advanced startup option by:
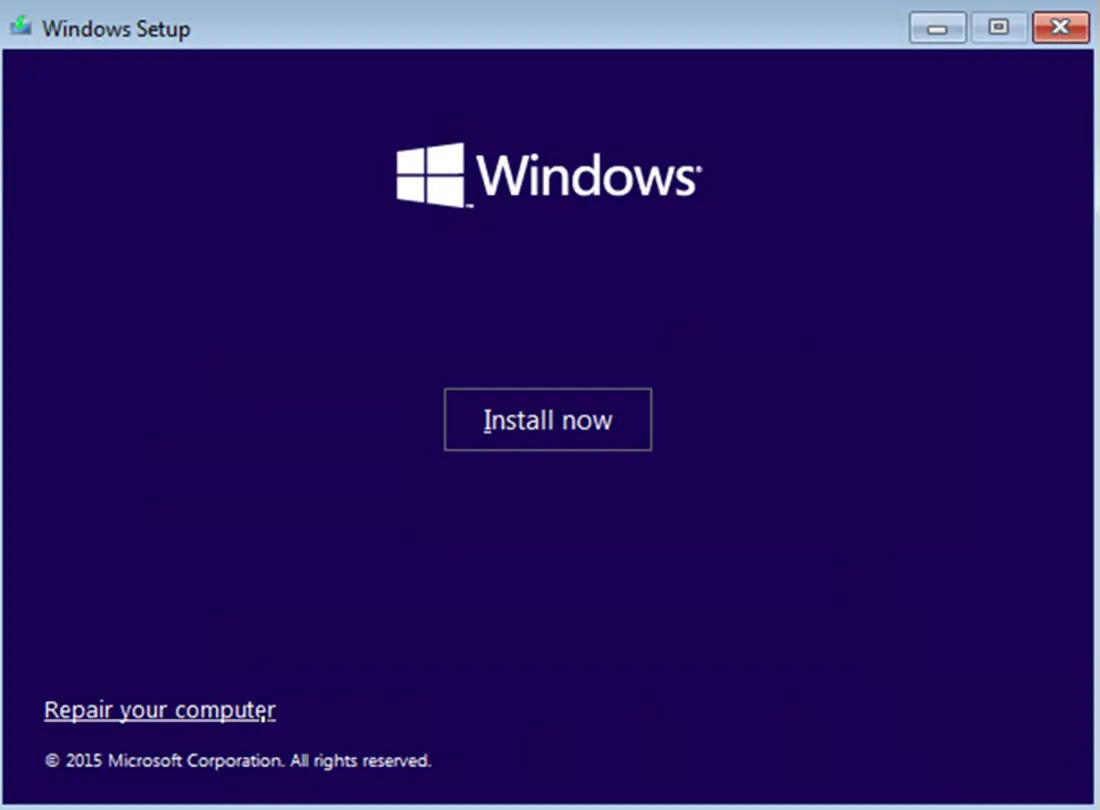
Booting from a Windows installation media
Insert the installation media that has the same architecture of the system that you are recovering and restart your computer. Press the required key to boot from the disc.
When you see the “Windows Setup” page, click Next, then click Repair your computer.
Start Windows in safe mode
Press the Power button at the Windows login screen. In the Start menu or in the Setting screen, press and hold the SHIFT key on the keyboard and click Restart.
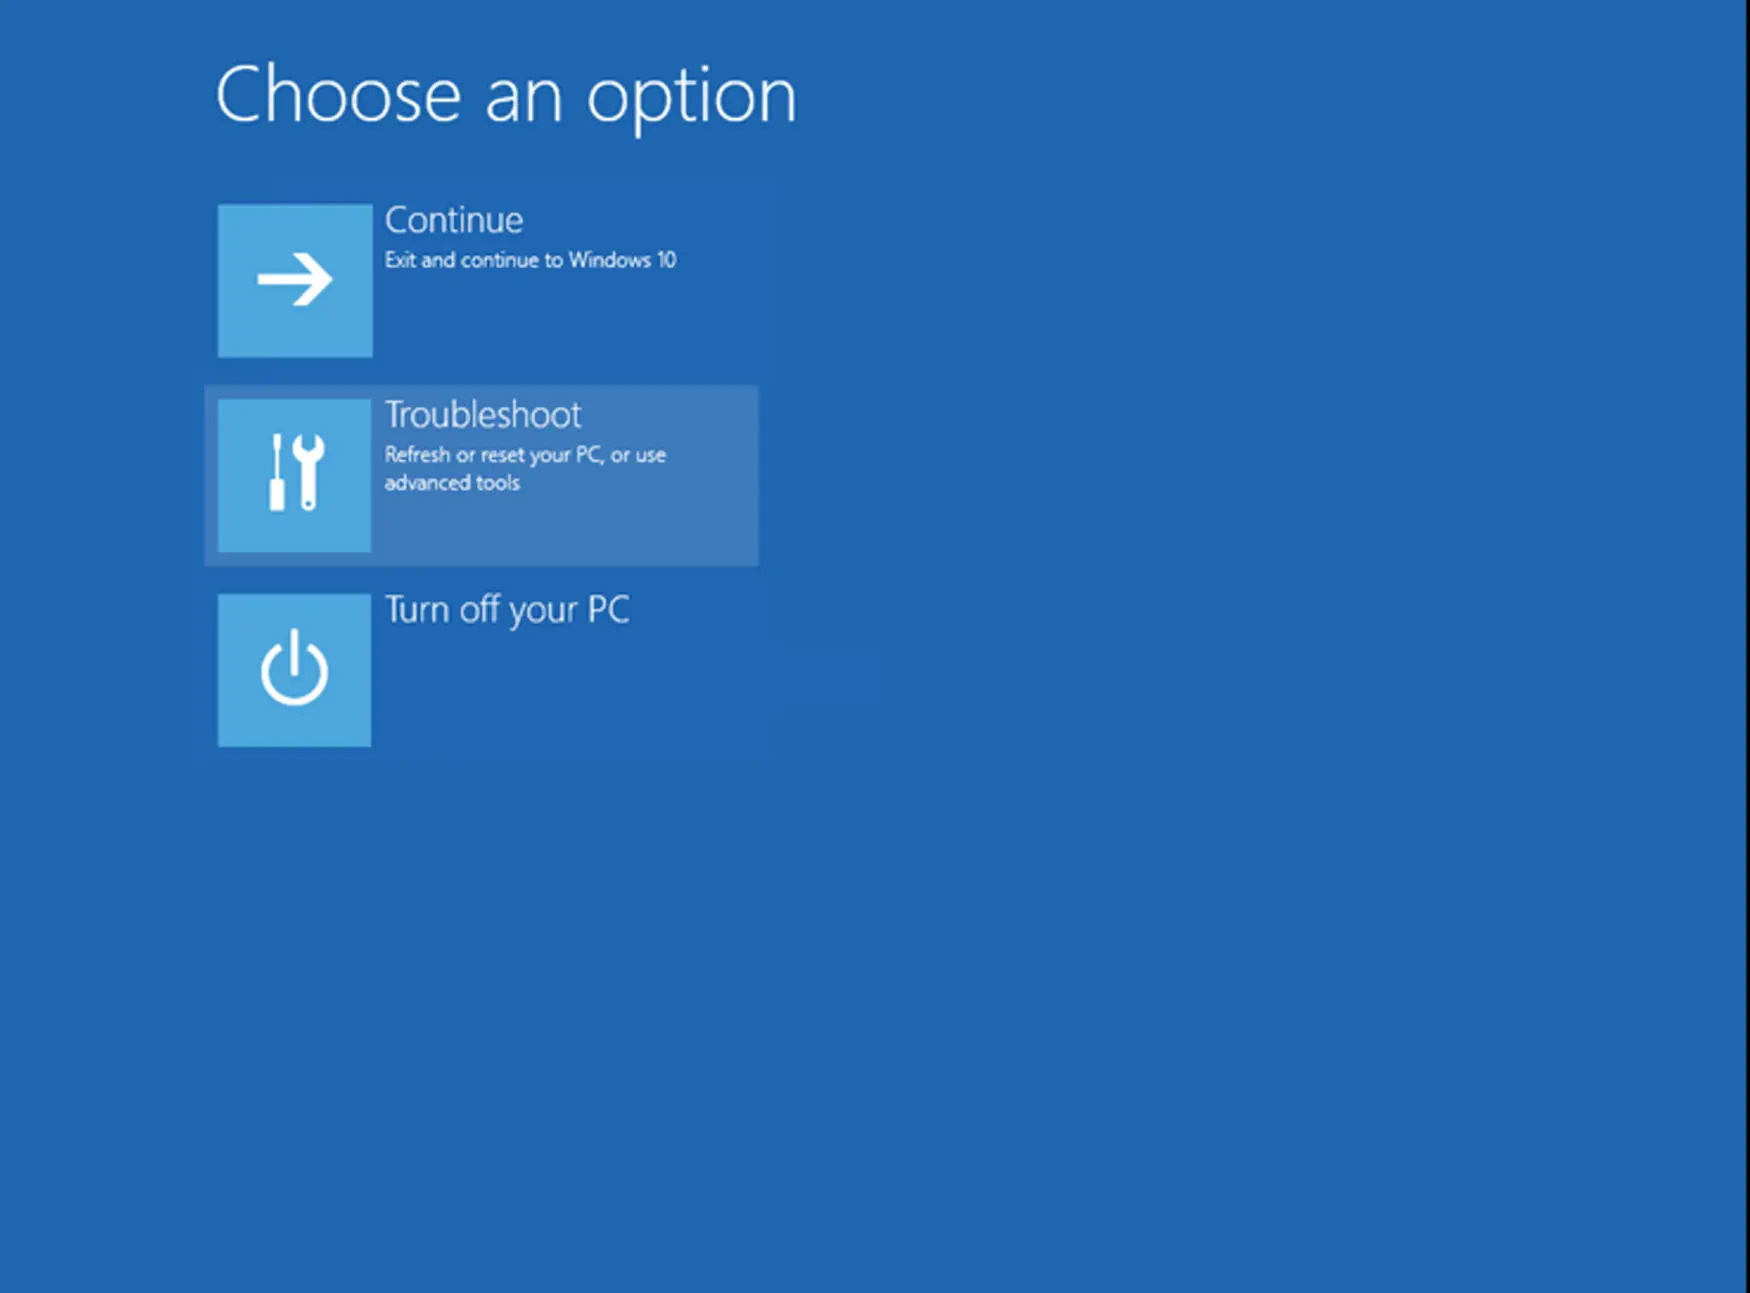
Once you are in the startup option menu, perform the following:
Click Troubleshoot.
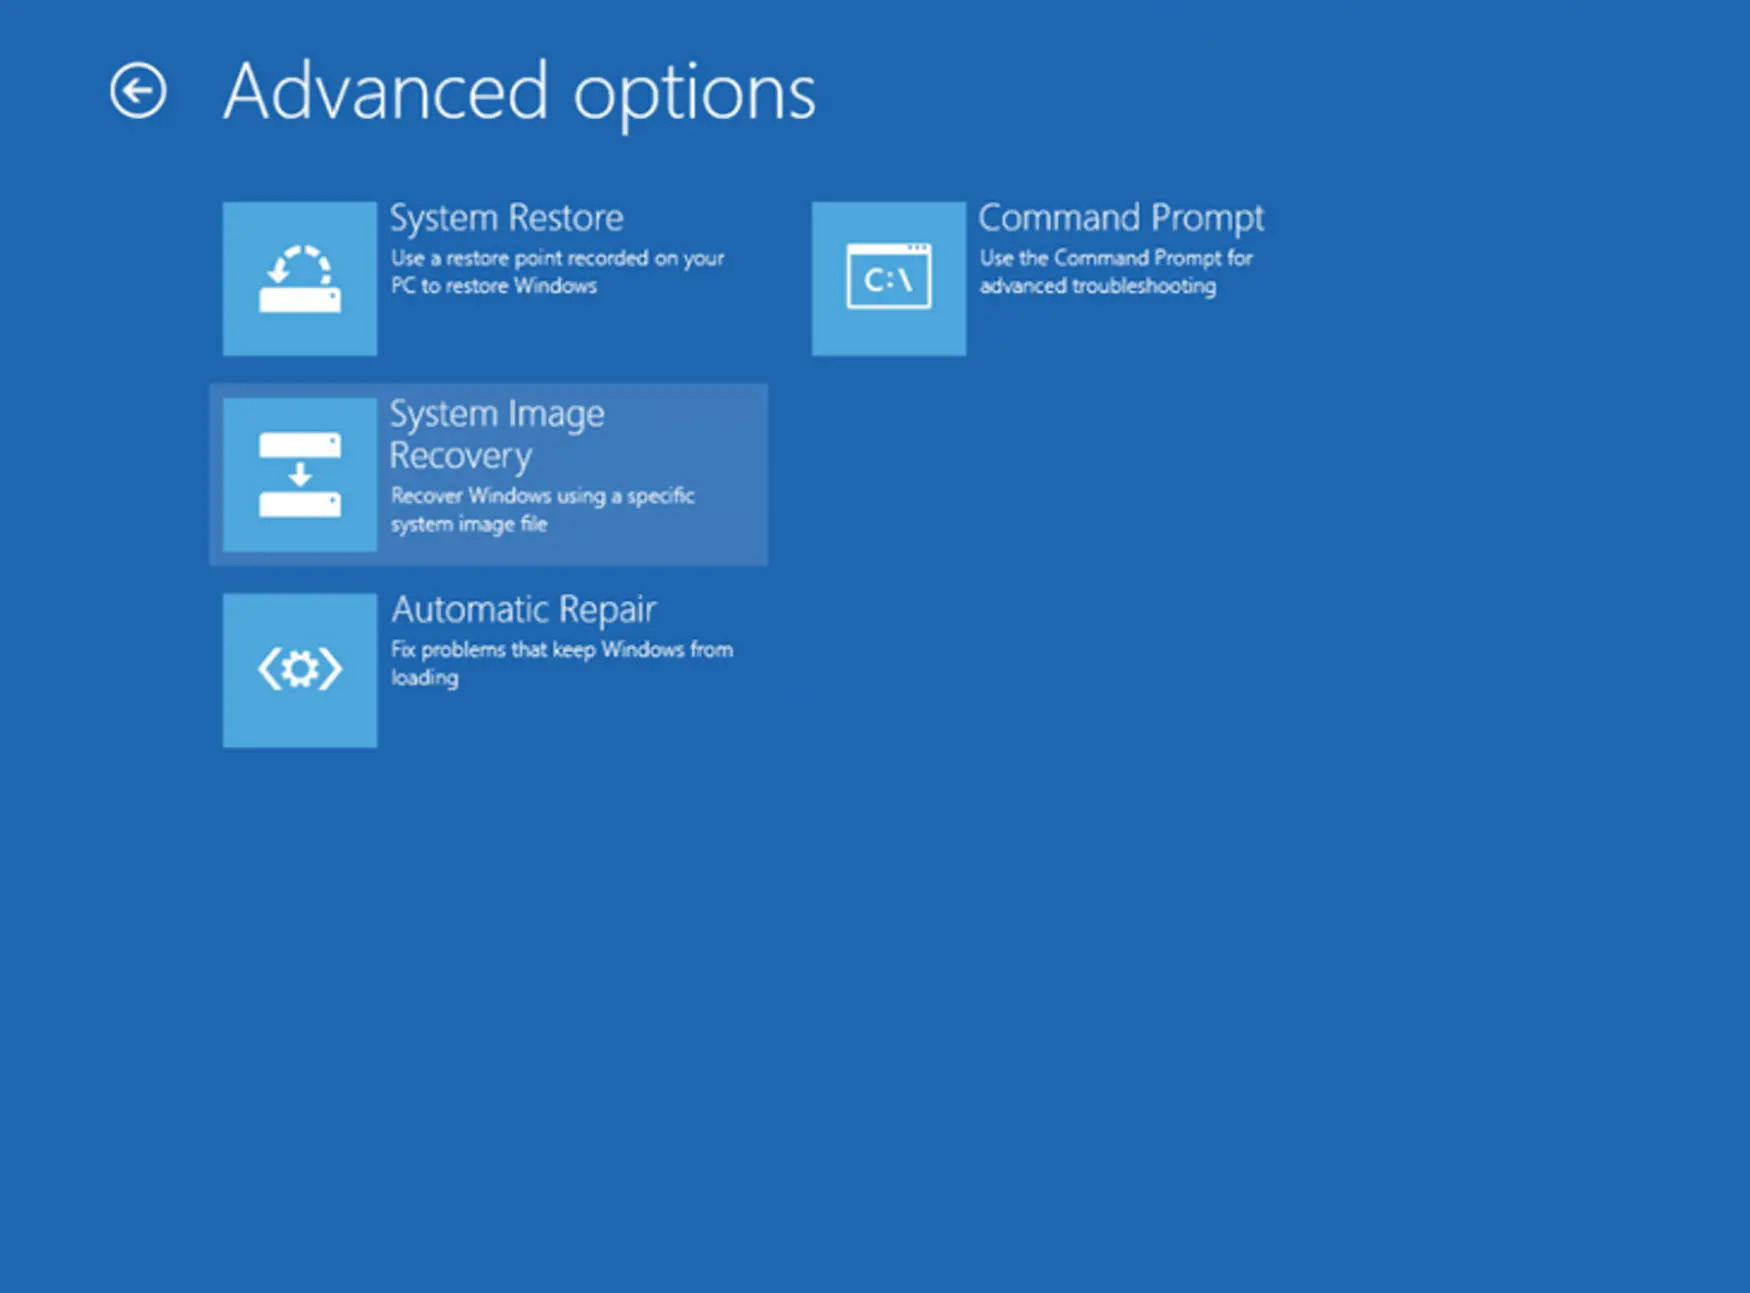
Click Advanced options.

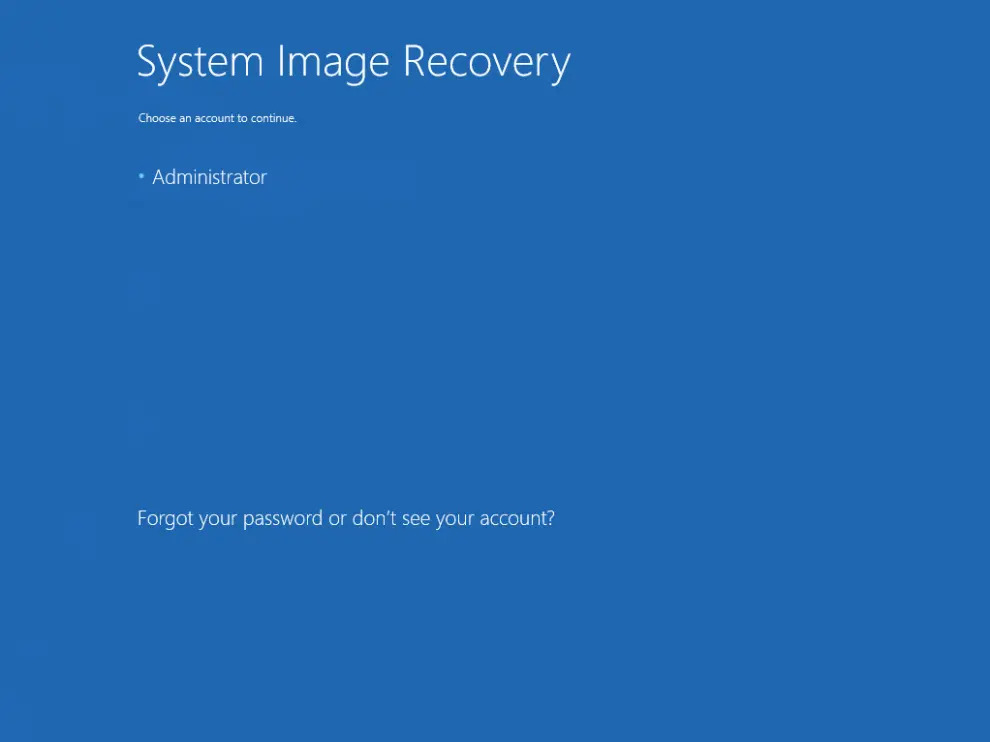
Click System Image Recovery.
Log in with an administrative account by clicking on Administrator.
Click Select a system image, then click Next.
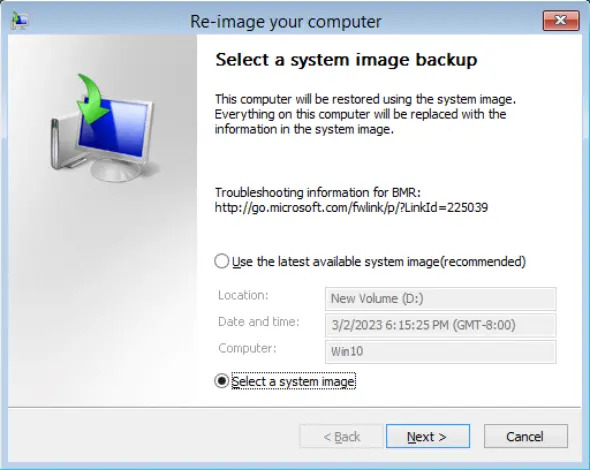
Select the location that contains the system image to restore from.
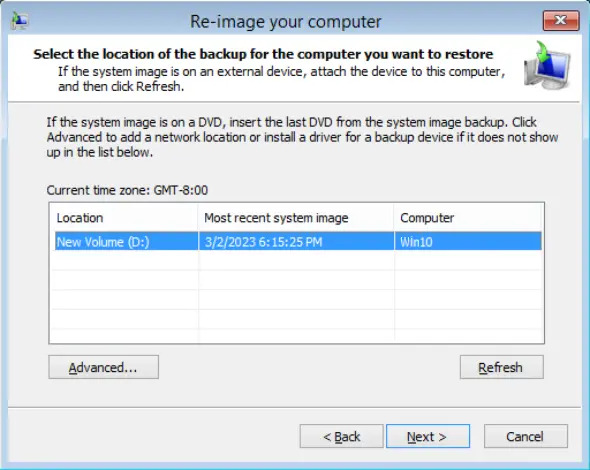
If you do not see the image available, then:
Click Advanced and install the required driver for the removable drive to be accessed, if the system image was copied to a removable drive attached to the server.
To install a driver, the driver must be located on the local system. You cannot install a driver from a network.
Click Advanced and browse to the remote shared folder which contains the system image if the system image was copied to a network path.
For domain environment, if the backup storage location is on a computer that is a member of that domain, then the computer containing the storage location should be on the IPsec boundary, to be accessible by non-domain computer.
When a computer boots into Windows Recovery Environment, it becomes a non-domain computer, therefore, cannot access the usual network shares. Only those computers that allow non-domain computers to access the share can be used as a backup storage location in this way.
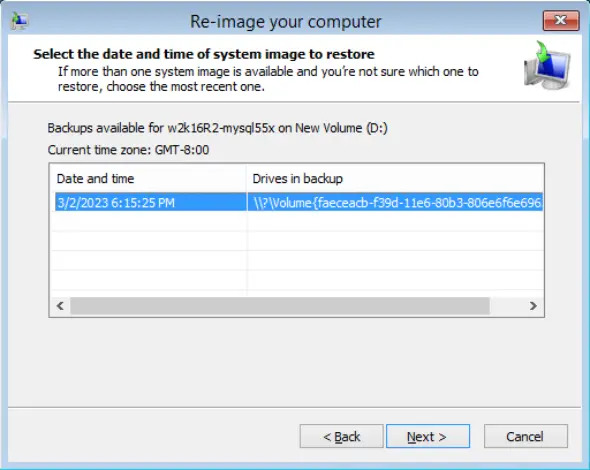
Select the system image to restore, then click Next to proceed.
On the “Choose additional restore options” page, click Install drivers to install device drivers for the hardware that you are recovering to.
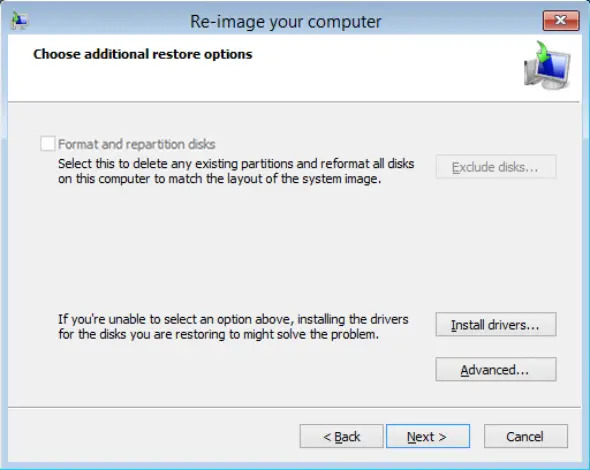
Click OK to add drivers.

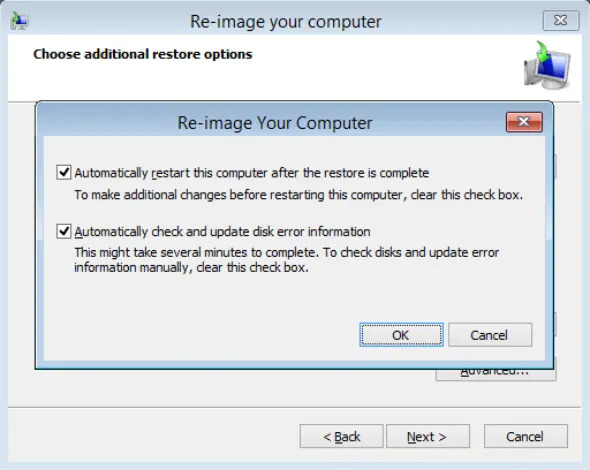
Click Advanced to specify whether the computer is automatically restarted, and the disks are checked for errors immediately after recovery.
Confirm the details for the restoration, and then click Finish to start the recovery process.
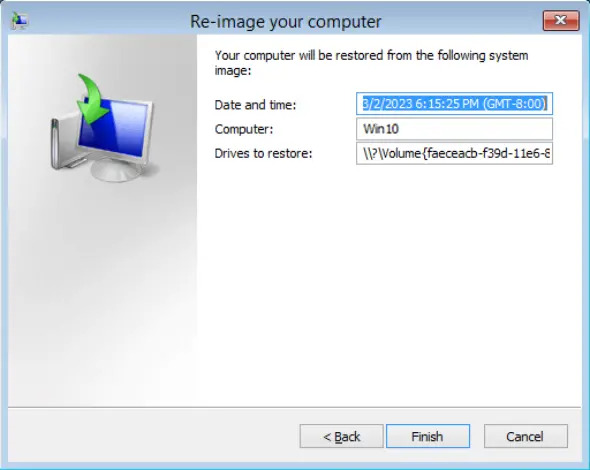
Do not interrupt the restore process.
The recovery will succeed as long as all the critical volumes (e.g. volumes containing operating system components) are recovered.