FAQ
FAQGeneral
The following shows the “General” tab under System Settings > Basic. It is used for general setup of AhsayCBS. There are several groups of settings under the General tab, and they are described below.
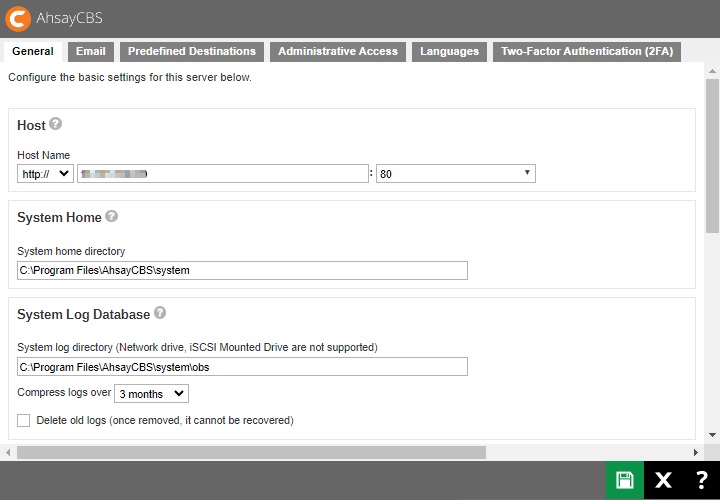
Host
This is the host name of your AhsayCBS.

- Select the protocol to use, whether http or https.
- Enter the domain name of your AhsayCBS in the format: <www.mybackup.com> or <IP address>.
- Select the port number.
System Home
This is the system home location of your AhsayCBS. This path is set to your installation home by default.
Here are examples for the different OS:
-
Windows

-
Linux

-
AhsayUBS

System Log Database
This is the system log database location of your AhsayCBS. This path is set to your installation home by default.
You can select when to compress the logs and if you want to delete old logs.

Other System Logs
This is the settings for the server logs. You can set the number of days when the logs will be compressed. There is also an option to delete the old logs.

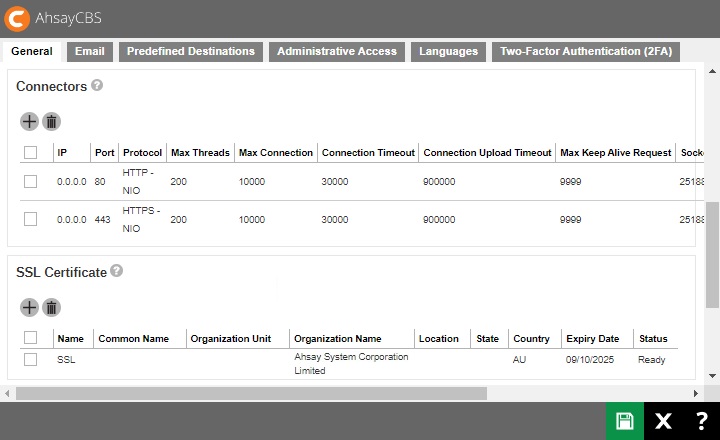
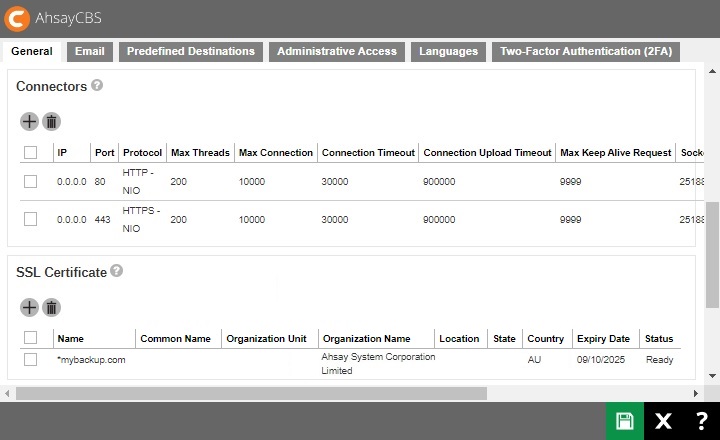
Connectors
Listening to non-standard TCP/IP port
If you like to run your own web server, or some other services using port 80 and 443. On your AhsayCBS server, you can change the listening TCP/IP port of AhsayCBS from port 80 and 443 to some other port numbers such as port 8080 and 8443.
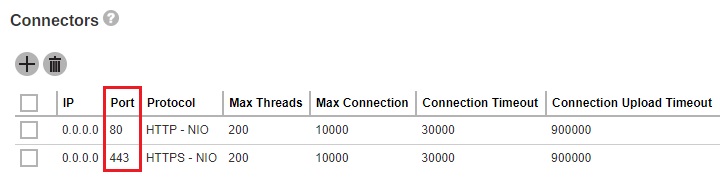
You can modify the connector settings from the AhsayCBS management console System Settings > Basic > General > Connectors and modify your new port in the connector settings. If you do this, it can affect how your clients connect to AhsayCBS. You may also need to open appropriate firewall to allow the connection.
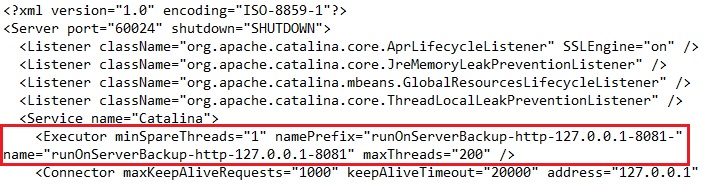
The port range 8081 to 9080 can be used by the connector dedicated for agentless Microsoft 365 and Cloud File backup. This is automatically setup upon installation, so no additional setup is needed to be done. It is not visible from System Settings > Basic > General > Connectors but can be checked from the server.xml file which is in the conf folder located in $APPLICATION_HOME\conf.
Listening to a single IP address
If the backup server has more than one network interface installed or has more than one IP address bind to a single network interface, you can configure AhsayCBS to use only a single IP address for backup services (by default the TCP port of all IP addresses available within the system are used and open). This has the benefits of sparing other IP addresses for other applications, e.g. Apache Web Server or Microsoft Internet Information Server (IIS).
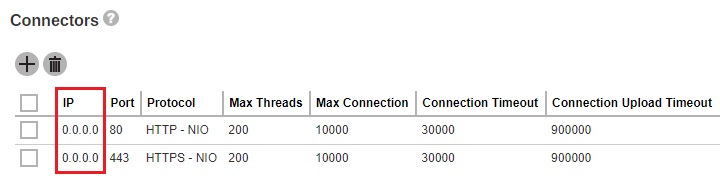
You can modify the connector setting from the AhsayCBS management console System Settings > Basic > General > Connectors and modify the IP address in the connector settings. This is the default settings upon fresh installation of v10.1.0.0 or above.
The AJP – APR protocol is an optimized binary version of HTTP that is used to allow Tomcat to communicate with an Apache web server. It maintains permanent connection between servers to reduce the time it takes to establish a connection. It is dedicated to a particular request and then maintained for the next request to be tunneled down, rather than each session causing a session to be created and broken.
The HTTP – NIO/HTTPS – NIO are used to support a higher number of concurrent connections to the AhsayCBS server.
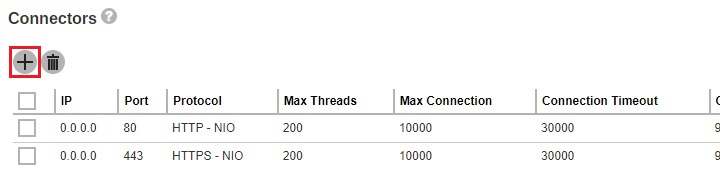
It is advisable to create another connector to be used to access the AhsayCBS web console to avoid a slow connection. To create another connector:
-
Click the Create button.
-
Enter the IP and Port.
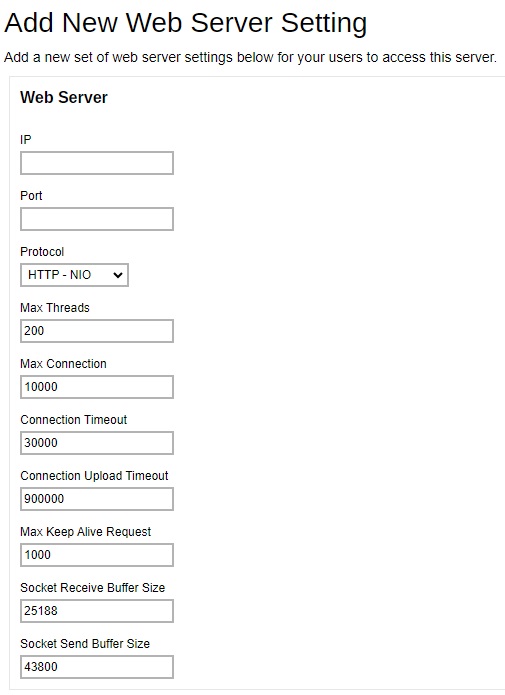
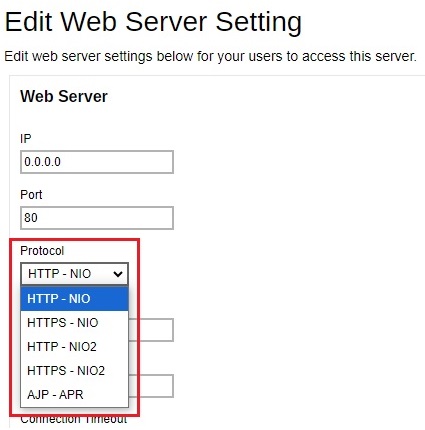
- Select the Protocol.
-
Change the following if needed:
- Max Threads, default value is 200.
- Max Connection, default value is 10000.
- Connection timeout, default value is 30000.
- Connection Upload Timeout, default value is 900000.
- Max Keep Alive Request, default value is 1000.
- Socket Receive Buffer Size, default value is 25188.
- Socket Send Buffer Size, default value is 43800.
- Click OK once done.
- Click Save to save the settings.
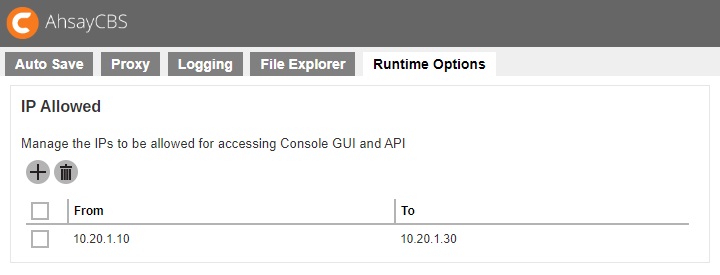
Restricting access to system page by IP address
For better security, you can restrict access to the AhsayCBS management console by IP addresses. To do so, please add IP restriction in your AhsayCBS management console System Settings > Advanced > Runtime Options > IP Allowed. You can enter a range of IPs or a specific IP in the IP Allowed settings.
SSL Certificate
Installing a trusted SSL Certificate
Default installation of AhsayCBS enables SSL (Secure Socket Layer) support using a dummy certificate. For your own security, you are advised to replace the pre-installed dummy SSL certificate with a secure SSL certificate from a trusted CA (Certificate Authority). For details, please refer to the following article Trusted Certificate Authority (CA) List for version 10.
Furthermore, to use Two-Factor Authentication with https protocol, a valid SSL certificate from a trusted CA must be installed on AhsayCBS. Otherwise, you will have to use http instead which means all AhsayOBM/AhsayACB users with Two-Factor Authentication enabled will need to connect using http as well.
Please note that only RSA SSL certificate is supported. To replace the non-secure dummy SSL certificate with a secure SSL certificate, you need to generate a CSR (Certificate Signing Request) and submit the CSR to your CA. Please perform the following in your AhsayCBS.
-
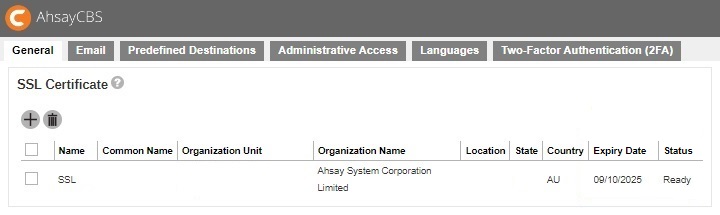
Navigate to System Settings > Basic > General > SSL Certificate, click the Create button.

-
Enter the CSR details, then click the Next button to proceed.
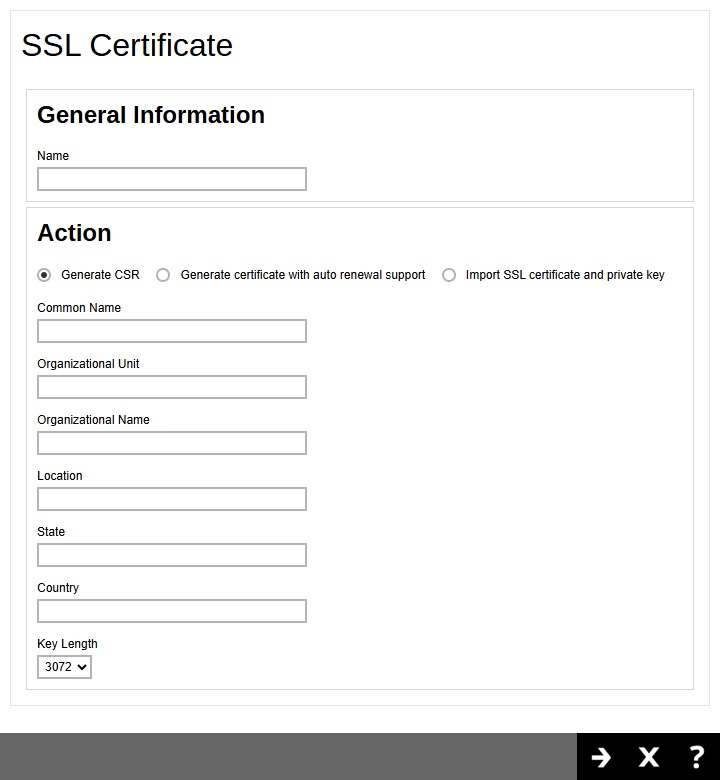
-
Generate a CSR to apply the SSL certificate from your trusted CA.
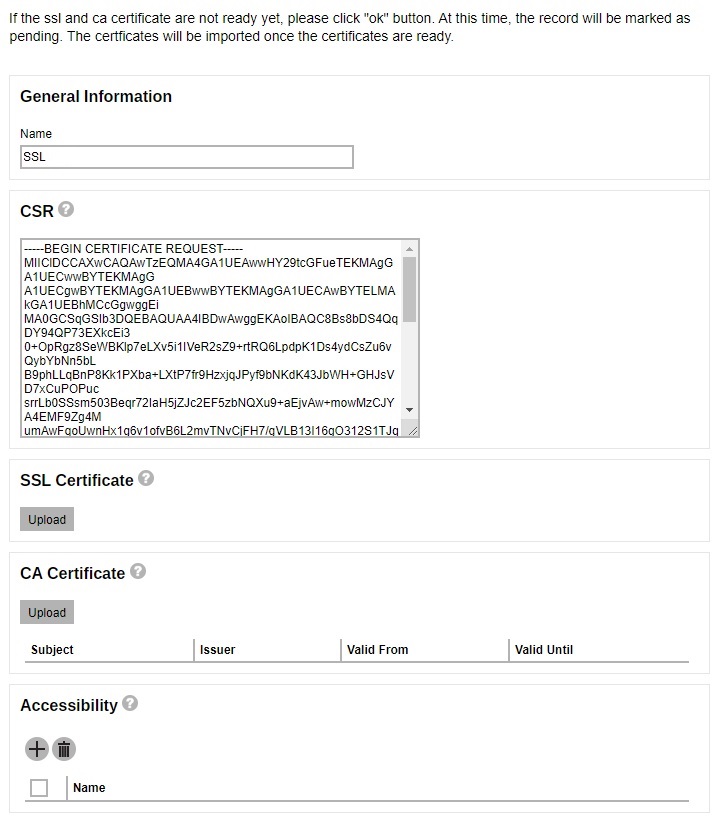
-
You will see a "Pending" status in the SSL Certificate page.
-
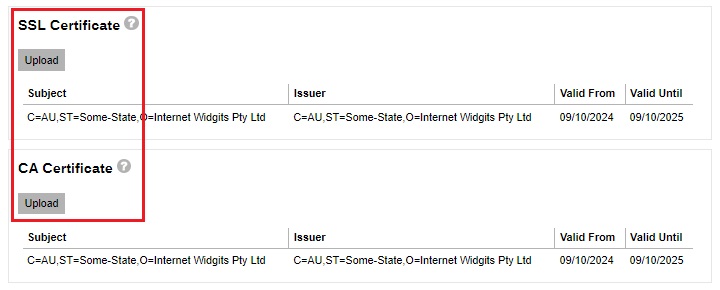
When the SSL certificate is ready, click into the certificate entry and import the SSL certificate and CA certificate.
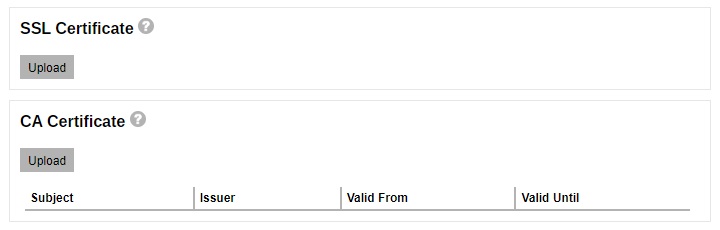 If the Certificate Authority provided bundled CAs, these bundled intermediate certificates must be uploaded to AhsayCBS. If uploading the bundled CAs does not work, upload the root and intermediate certificates separately.
 -
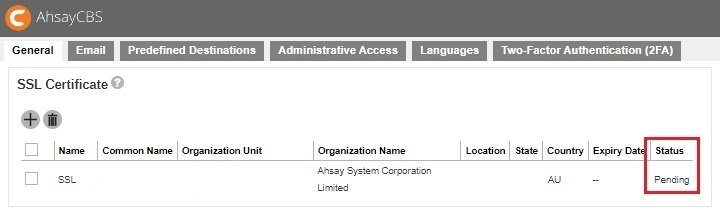
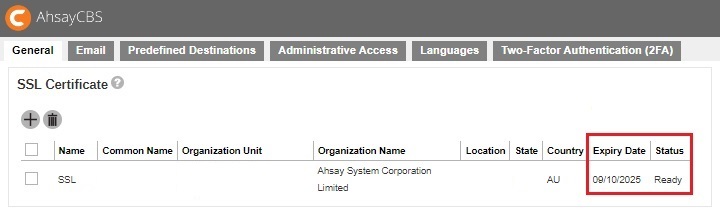
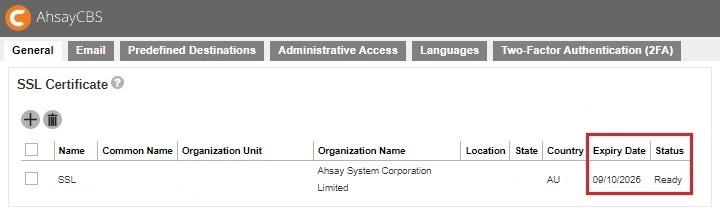
You will be able to see the status of the certificate as “Ready” and a valid “Expiry Date”.
-
To apply the SSL certificate to your connector, click the HTTPS entry.
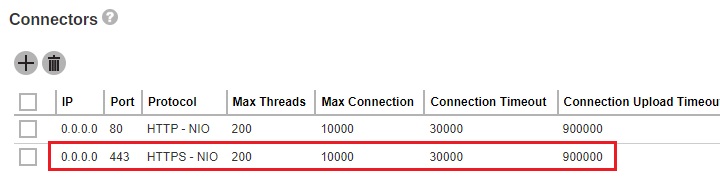
-
Add the SSL certificate to this connector as shown below.

-
Click the Save button to save the settings.
Installing a trusted SSL Certificate with auto renewal support
Starting with AhsayCBS v10.1.4 a new option is available wherein you can install a trusted SSL certificate that is renewed automatically 30 days before its expiry date. This new feature is very convenient and prevents security vulnerabilities and possible service disruptions.
In the SSL Certificate page, enter a name then select Generate certificate with auto renewal support.
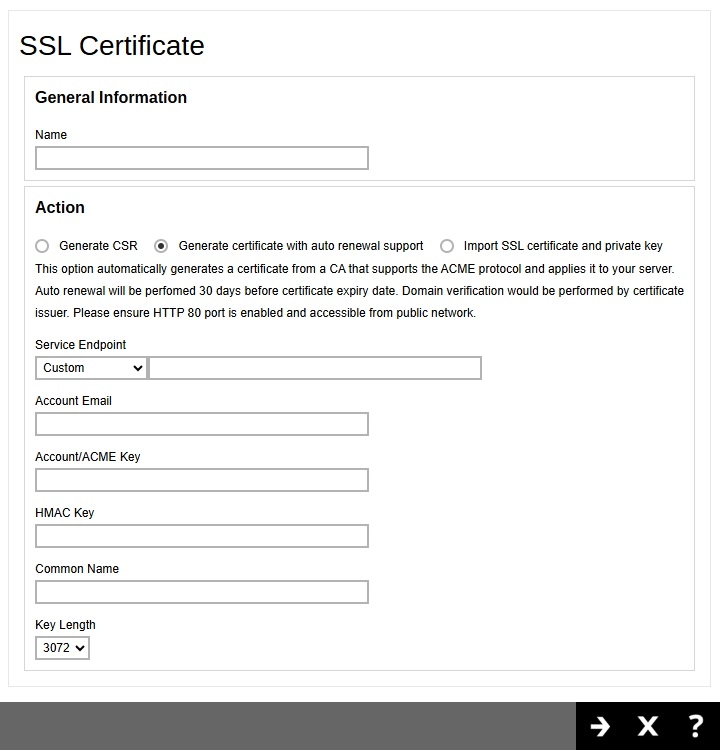
Select the service endpoint. The CSR details needed will depend on the selected service endpoint.
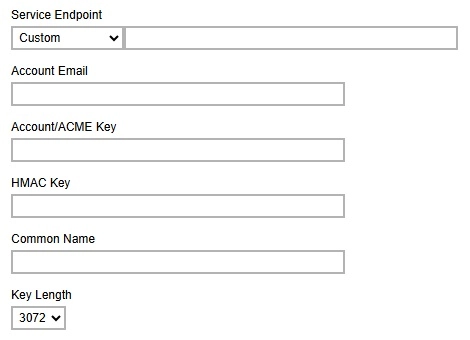
If "Custom" is selected, enter the path of the service endpoint.
Also provide the following:
- Account Email
- Account/ACME Key
- HMAC Key
- Common Name
- Key Length
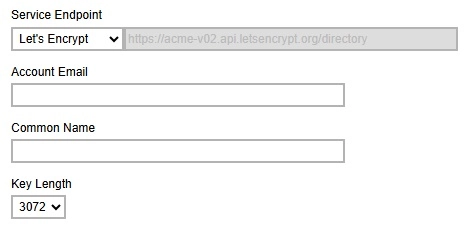
If "Let's Encrypt" is selected, provide the following:
- Account Email
- Common Name
- Key Length
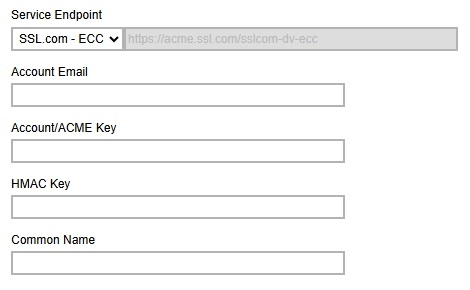
If "SSL.com - ECC" is selected, provide the following:
- Account Email
- Account/ACME Key
- HMAC Key
- Common Name
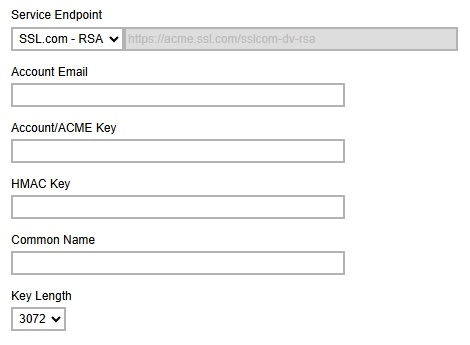
If "SSL.com - RSA" is selected, provide the following:
- Account Email
- Account/ACME Key
- HMAC Key
- Common Name
- Key Length
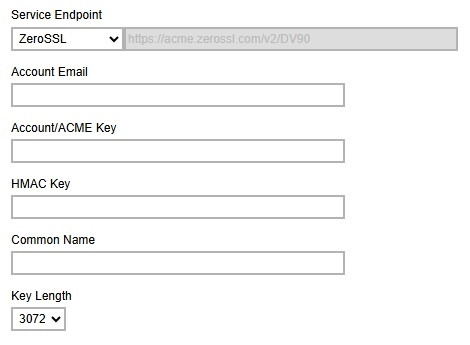
If "ZeroSSL" is selected, provide the following:
- Account Email
- Account/ACME Key
- HMAC Key
- Common Name
- Key Length
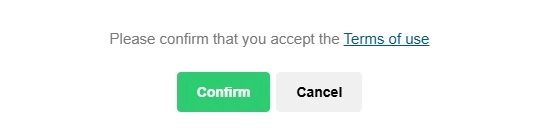
Once done, click Next to proceed.
Click Confirm to continue.
The installed certificate will be listed under "SSL Certificate".
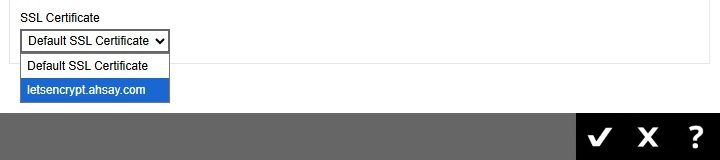
To apply the SSL certificate to your connector, click the HTTPS entry.
Select the SSL certificate from the dropdown list and click OK then Save.
Renew a trusted SSL Certificate
When your SSL certificate is due to expire, you can renew your SSL cert via your CA’s website. Your CA may ask you to use the existing CSR that you submitted previously or submit a new CSR.
- If you decided to use a new CSR, most likely the information on the old CSR is not up-to-date. Most CA will not consider this as a renew process and you need to start from the beginning of a certificate process described in the previous section.
- If you purchase a renew SSL certificate with the existing CSR, wait for your CA to sign the renew SSL certificate.
The import step of a renewed SSL certificate is similar to the installation of a SSL certificate. Please perform the following in your AhsayCBS.
-
Go to System Settings > Basic > General > SSL Certificate.
- Click the certificate entry.
-
Import the SSL certificate and CA certificate.
 If the Certificate Authority provided bundled CAs, these bundled intermediate certificates must be uploaded to AhsayCBS. If uploading the bundled CAs does not work, upload the root and intermediate certificates separately.
 -
You will see the date in “Expiry Date” is extended.
Wild Card SSL Certificate With Redirector Setup
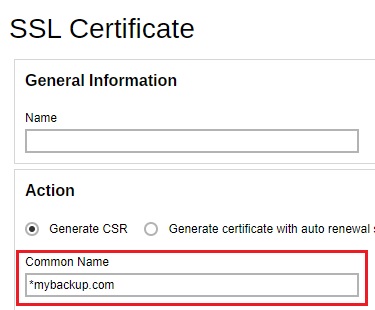
In the Redirector with a number of Backup Servers setup scenario, you need to apply a wild card certificate for all your AhsayCBS servers. The application of the wild card certificate is the same as a normal certificate except for the common name, enter *.backup.com instead. To apply a wild card certificate for all your AhsayCBS servers, please perform the following:
- In the AhsayCBS with the Redirector role, go to System Settings > Basic > General > SSL Certificate.
-
Generate a CSR with the common name set to, for example *.mybackup.com, and apply the SSL certificate from your trusted CA.
- When the SSL certificate is ready, import the SSL certificate.
-
Copy the SSL certificate, private key and the CA certificate file from your AhsayCBS_HOME/conf/cert folder and transfer to your AhsayCBS with Backup Server role. They are named similar as the following:
1449049185371.crt
1449049185371.key
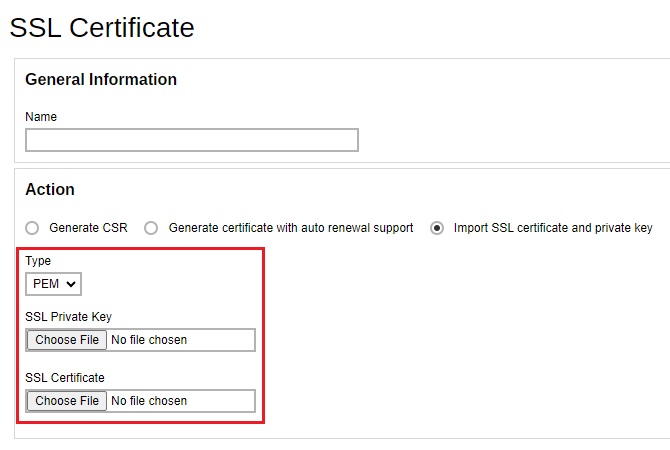
1449049185371.ca - Import these 3 certificate files in one of your AhsayCBS (Backup Server role) in the System Settings > Basic > General > SSL Certificate, click on the Createbutton.
-
Select the Import SSL Certificate and Private Key radio button. Select the “Type” and then import the SSL Private Key, SSL certificate and the CA certificate.
-
To apply the SSL certificate to your connector, click the HTTPS entry.
-
Add the SSL certificate to this connector.
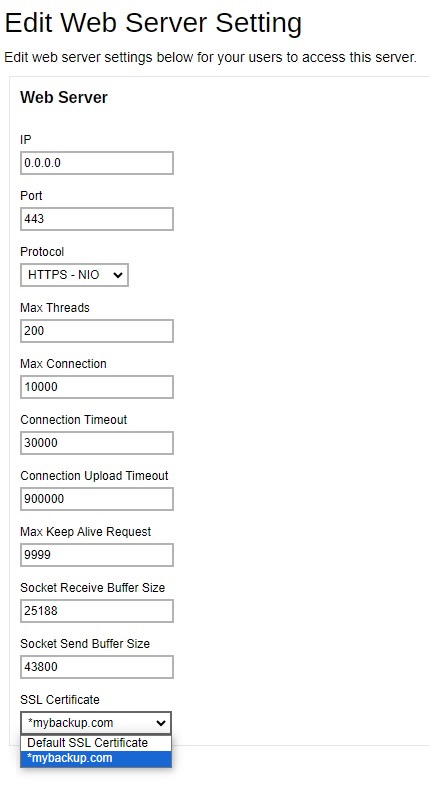
-
Click Save to save the settings.
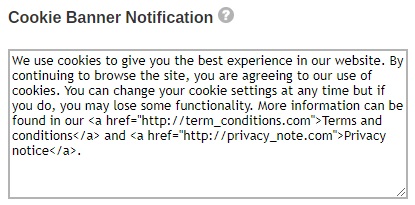
Cookie Banner Notification
To comply with the new General Data Protection Regulation (GDPR) requirements, a banner will be displayed stating the organizations cookie policy upon log in to the AhsayCBS server. This will also apply to the AhsayCBS web console.
Administrator can configure a notification banner to be displayed on the AhsayCBS web console (displayed at the login interface), and the contents of the banner can be configured on the AhsayCBS web console. Also, HTML codes can be used for content of the banner.