
 AhsayCBS (DIY)
Migrate AhsayUBS to Debian
Product Version
Operating System
Description
This guide provides instructions for migrating AhsayUBS to Debian.
We strongly recommend creating backups of your system and configuration files before proceeding with the migration.
Solution
Since AhsayUBS has been discontinued in v10, the steps below are provided to guide users on how to migrate AhsayUBS to Debian.
First record all settings of your AhsayUBS. Then the Debian OS must be setup before the AhsayUBS links are created, and System Home Directory and System Log Database are configured. The steps to do these are outlined below.
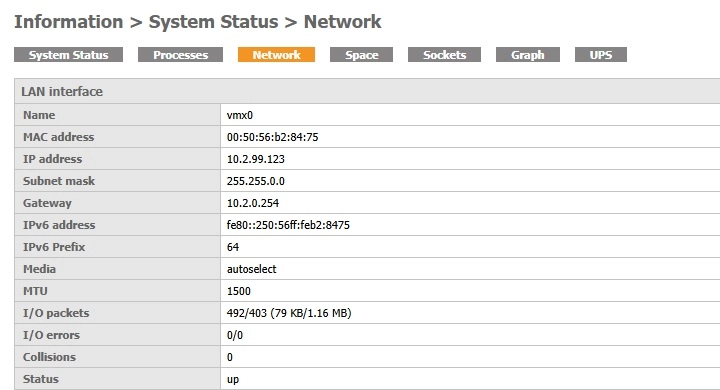
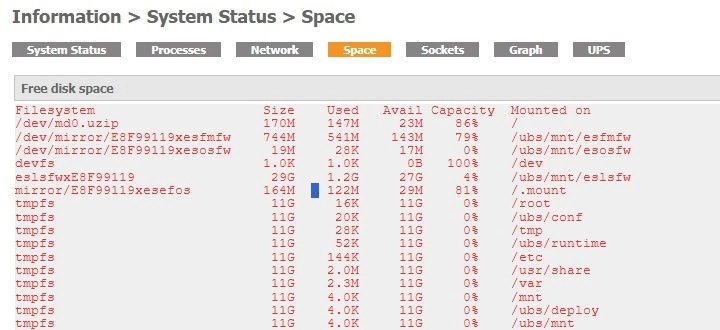
Login to the AhsayUBS console and take note of the network and storage information.
To get the network information go to Information > System Status > Network.
To get the storage information go to Information > System Status > Space.
Format the UBS swap partition and install the Debian OS there.
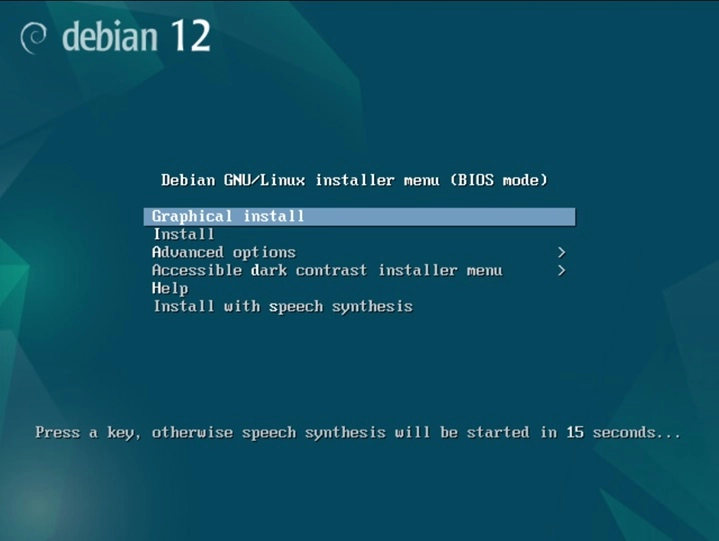
Debian 12 is used as an example, for more information on how to setup other versions please refer to this article.
Select Graphical install.
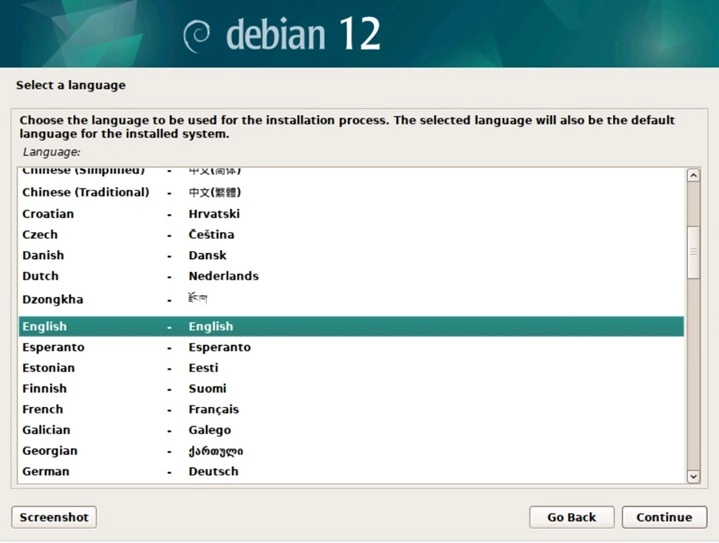
Select the language, then click Continue.
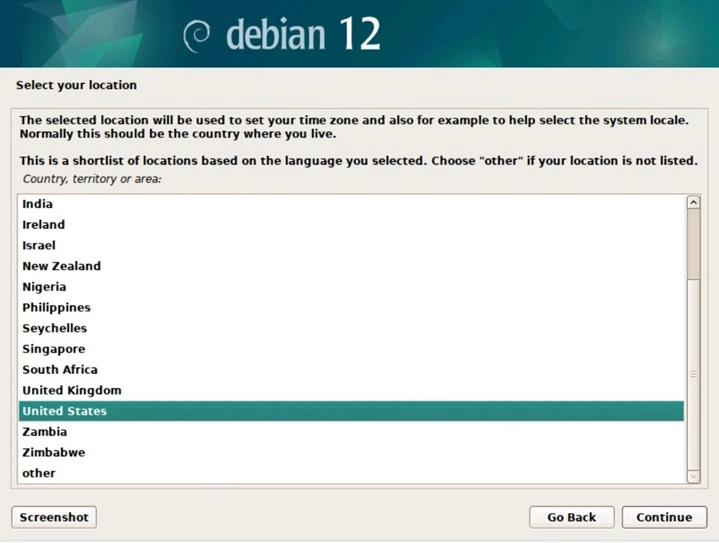
Select the location, then click Continue.
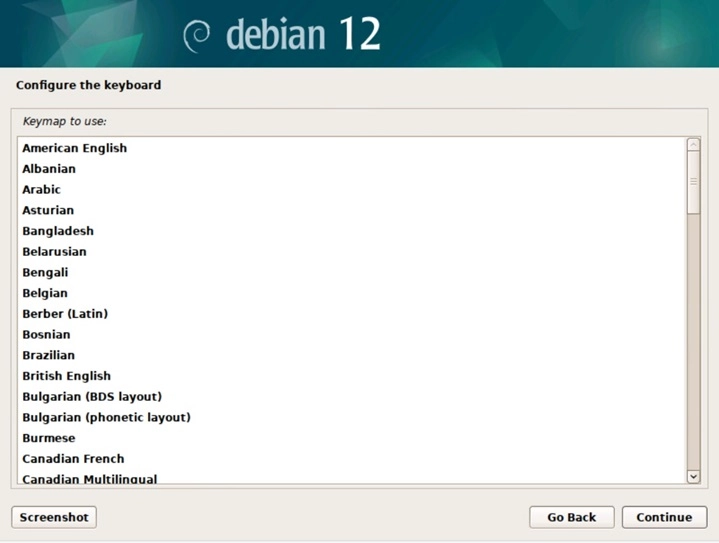
Select the keyboard, then click Continue.
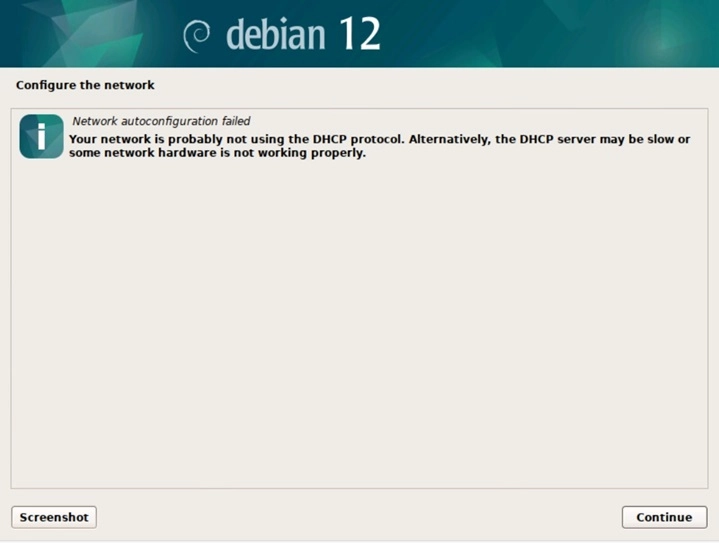
Network autoconfiguration will fail, click Continue.
Select Do not configure the network at this time, then click Continue.

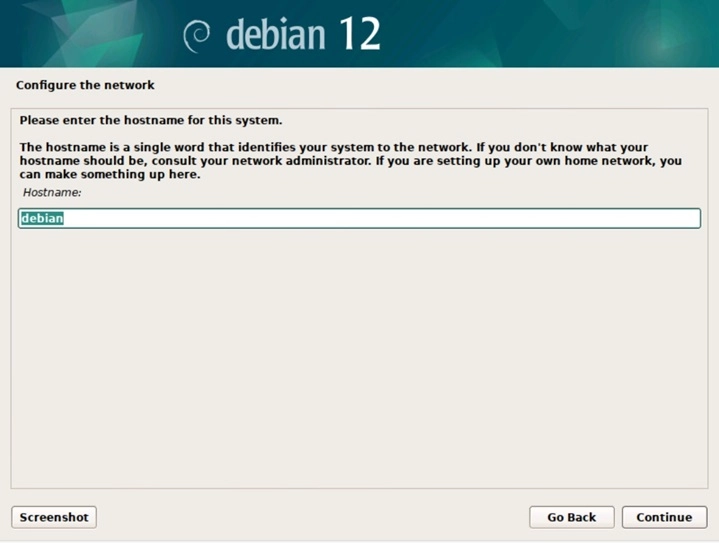
Configure the hostname, then click Continue.
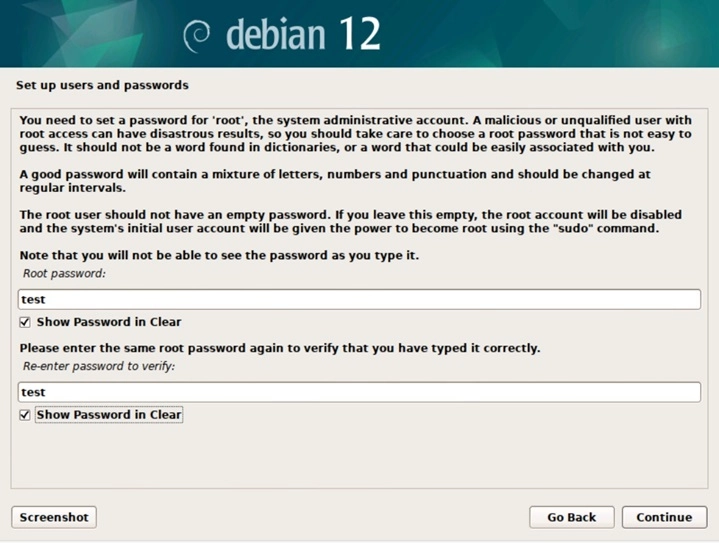
Set 'test' as root password, then click Continue.
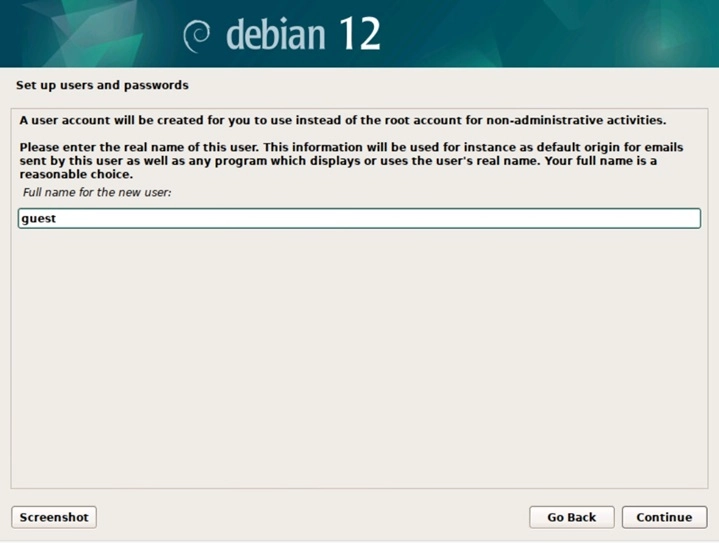
Enter the name of the user: type 'guest', then click Continue.
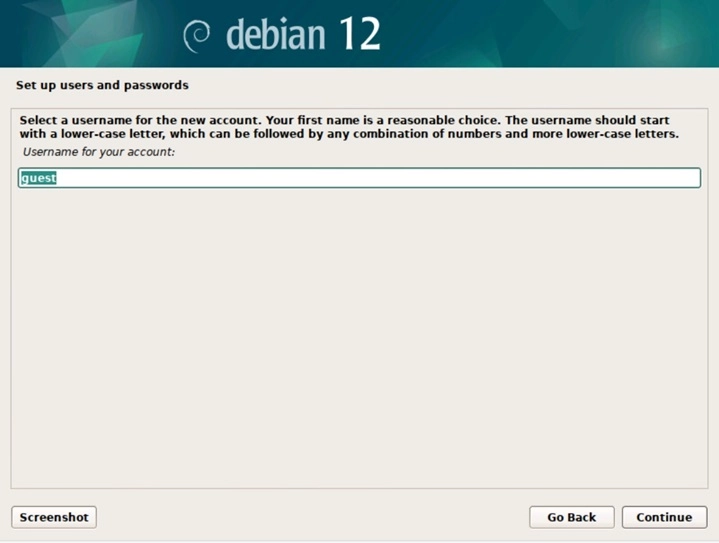
Select username for the new account which is 'guest', then click Continue.
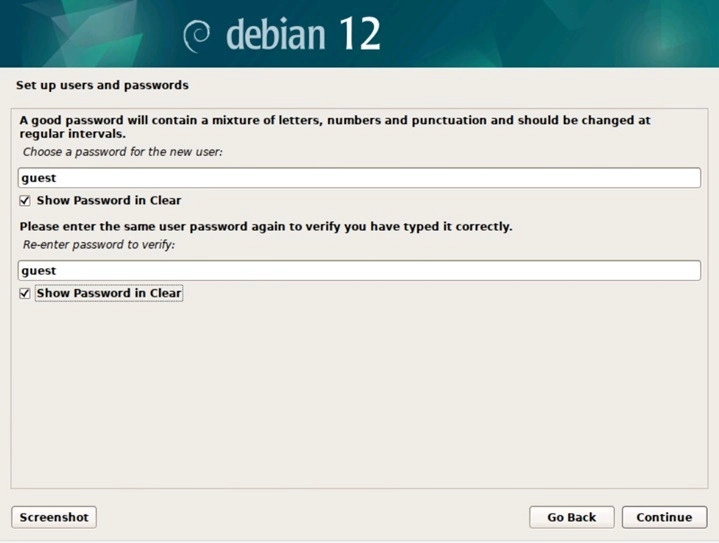
Set 'guest' as the password for the user, then click Continue.
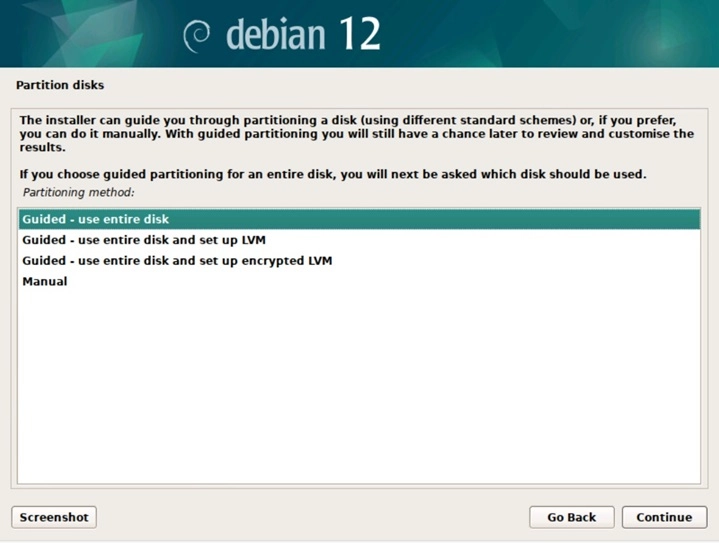
Select Guided - use entire disk, then click Continue.
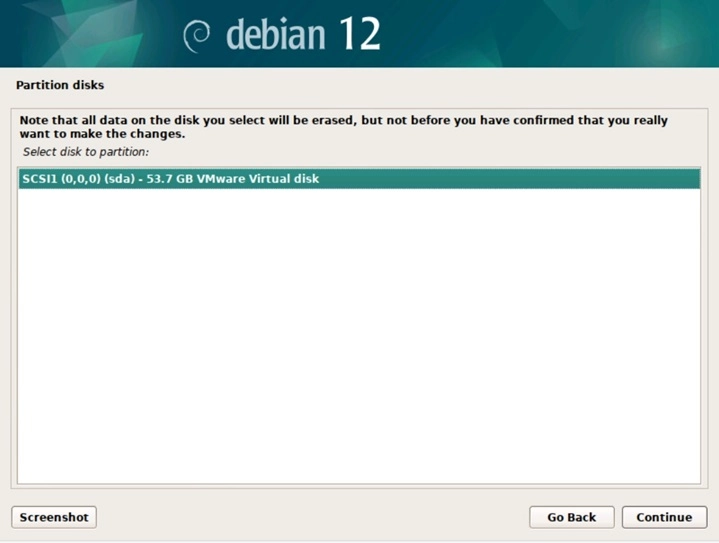
Select the disk to partition, then click Continue.
Select the partitioning scheme All files in one partition (recommended for new users), then click Continue.

Select Finish partitioning and write changes to disk, then click Continue.

Select Yes when asked to "Write the changes to disks?", then click Continue.

Select No when asked to "Scan extra installation media?", then click Continue.

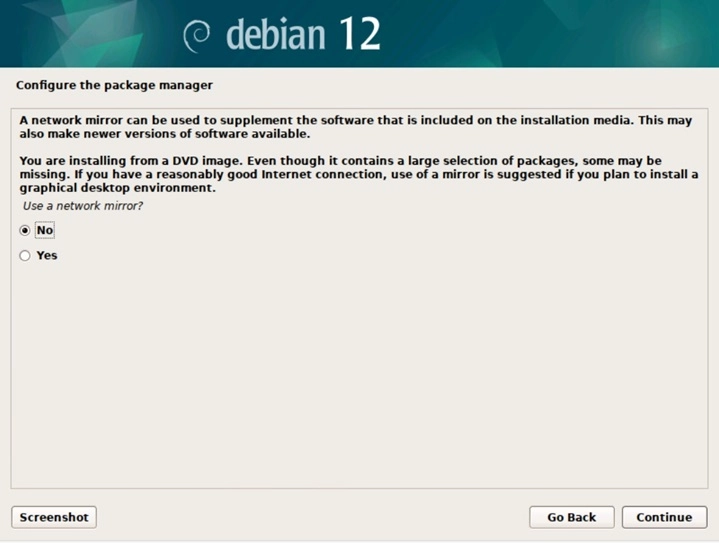
Select No when asked to "Use a network mirror?", then click Continue.
Select No when asked to "Participate in the package usage survey?", then click Continue.

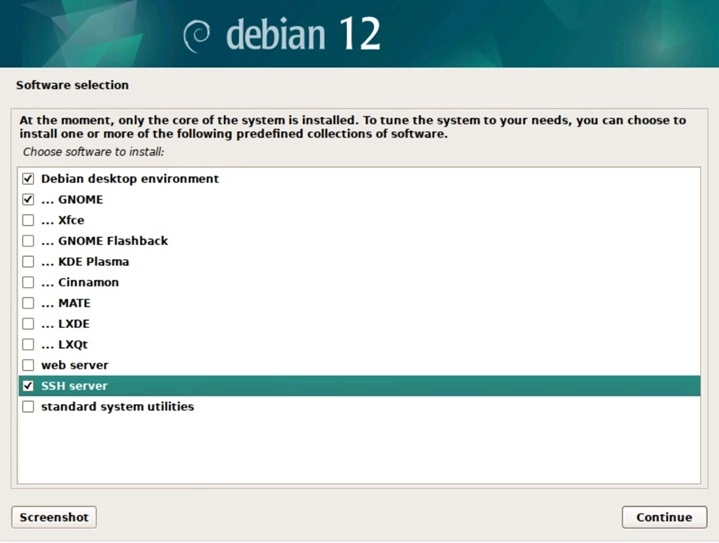
Uncheck "standard system utilities" and check SSH server, click Continue.
Select Yes when asked to "Install the GRUB boot loader to your primary drive?", click Continue.

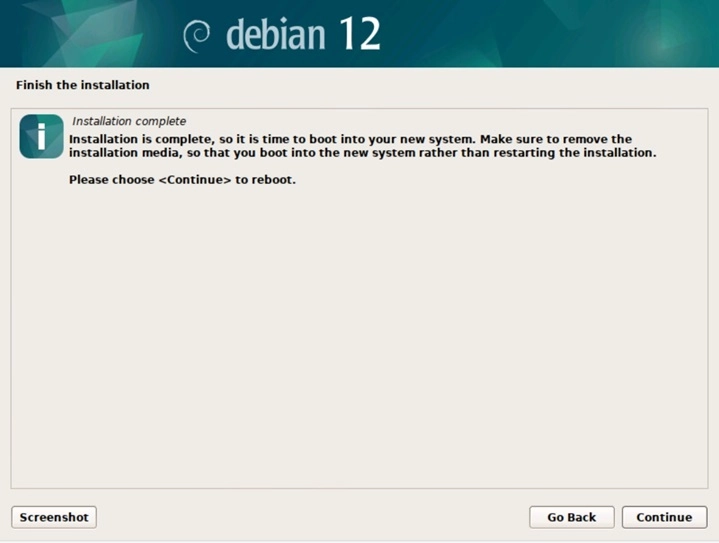
Select the device for boot loader installation, then click Continue.

Once installation is complete, click Continue to finish.
Perform the apt update command.
apt update
apt install linux-headers-$(uname -r)
apt install zfsutils-linux
systemctl enable zfs-import-scan
systemctl enable zfs-import-cache
systemctl enable zfs-mount
systemctl enable zfs.target
Create the ZFS volume mount points.
mkdir -p /ubs/mnt/esms00
mkdir -p /ubs/mnt/eslsfw
zpool import -f eslsfwxE8F99119
zpool import -f esms00xE8F99119
zfs set mountpoint=/ubs/mnt/eslsfw eslsfwxE8F99119
zfs set mountpoint=/ubs/mnt/esms00 esms00xE8F99119
zfs set sharesmb=off eslsfwxE8F99119
zfs set sharesmb=off esms00xE8F99119
zpool set cachefile=/etc/zfs/zpool.cache eslsfwxE8F99119
zpool set cachefile=/etc/zfs/zpool.cache esms00xE8F99119
zfs get all
Create the AhsayUBS links.
mkdir -p /ubs/mnt/esms00
mkdir -p /ubs/mnt/eslsfw
mkdir -p /ubs/mnt/esfmfw/obsr/system/obsr
mkdir -p /ubs/mnt/eslsfw/obsr/download
Configure System Home Directory and System Log Database
mkdir -p /ubs/module/obsr/system/
ln -s /ubs/storage/obsr obsr