
 How-To
AhsayUBS Installer Image Deployment
How to prepare the installer source to deploy AhsayUBS on a physical server will be discussed here.
If you are deploying AhsayUBS as a Virtual Machine on VMware, you may skip to Installing AhsayUBS Firmware (New Installation) on how to install the UBS Firmware properly.
For more information on 'IMG and 'ISO' format differences, please refer to Installer Media Requirements.
Removable Storage Device
Step 1: Preparation
Please follow the instructions below to view the current disk configuration from Computer Management Console:
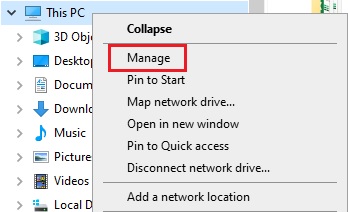
Open the Computer Management window. You may do this by right-clicking on "This PC" and then selecting Manage, or by simply searching for it using the Search function from the Desktop.
Click on Disk Management from the Computer Management MMC console. All connected storage device(s) will be listed and marked as Disk *.
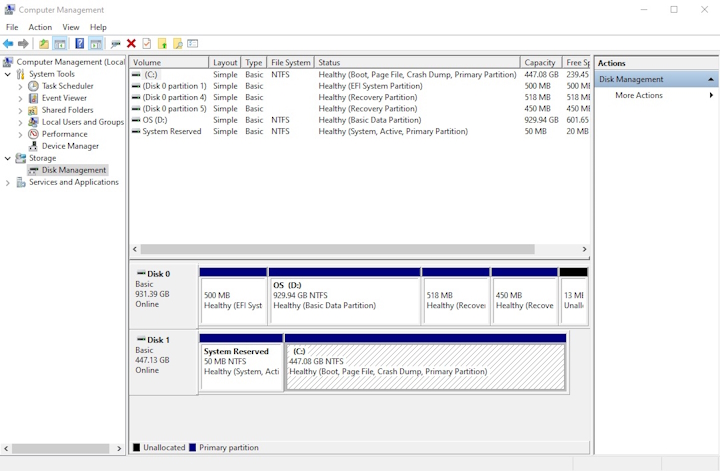
Attach the removable device to your computer and refresh the Disk Management console. This can be done by pressing the F5 button on your keyboard.
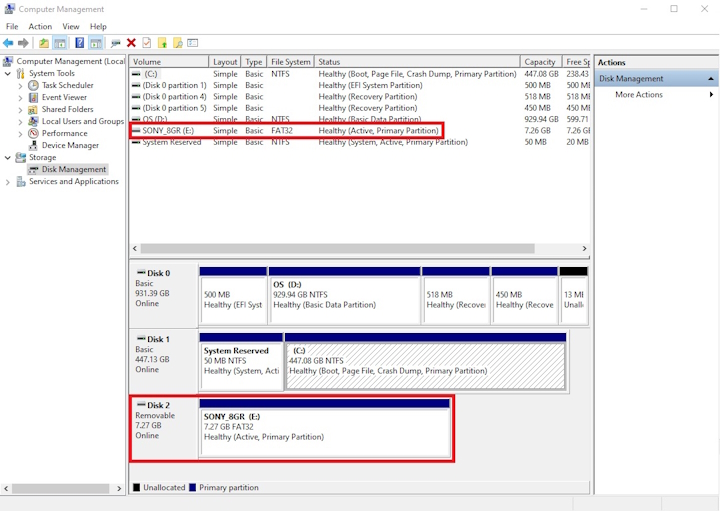
The new disk should be shown in the Computer Management console. In our example, it is shown as Disk 2 with a drive letter "E".


Step 2: Deploy the installer image with "AhsayUBS Deployment Utility"
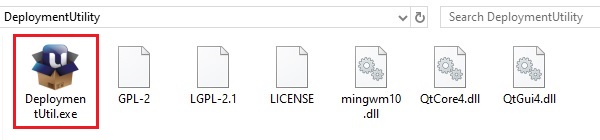
Download the AhsayUBS Deployment Utility from our website and extract all files from the bundle to a temporary directory. This bundle shall only contain the Deployment Tool, and not the actual image file containing AhsayUBS.
In this example, D:\DeploymentUtility
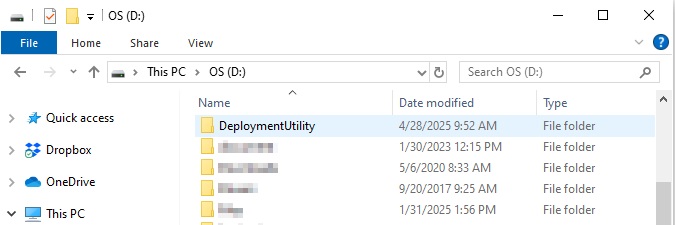
The deployment program is stored in Deployment Utility folder under %TEMPORARY_DIRECTORY%\DeploymentUtility
In this example, the path for the deployment utility is D:\DeploymentUtility\DeploymentUtil.exe.
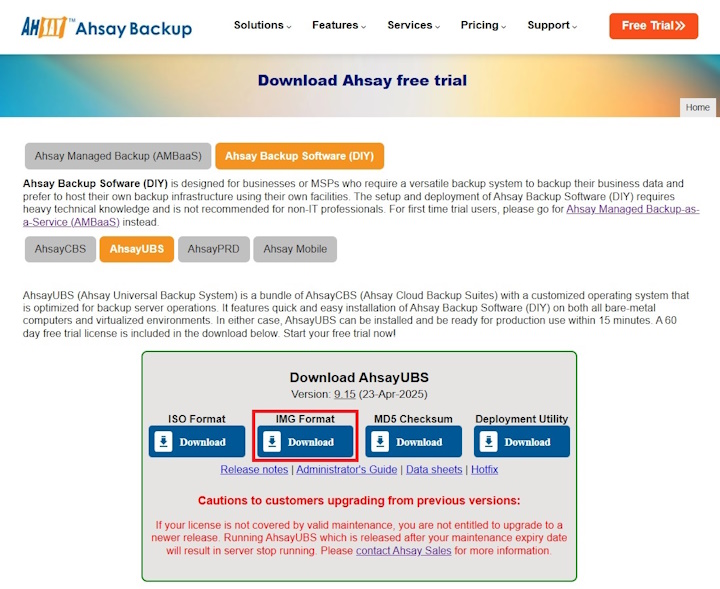
Download the AhsayUBS Image File from the Ahsay Website. Go to the AhsayUBS tab. There, click on the "Download" button for "IMG Format" and save it to a temporary directory.
In this example, we will save it to D:\.
If installing onto a VM, users will need to simply download and upload the “ISO Format” file to their intended virtual machine, and boot the machine from there. Users following this method may skip to Install AhsayUBS Firmware (New Installation) on how to install the UBS Firmware properly.
For more information on 'IMG' and 'ISO' format differences, please refer to Installer Media Requirements.
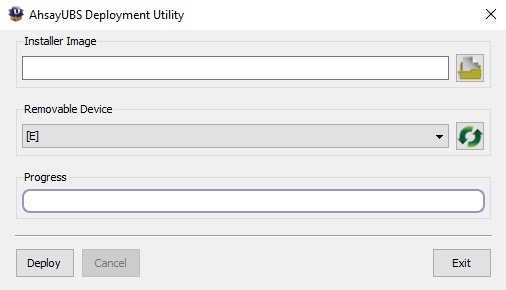
Double click the DeploymentUtil.exe icon to launch the utility.
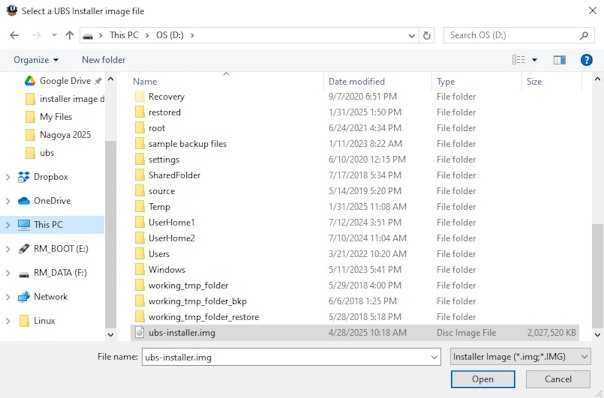
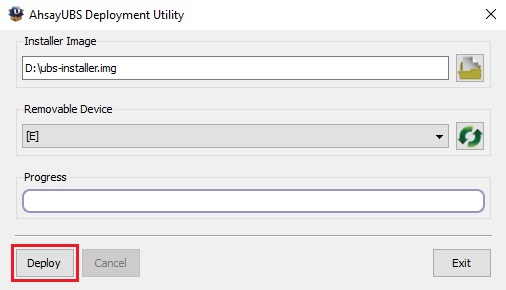
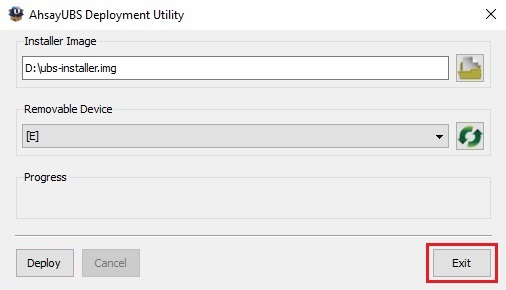
After launching the Deployment Utility software, click the folder icon from the "Installer Image" to select the image file to copy.
In the popup window, select the AhsayUBS installer image "ubs-installer.img" from where the location where you saved it. In this example, D:\.
Select the target drive in the "Removable Device" drop down panel (i.e. drive E in our case). Then click the Deploy button to write the AhsayUBS installer image to the selected drive.
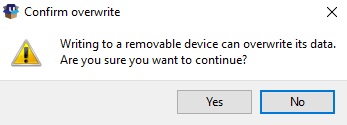
A warning dialog window will be displayed on the screen. Click the Yes button to continue. However, if you have chosen the wrong image file/drive, please click the No button to abort the process and repeat steps 1-6 again.
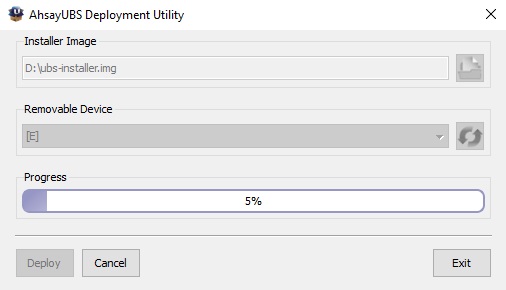
If you clicked the Yes button in step 7, the software will start writing the AhsayUBS image to your removable storage device. The write progress percentage will be shown in the Progress Bar. Please wait until all bytes are written to the selected removable storage device.
When it has completed the writing process, the following message will be shown on the screen.
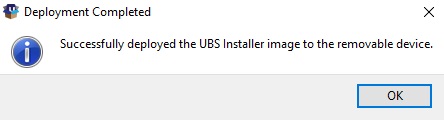
The deployment process is now completed. You may close the software by clicking the Exit button.
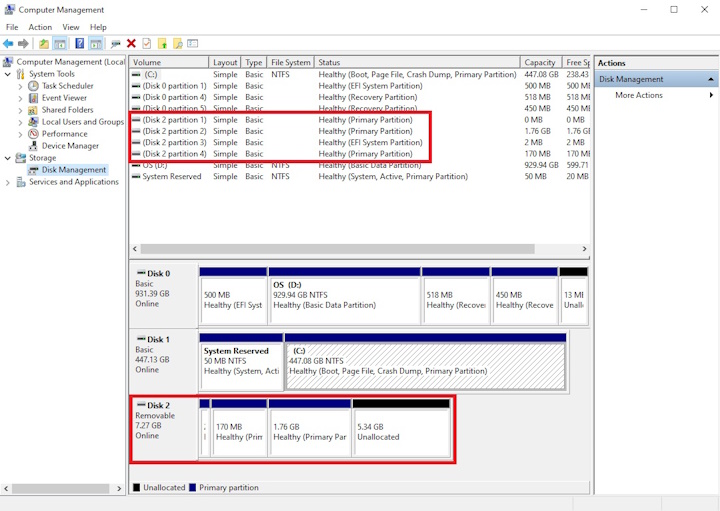
To verify the results, please go to Computer Management Console and select Action > Refresh from the menu. The selected removable storage device should contain a GPT partition.
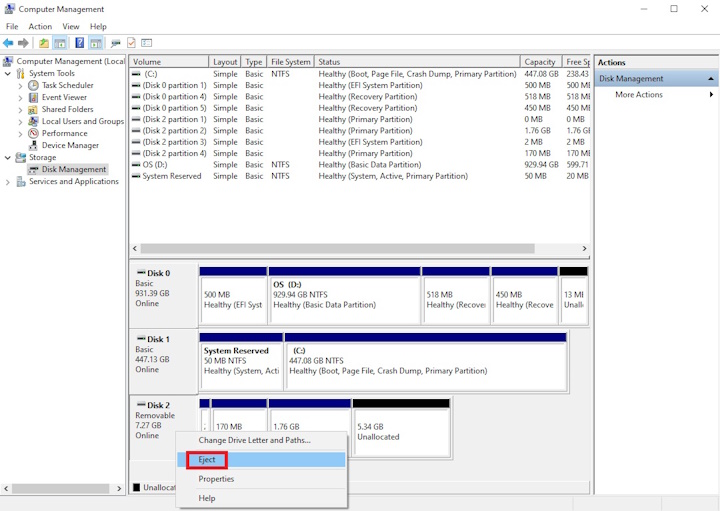
Then, remove the hardware safely by ejecting it through the Computer Management screen or through its icon in the System Tray (bottom right-hand corner of the Desktop).
The AhsayUBS installer image has been deployed to the removable device.


