
 How-To
AhsayUBS System Console
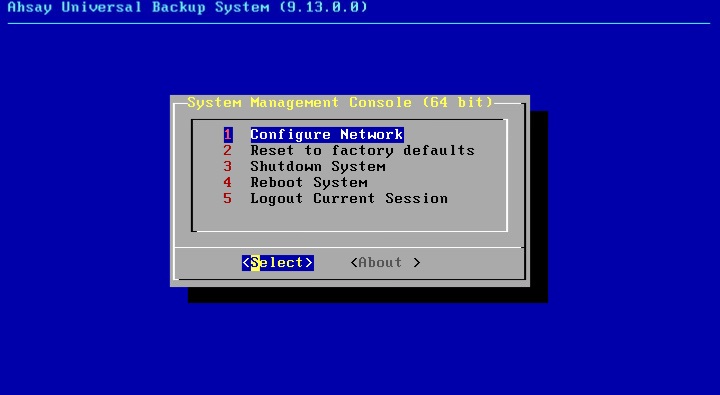
Login to the System Console
Before using the functions of AhsayUBS System Console, please login using the administration credentials to complete the configuration.

The default login credentials for AhsayUBS console are:
- Login: admin
- Password: ahsayubs
Network Settings Configuration
In the main menu, choose 1 to configure the network.
Choose 1 to assign a LAN IP to the device.
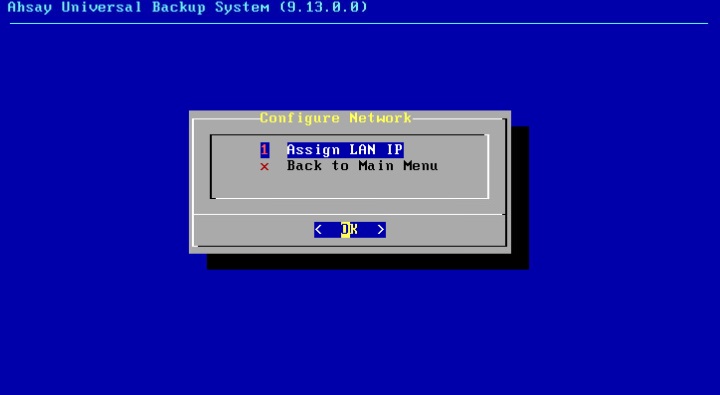
Select the method for setting up the IP Address on the device. There are two methods:
- DHCP - stands for automatic setup. It will send a request to your DHCP server to get an IP Address. You must have a DHCP server in your network to use this option.
- Static - stands for manual setup. You need to enter the network settings manually.
You can press the Esc key to go back to the main menu if you selected the wrong option.In this step, choose Yes for using DHCP or No to configure the network manually.
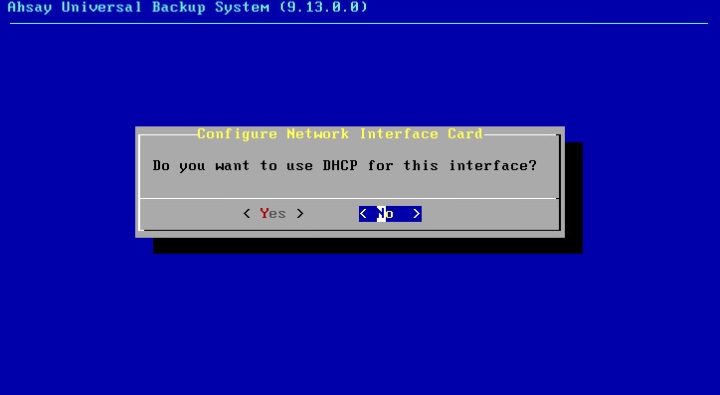
The following steps will only be displayed when No is chosen in step 3:
Enter the IPv4 IP address and choose OK to continue.

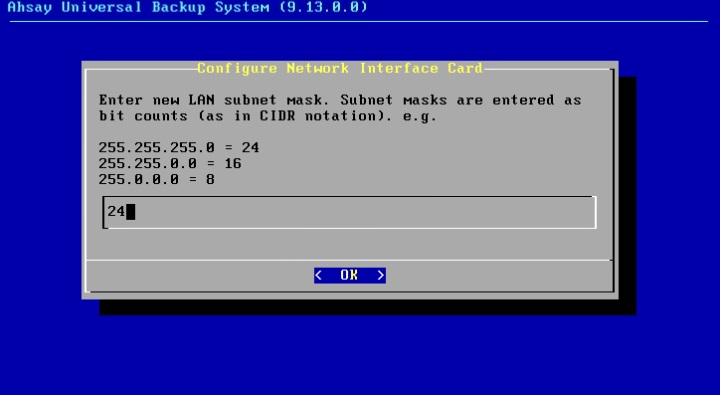
Enter the subnet and choose OK to continue.
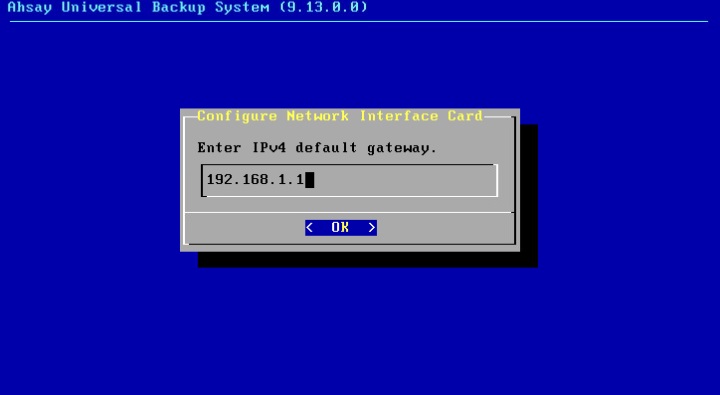
Enter the default gateway address and choose OK to continue.
Enter the DNS address and choose OK to continue.

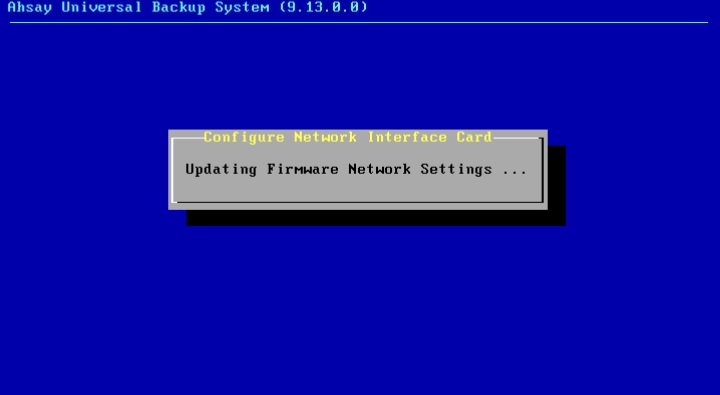
Wait for AhsayUBS Firmware to finish updating the network configuration.
Try to access the AhsayUBS WebAdmin by using the provided URL to verify the network settings.
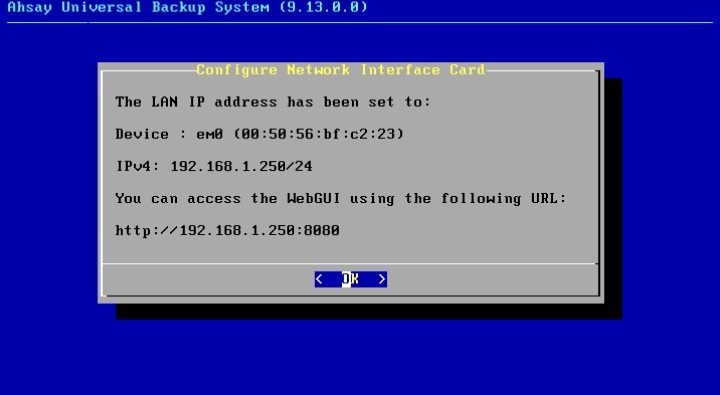
In the verification, choose OK to go back to the main console menu.


Login System
Launch your browser and type the AhsayUBS WebAdmin’s IP address and AhsayUBS WebAdmin service port in the address bar.
For example, the AhsayUBS IP: 192.168.1.250 and the default WebAdmin server port is 8080 (you can change this port later). The default URL address to access the AhsayUBS Web Admin would be: http://192.168.1.250:8080, as shown in the previous screenshot.
After you have connected to the WebAdmin Login page, login to the AhsayUBS WebAdmin with the correct Login Name and Password. The default login credentials for AhsayUBS WebAdmin are:
- Login Name: admin
- Password: ahsayubs

- When logging in using a web browser, you can only use admin for the Login Name. But if using an ssh, you may use either root or admin for the Login Name.
- AhsayUBS WebAdmin console will automatically logout after 10 minutes of inactivity.
System Time and Time Zone Setup
Accurately configure the date and time settings of AhsayUBS. Without accuracy, logs and backup schedules may be incorrect.
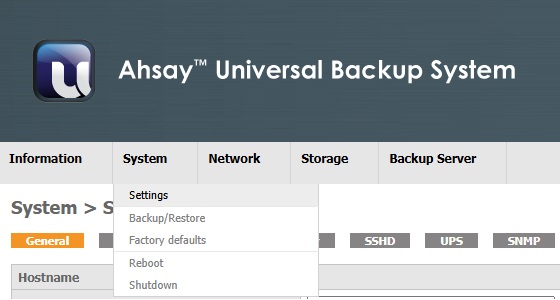
Login to the AhsayUBS WebAdmin and go to System > Settings > General.
You can find the "Time" settings at the bottom of the page.
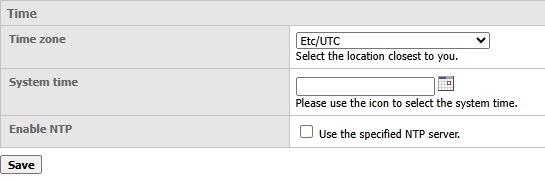
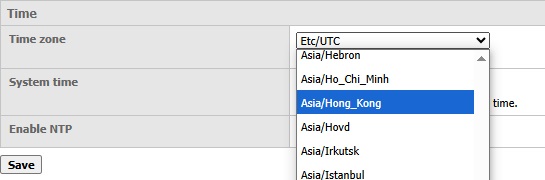
Select the appropriate time zone from the "Time zone" drop down menu.
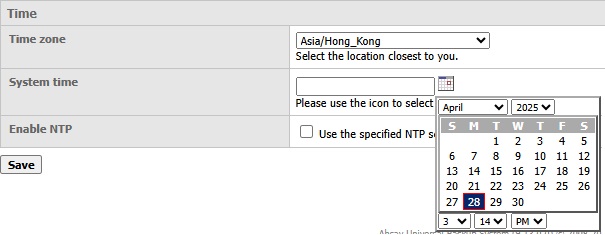
After you have selected the appropriate time zone, click the Calendar icon and a small calendar will pop up. Select the current date and specify the current time.
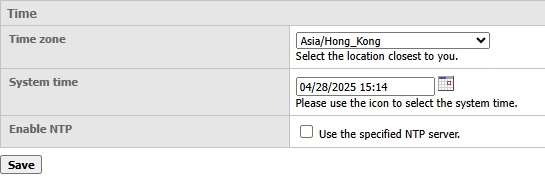
You have provided the appropriate time. If you prefer NTP synchronization, please tick the Use the specified NTP Server checkbox.
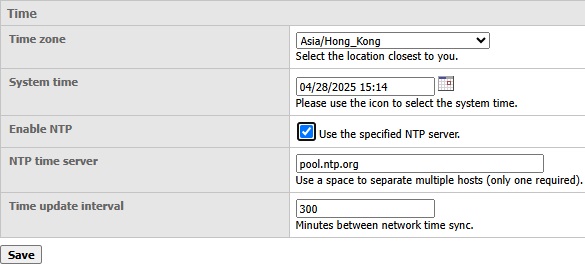
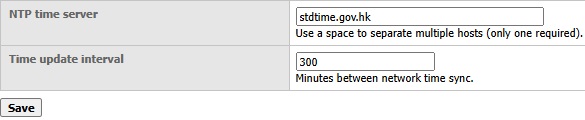
Additional options will appear. Specify your preferred NTP URL in the "NTP time server" text field. Specify the preferred update interval in unit of minutes in the "Time update interval" text field.

Finally, click the Save button to apply the changes.


Change WebAdmin Password
For security reasons, changing the default AhsayUBS WebAdmin password is recommended during the initial setup of the AhsayUBS WebAdmin.
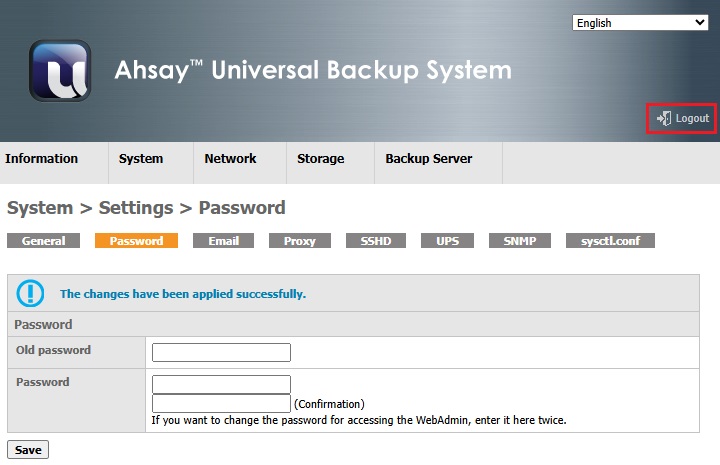
Login to the AhsayUBS WebAdmin and go to System > Settings > Password.
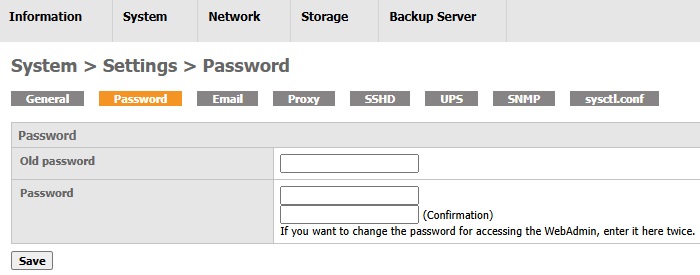
Fill in the correct values in the appropriate fields. Click the Save button to update the new password.
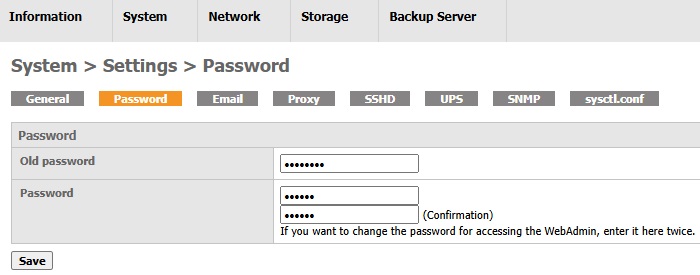 The new password should have a maximum of 15 characters. Anything greater may result in access problems for both web console and system console.
Logout from the AhsayUBS WebAdmin and re-login using the new password.
 Once you have changed the default AhsayUBS WebAdmin password, keep a record of your new password as there is no way to recover it once lost/forgotten.


Email Setup
AhsayUBS is bundled with a sendmail SMTP server. It is designed for users who do not have their own mail server.
- Click System > Settings > Email > Settings to go to the email settings page.
Enter "127.0.0.1" in the "Outgoing mail server" field if you want to use the local sendmail SMTP server. Otherwise, specify the domain name of your preferred SMTP Server in the "Outgoing mail server". To use an external mail server, please ensure that the DNS server setting is entered correctly.
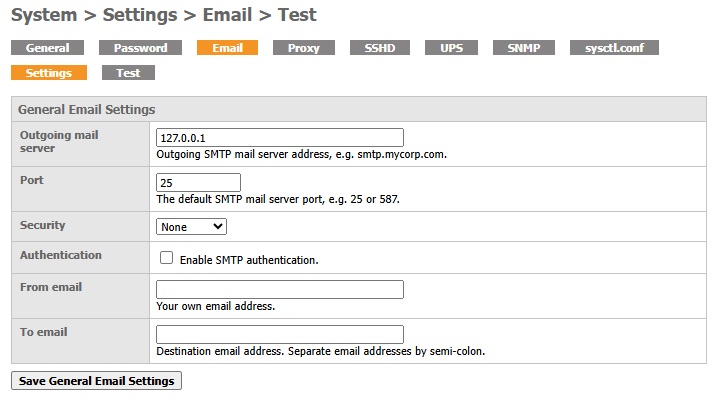
- Enter the sender’s email address for sending system status reports in the "From email" field, e.g. admin@mycompany.com
- Click the Save General Email Settings button to save the settings.
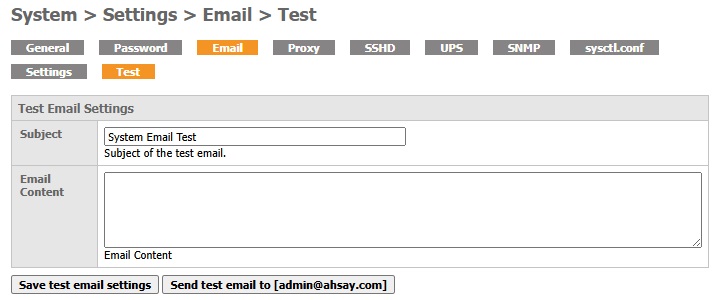
- After you have completed the email setup, verify it by sending a test email.
- Go to System > Settings > Email > Test.
- Fill in all the fields shown on screen.
Click the Send test email to [%email address%] button to send the test email. The email subject and contents will be saved in the system.


Backup System Configuration
Once you have completed the system configuration on the AhsayUBS WebAdmin. It is recommended to back up the AhsayUBS system configuration settings.
AhsayUBS provides a feature to export the system settings to an XML file.
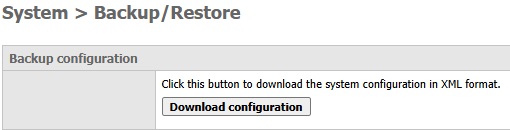
Click System > Backup / Restore.
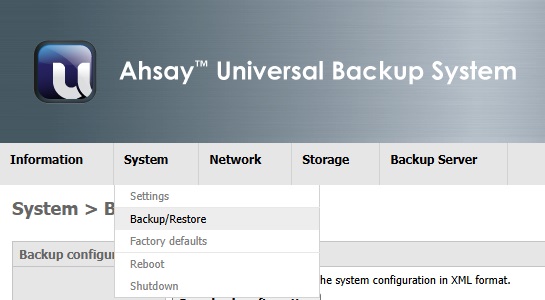
Click the Download configuration button to save the current settings as an XML file on your machine.
This configuration file is useful for system upgrade and system recovery.
Any time you make configuration changes through the AhsayUBS WebAdmin, you should plan to make a backup of your configuration for disaster recovery.

