AhsayCBS (DIY)
Windows
Click the Backup Sets icon on the main interface of AhsayOBM.
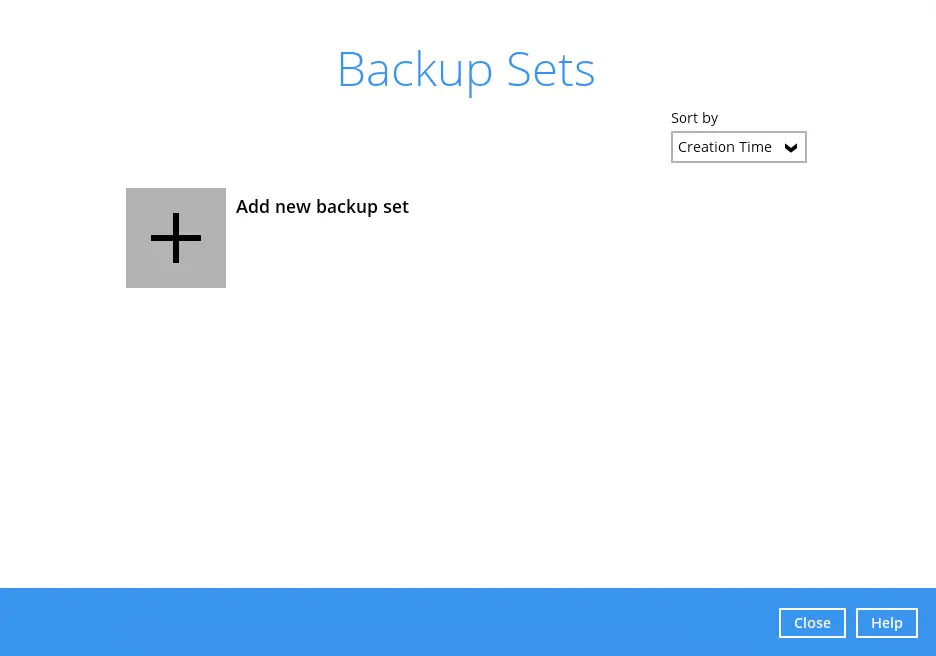
Click the "+" icon before “Add new backup set” to create a new backup set.
Select the “Backup set type”, provide a name for your new backup set. Below, select a Host type.
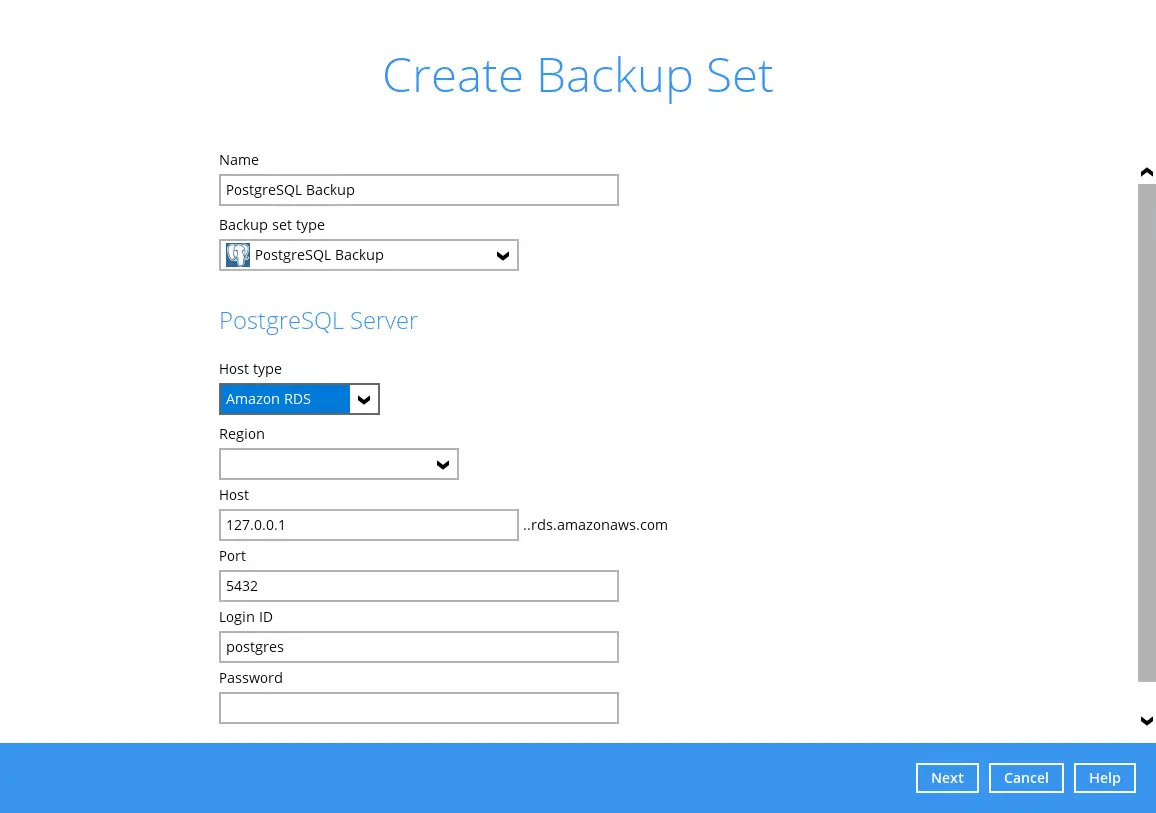
For Host type, there will be three options: Self-hosted, Amazon RDS, Azure Database, and Google Cloud SQL.
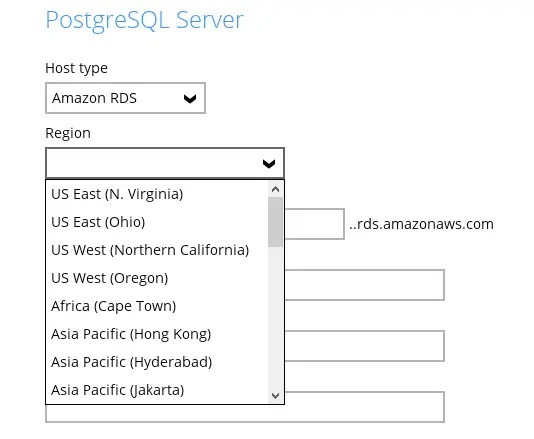
If Amazon RDS is selected, users will have to choose an appropriate Region. Below are the available Regions for Amazon RDS.
- US East (N. Virginia)
- US East (Ohio)
- US West (Oregon)
- Africa (Cape Town)
- Asia Pacific (Hong Kong)
- Asia Pacific (Hyderabad)
- Asia Pacific (Jakarta)
- Asia Pacific (Malaysia)
- Asia Pacific (Melbourne)
- Asia Pacific (Mumbai)
- Asia Pacific (Osaka-Local)
- Asia Pacific (Seoul)
- Asia Pacific (Singapore)
- Asia Pacific (Sydney)
- Asia Pacific (Tokyo)
- Canada (Central)
- Canada West (Calgary)
- Europe (Frankfurt)
- Europe (Ireland)
- Europe (London)
- Europe (Milan)
- Europe (Paris)
- Europe (Spain)
- Europe (Stockholm)
- Europe (Zurich)
- Israel (Tel Aviv)
- Middle East (Bahrain)
- Midde East (UAE)
- South America (Sao Paulo)
Enter the rest of the login information:
- Host - this value is typically set to localhost or 127.0.0.1. If Amazon RDS was selected as the Host type, this section will always have the suffix of .rds.amazonaws.com
- Port - set commonly to 5432
- Login ID - ID used to login to PostgreSQL.
- Password - Password used to login to PostgreSQL.
- (Optional) Path to pg_dump
Click Next to proceed.
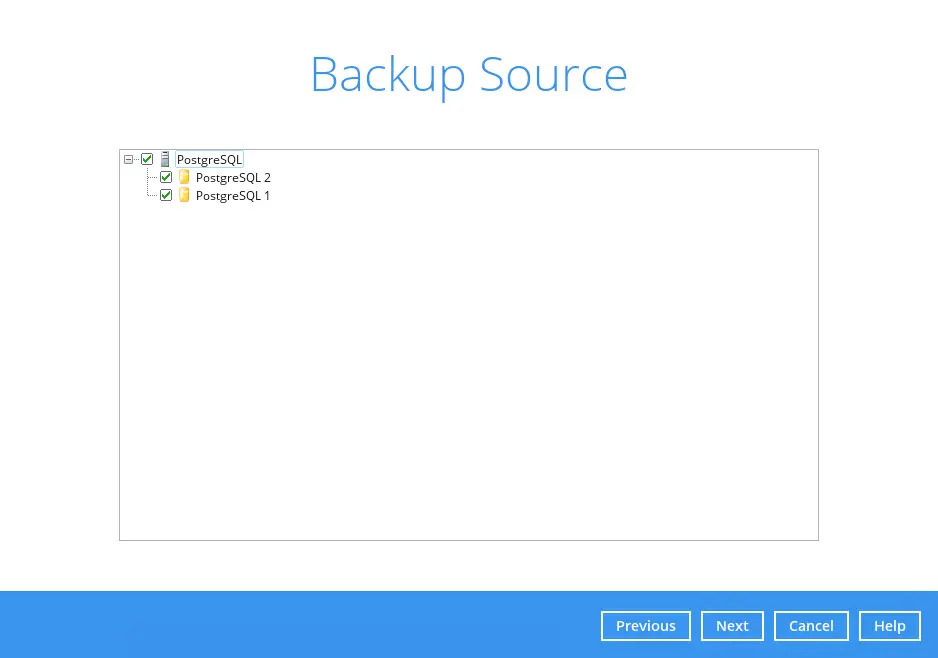
In the “Backup Source” menu, select the PostgreSQL servers you would like to backup. Click Next to proceed.
In the “Schedule” menu, you can configure a backup schedule for backup job to run automatically at your specified time interval.
By default, this is enabled. You can modify the default backup set by clicking on it then modifying the settings. Or you can click "Add" to create a new backup schedule then click OK once done setting the schedule. Click Next to proceed.
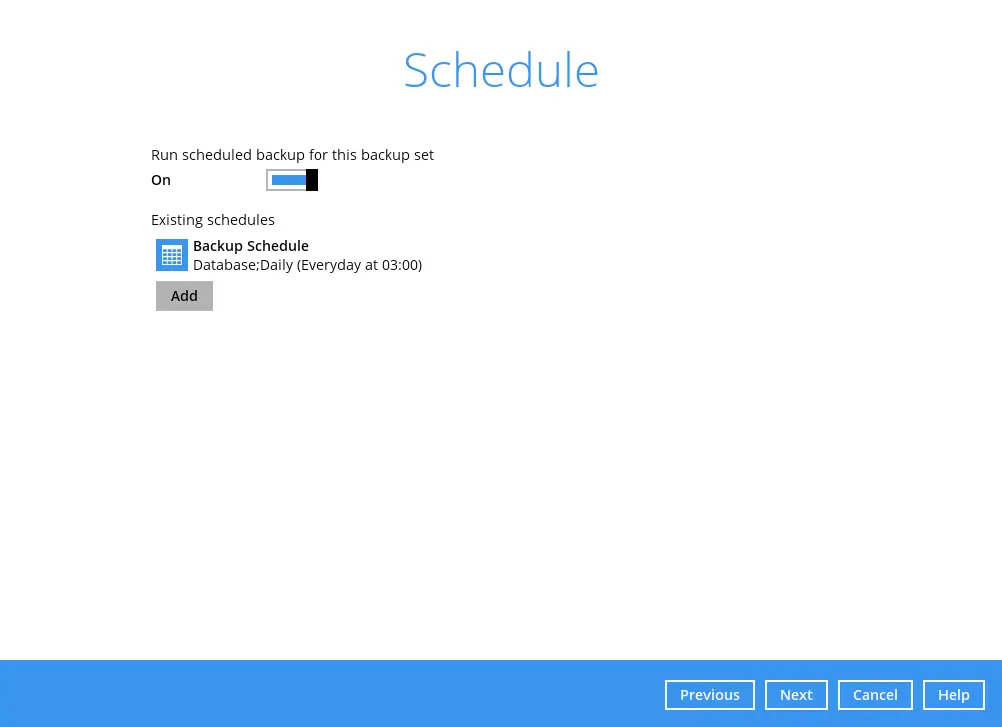
The default backup schedule is daily backup at 3:00 where the backup job will run until completion.
For details on how to configure the backup schedule settings, please refer to the Overview section (GUI).
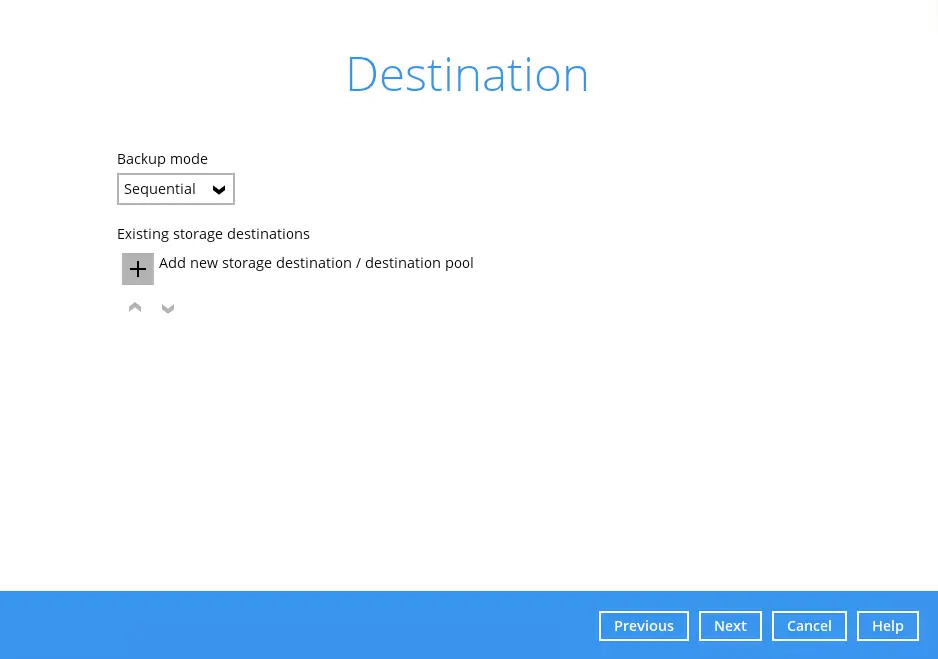
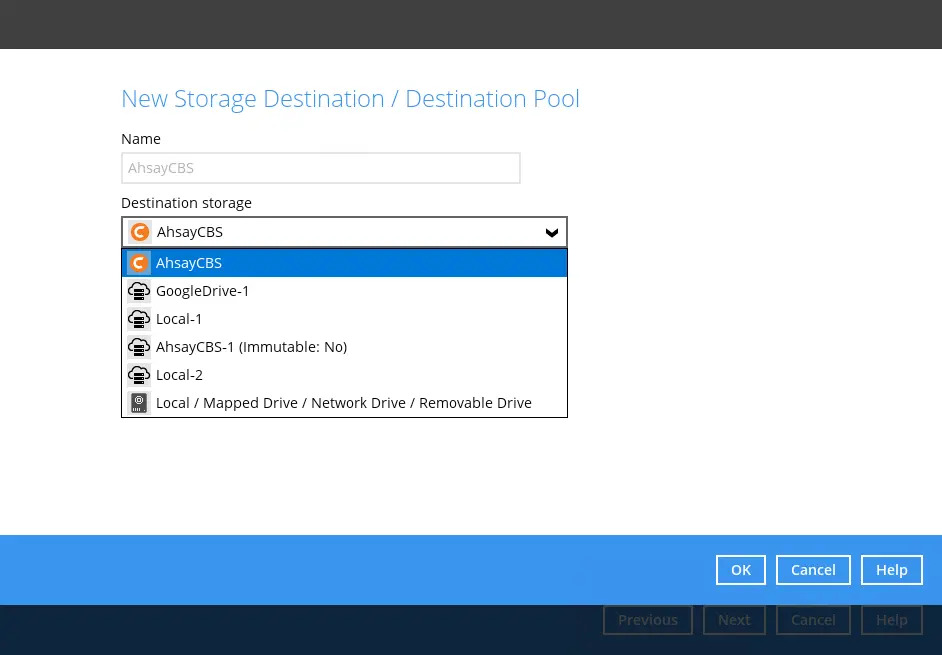
Select a “Backup mode” and click "+" before “Add new storage destination / destination pool” to add a backup storage destination.
Select the backup storage destination. Click OK then Next to proceed.
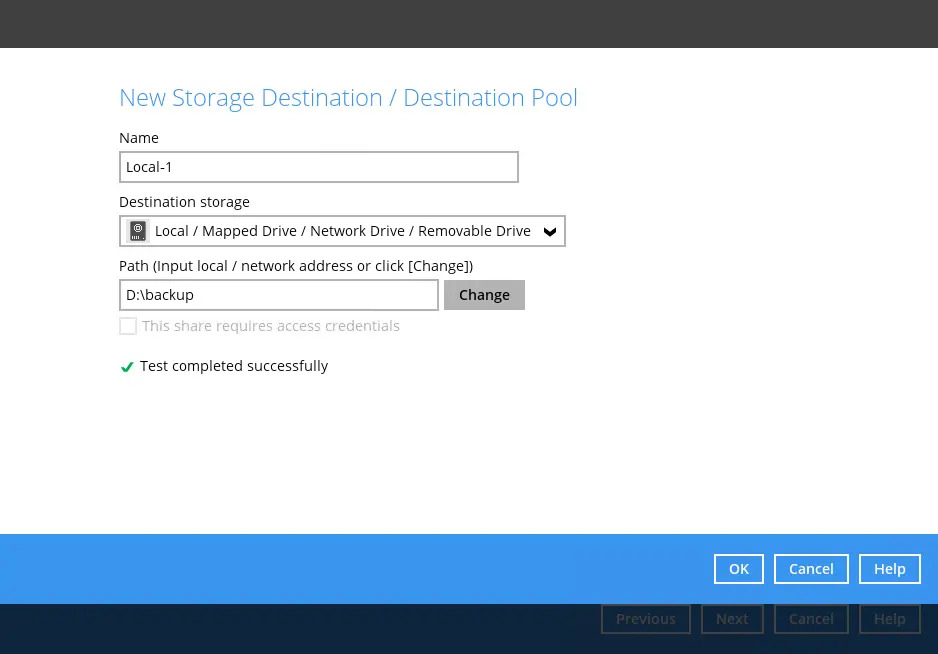
If you have chosen the Local / Mapped Drive / Network Drive / Removable Drive option, click Change to select the storage destination. Tick This share requires access credentials if credentials are needed to access the directory path.
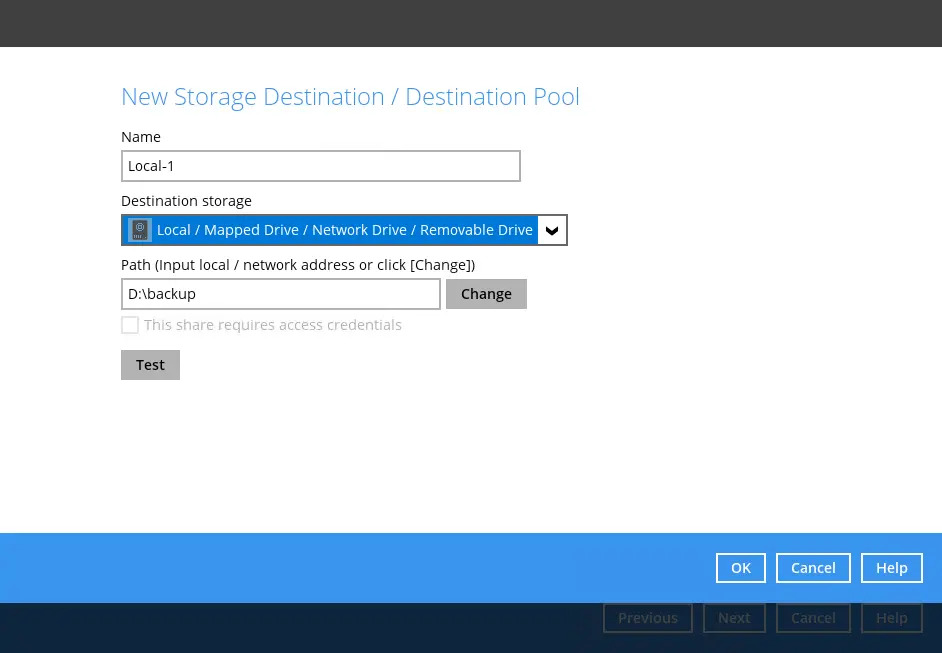
Click Test to validate the path, “Test completed successfully” shows when the validation is done.
In the “Encryption” window, the default “Encrypt Backup Data” option is enabled with an encryption key preset by the system which provides the most secure protection.
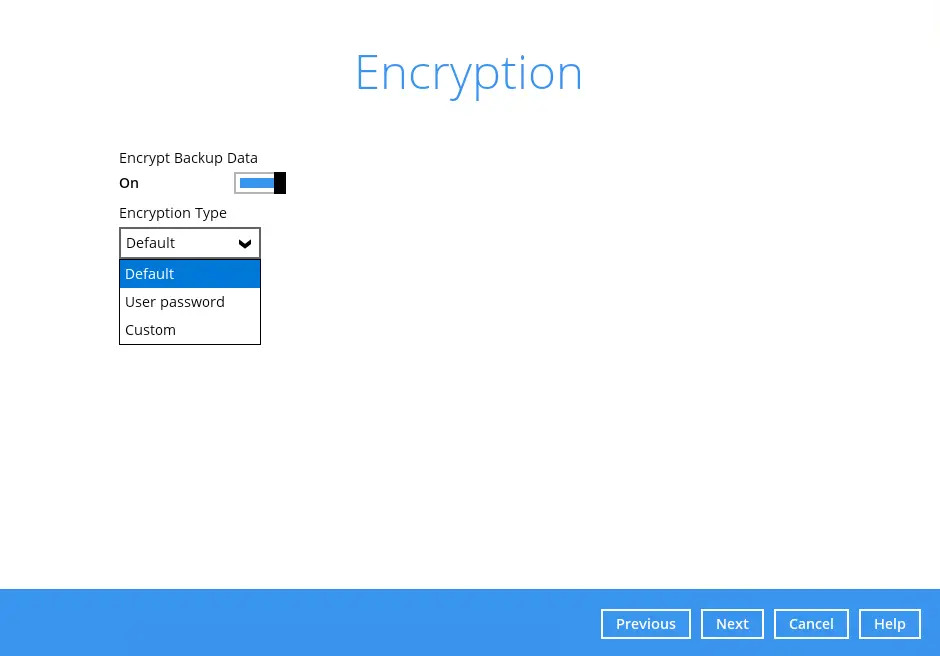
For details on how to configure the "Encryption" settings, please refer to the Overview section (GUI).
For best practice on managing your encryption key, refer to the following article: FAQ: Best practices for managing encryption key on AhsayOBM or AhsayACB.
Click Next when you are done setting.
If you have enabled the Encryption Key feature in the previous step, the following pop-up window shows, no matter which encryption type you have selected.
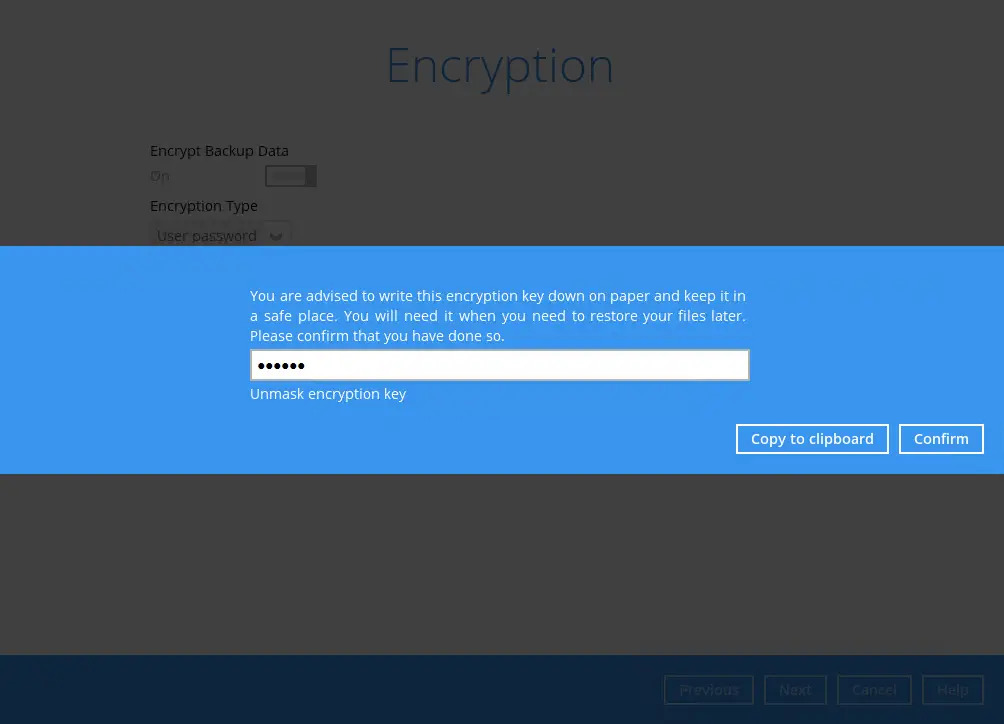
The pop-up window has the following three options to choose from:
Unmask encryption key - The encryption key is masked by default. Click this option to show the encryption key.

- Copy to clipboard - Click to copy the encryption key, then you can paste it in another location of your choice.
- Confirm - Click to exit this pop-up window and proceed to the next step.
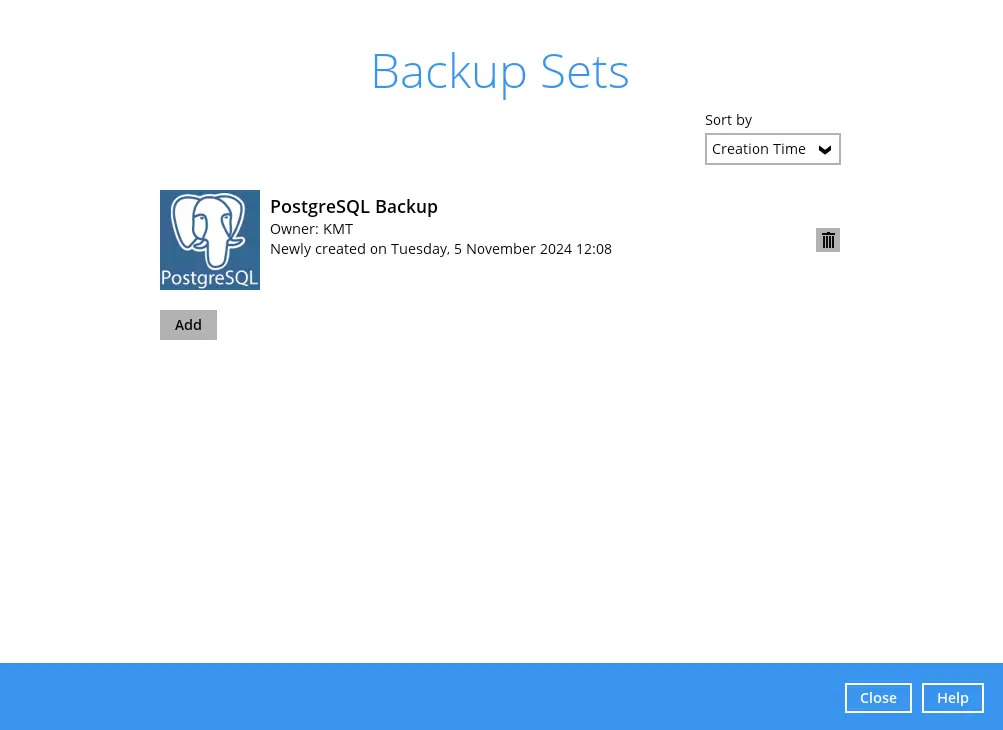
- Backup set created.
To start a manual backup job, click Backup now.
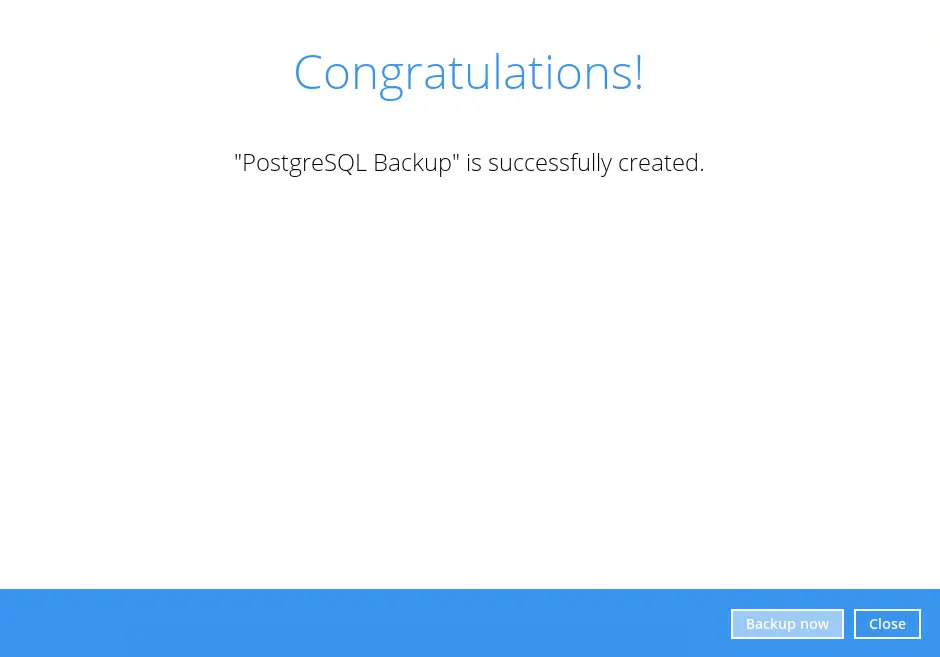
To verify the backup set settings, click Close and then click on the PostgreSQL backup set.
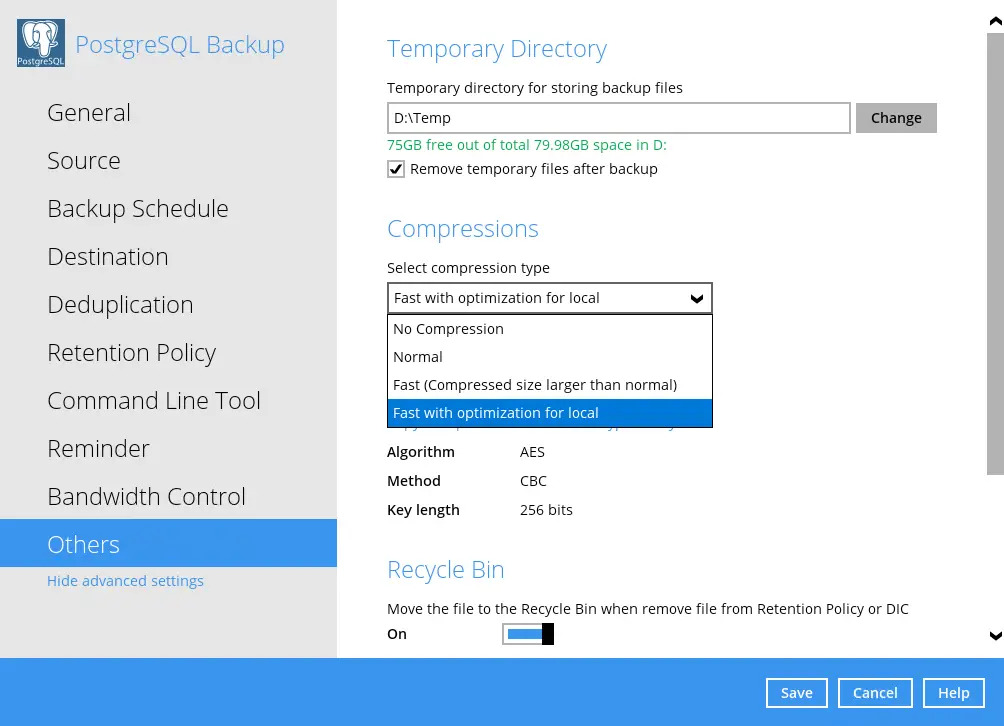
Based on Best Practices and Recommendations, it is highly recommended to change the “Temporary Directory”. Select another location with sufficient free disk space other than Drive C:\Users\Administrator\temp (e.g. D:\Temp).
Open the Backup set then go to Others > Temporary Directory. Click Change to browse for another location.
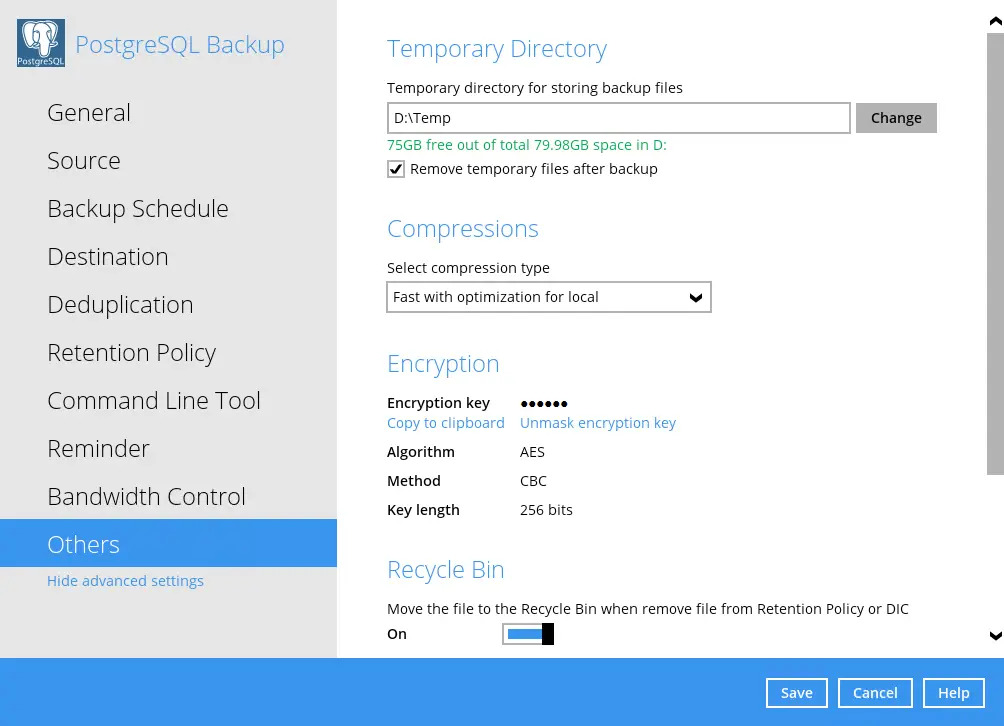
Optional: Select your preferred compression type. By default, the compression is Fast with optimization for local.
Go to Others > Compressions. Select from the following list:
- No Compression
- Normal
- Fast (Compressed size larger than normal)
- Fast with optimization for local